


Debian 12 Bookworm comes with Linux Kernel 6.1 by default. However, user can always get most recent Kernel for new hardware support and compatibility issue fixes.
Linux Kernel keeps updating with new stable release series every few months. Most Linux Distributions have their own Kernel builds, and keep updating in their own schedule.
Debian includes newer Kernel packages in the backports repository. At the moment of writing it’s Kernel 6.5, but for the time being, it will be updated to Kernel 6.6, 6.7, and future releases.
For choices, there’s also third-party repositories to always get the latest Kernel without waiting too long.
Tell which Kernel is running now
Before getting started, you may want to know which version if Linux Kernel is currently running on your machine.
To do so, simply search for and launch terminal from start menu or Gnome overview screen.
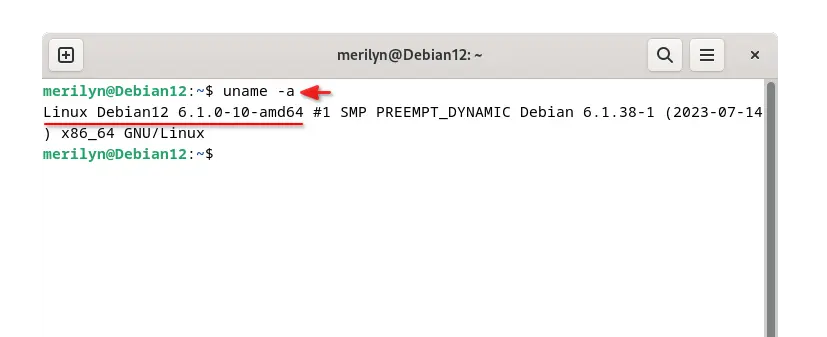
When terminal opens, run command:
uname -a
It outputs your current Kernel version as well as architecture type. In my case, they are Kernel 6.1.38 and amd64.
Option 1: Upgrade Kernel from Backports Repository (Official)
The safest way to get newer kernel is installing the package from Debian Backports repository.
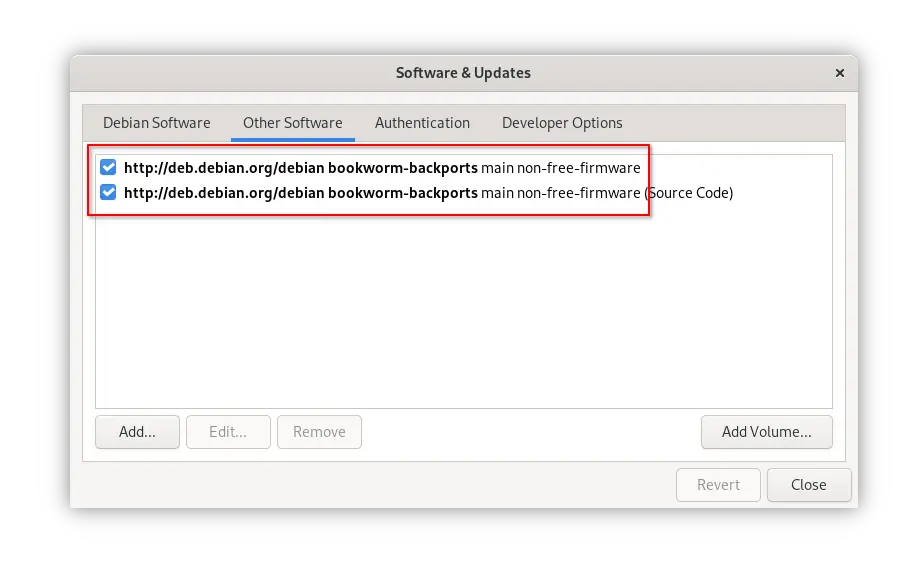
1. Enable Backports repository
The repository is usually enabled by default. Just in case, you may launch “Software & Updates” then navigate to Other Software tab to verify:
If the tool does not exist, try installing it via command sudo apt install software-properties-gtk, or sudo apt install software-properties-qt for KDE & LXQt desktop.
2.1 Install Newer Kernel via Synaptic
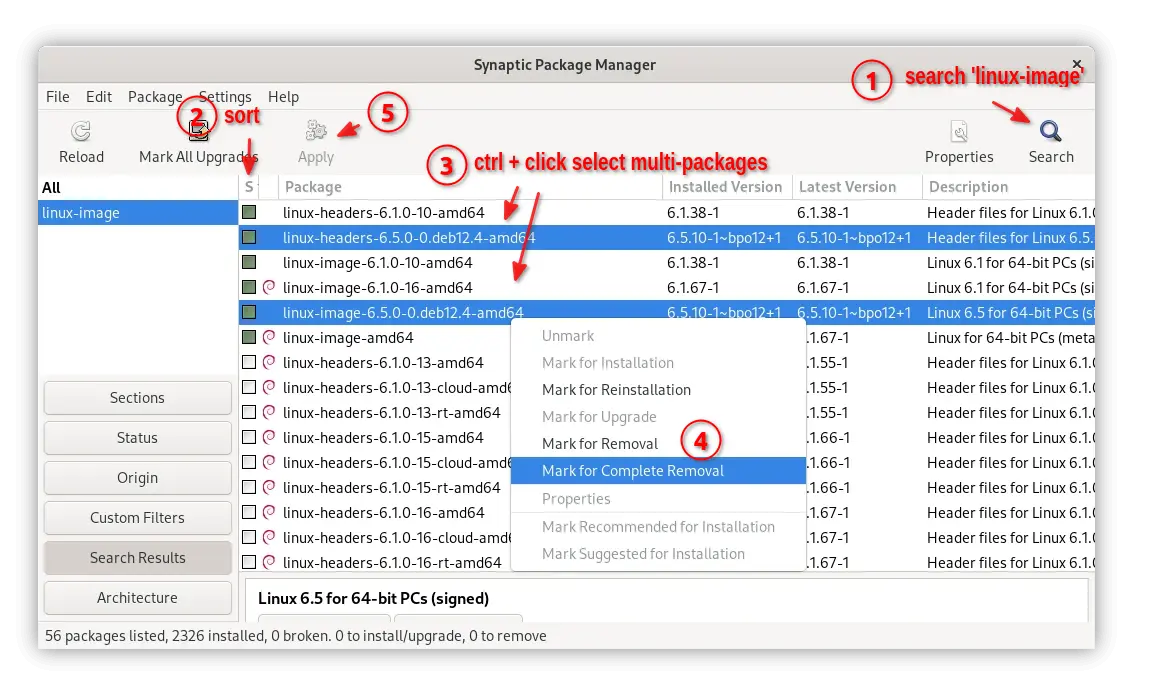
Now, search for and launch “Synaptic” package manager. When it opens, click on “Search”, then search either linux-image or linux-header.
Browse to find out the latest version of the packages, then right-click and select “Mark for Installation” for both linux-header-x.x.x… and linux-image-x.x.x… packages (they must have same version number).
For the time being, the kernel package version keeps updated.

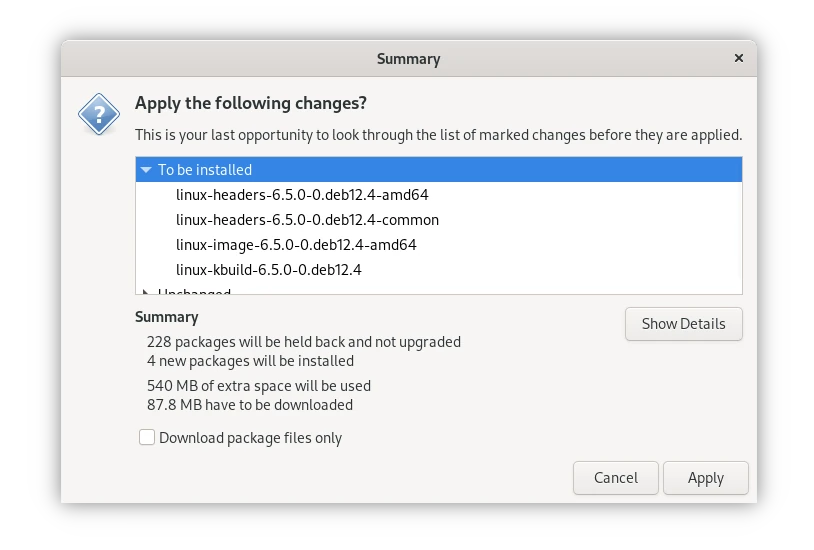
Finally, click “Apply“, then confirm on the pop-up ‘Summary’ dialog to start installing the kernel.
2.2 Install Newer kernel via apt command
For choice, you may launch terminal, and run the command below instead to install the newer kernel packages:
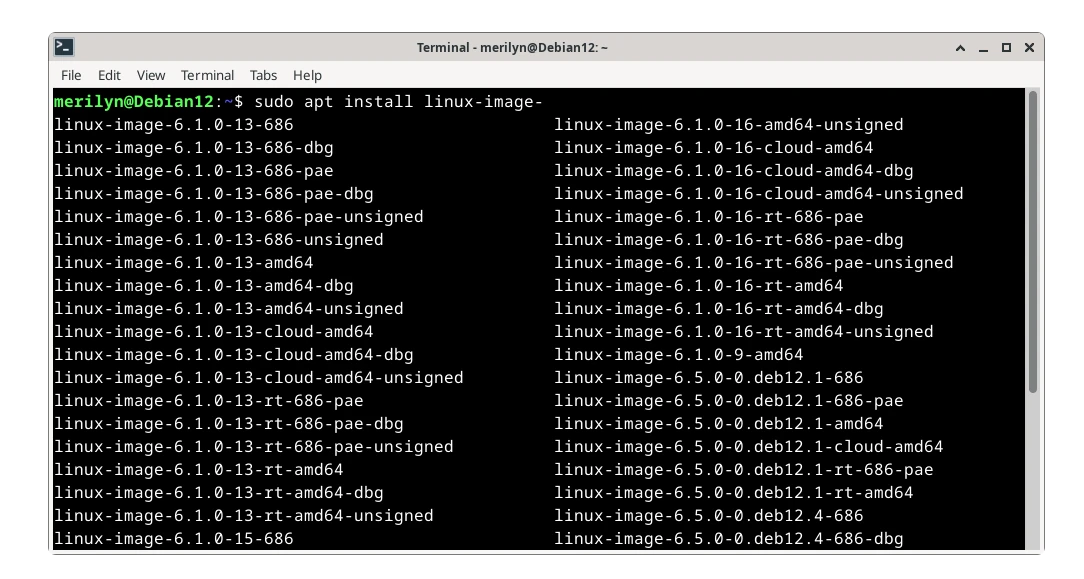
sudo apt install linux-image-6.5.0-0.deb12.4-amd64 linux-headers-6.5.0-0.deb12.4-amd64
NOTE: you NEED to replace 6.5.0-0.deb12.4-amd64 in command accordingly! After typing ‘linux-image-‘, hit TAB key twice, then it will show you all available choices.
When done installing new kernel, restart, and verify via uname -a command.
Option 2: Install Most Recent Kernel via Zabbly Repository (Unofficial)
If you want to try out the latest stable Kernel, then there’s an unofficial zabbly repository contains the package so far for Debian 11, Debian 12, Ubuntu 20.04 LTS, and Ubuntu 22.04 LTS.
The repository is maintained by Stéphane Graber, a former employee of Canonical, who worked for 12 years in the company behind Ubuntu.
NOTE: This is an unofficial repository! Kernel packages are un-signed, you may need to disable secure boot for use the kernel.
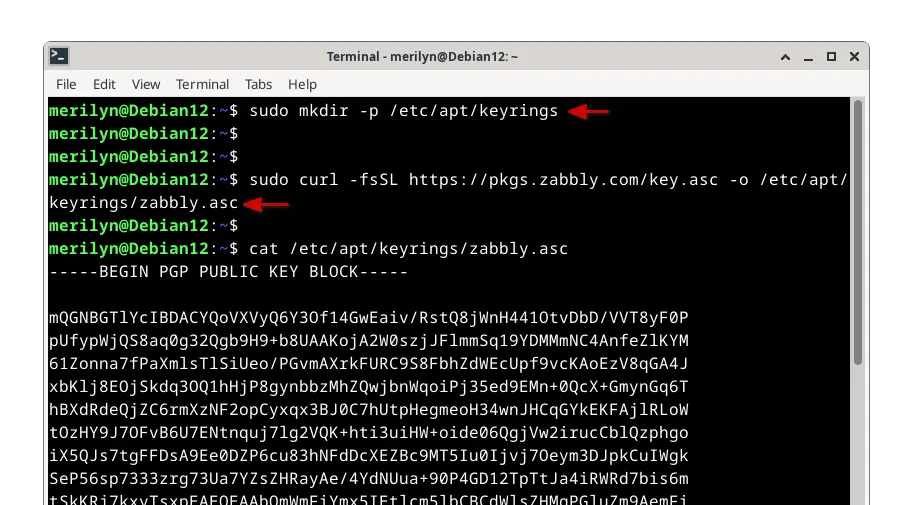
1. First, launch terminal and run command to download the key to /etc/apt/keyrings directory.
- Run command to create the
/etc/apt/keyringsdirectory in case it does not exist:sudo mkdir -p /etc/apt/keyrings/
- Then, download & install the key to that folder:
sudo curl -fsSL https://pkgs.zabbly.com/key.asc -o /etc/apt/keyrings/zabbly.asc
When done, you may run cat /etc/apt/keyrings/zabbly.asc to verify the key file.
2. Second, run command to add the Zabbly repository:
sudo sh -c 'cat < /etc/apt/sources.list.d/zabbly-kernel-stable.sources
Enabled: yes
Types: deb
URIs: https://pkgs.zabbly.com/kernel/stable
Suites: $(. /etc/os-release && echo ${VERSION_CODENAME})
Components: main
Architectures: $(dpkg --print-architecture)
Signed-By: /etc/apt/keyrings/zabbly.asc

EOF'
This is a single command in multiple lines, which create a .sources file and write some lines. When done the command, use cat /etc/apt/sources.list.d/zabbly-kernel-stable.sources to verify.
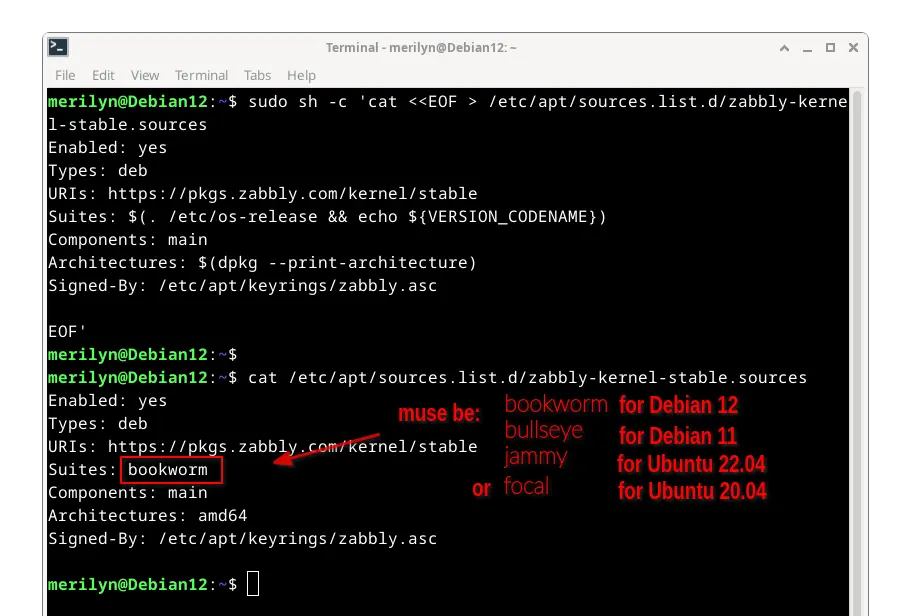
The command above only work for Debian 11/12, Ubuntu 20.04, Ubuntu 22.04. But for their based systems, you have to change the Suites value according which Debian/Ubuntu version is based on.
In case you messed up the last command, run this command instead to edit the file:
sudo nano /etc/apt/sources.list.d/zabbly-kernel-stable.sources
Then, write following lines manually (replace bookworm according to your system).
Enabled: yes
Types: deb
URIs: https://pkgs.zabbly.com/kernel/stable
Suites: bookworm
Components: main
Architectures: amd64
Signed-By: /etc/apt/keyrings/zabbly.asc
Finally, press Ctrl+S to save, and Ctrl+X to exit.
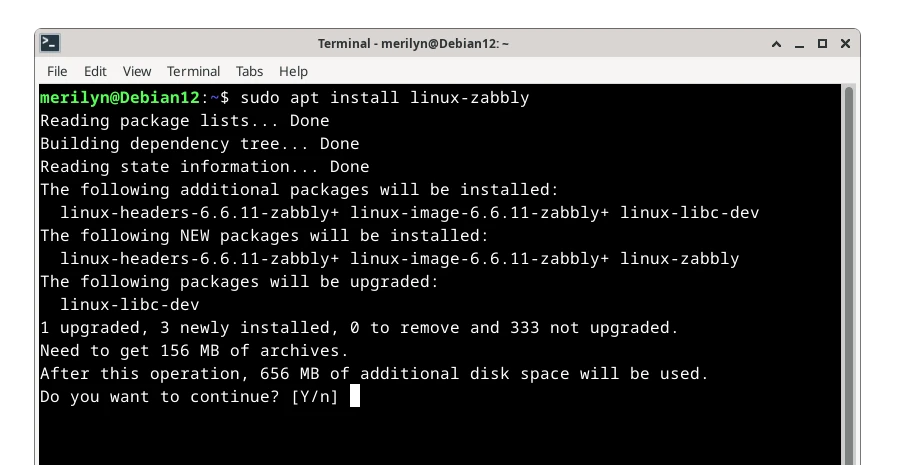
3. Finally, refresh package cache, and install the most recent Kernel:
sudo apt update
sudo apt install linux-zabbly
When done, restart your computer and verify by running uname -a command.
Option 3: Third-party Liquorix Kernel
For choice, there’s also third-party custom kernel, Liquorix Kernel, to enable low latency compute in A/V production, and reduced frame time deviations in games.
NOTE: This is an unofficial third-party maintained Kernel package.
Simply launch terminal and run command:
curl -s 'https://liquorix.net/install-liquorix.sh' | sudo bash
It will download and run the script to automate the process building the custom Kernel, which however does NOT work for me (due to poor internet connection, maybe).
How to Restore
To restore the previous Linux Kernel 6.1, first reboot your machine. While starting up, press Esc (or Shift in some machines) to view the boot menu. Then, select booting the old kernel from ‘Advanced options for Debian GNU/Linux’ sub-menu.

Finally, either use “Synaptic” package manager, to search & uninstall the Kernel package (you installed via options above).
- Click on Search icon, and search either
linux-imageorlinux-headers. - Then click on S to show installed packages in top.
- Press and hold Ctrl, then select the kernel packages to uninstall.
- Right-click on select items, and choose “Mark for Complete Removal”
- Finally, click on Apply button.
Alternatively, open terminal, and run command to uninstall the newer kernel packages:
sudo apt remove --autoremove linux-image-6.5.0-0.deb12.4-amd64 linux-headers-6.5.0-0.deb12.4-amd64
You have to replace the package name, depends on which version you installed.