

This simple tutorial shows how to customize your Ubuntu 22.04 desktop to make it look like macOS Big Sur.
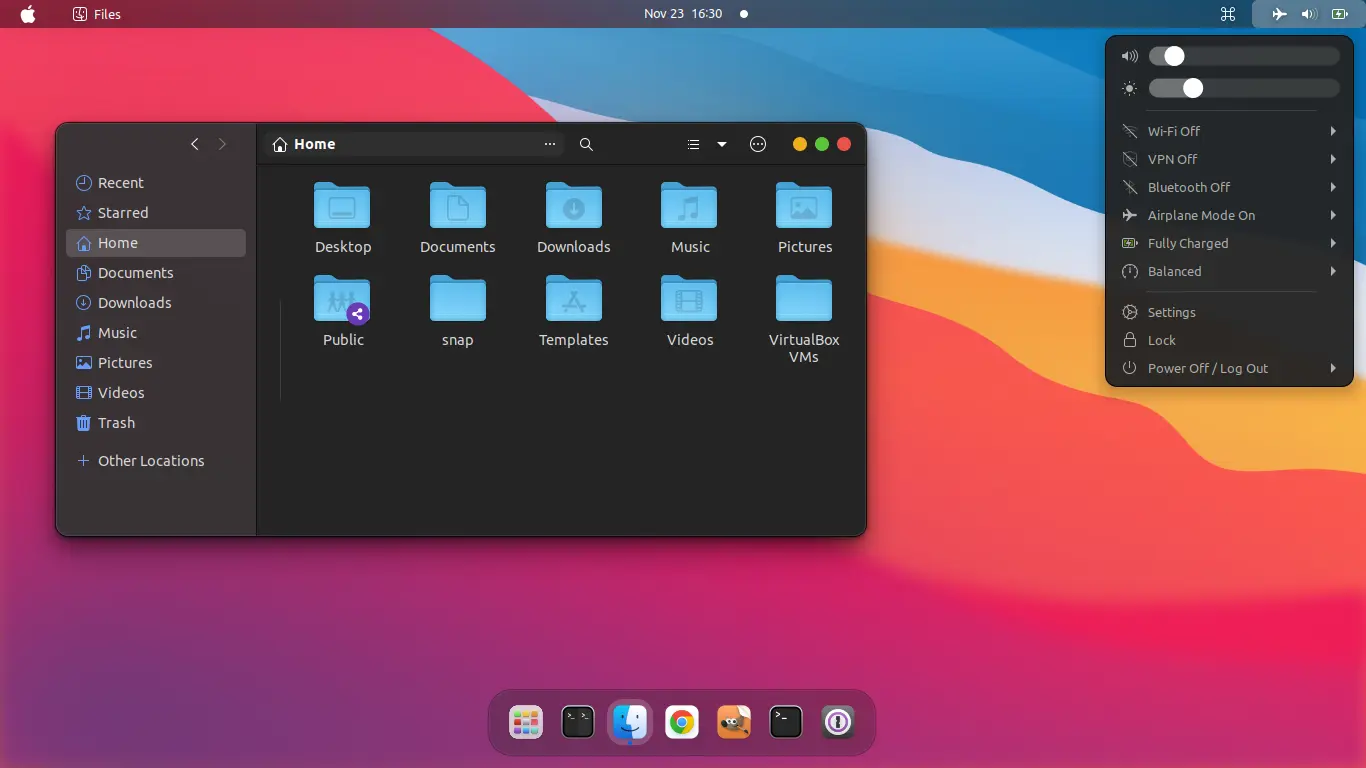
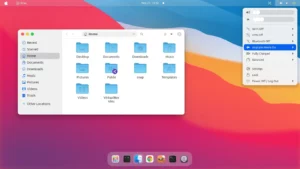
NOTE that this is tested and works in the default GNOME desktop environment. And after this tutorial, you Ubuntu desktop will look like:

Step 1: Shorten and move left panel to bottom
First thing to do is move the left dock panel to bottom edge of screen, and make it short!
To do it, launch Settings (aka GNOME Control Center) either from top-right system status menu or by searching from ‘Activities’ overview.
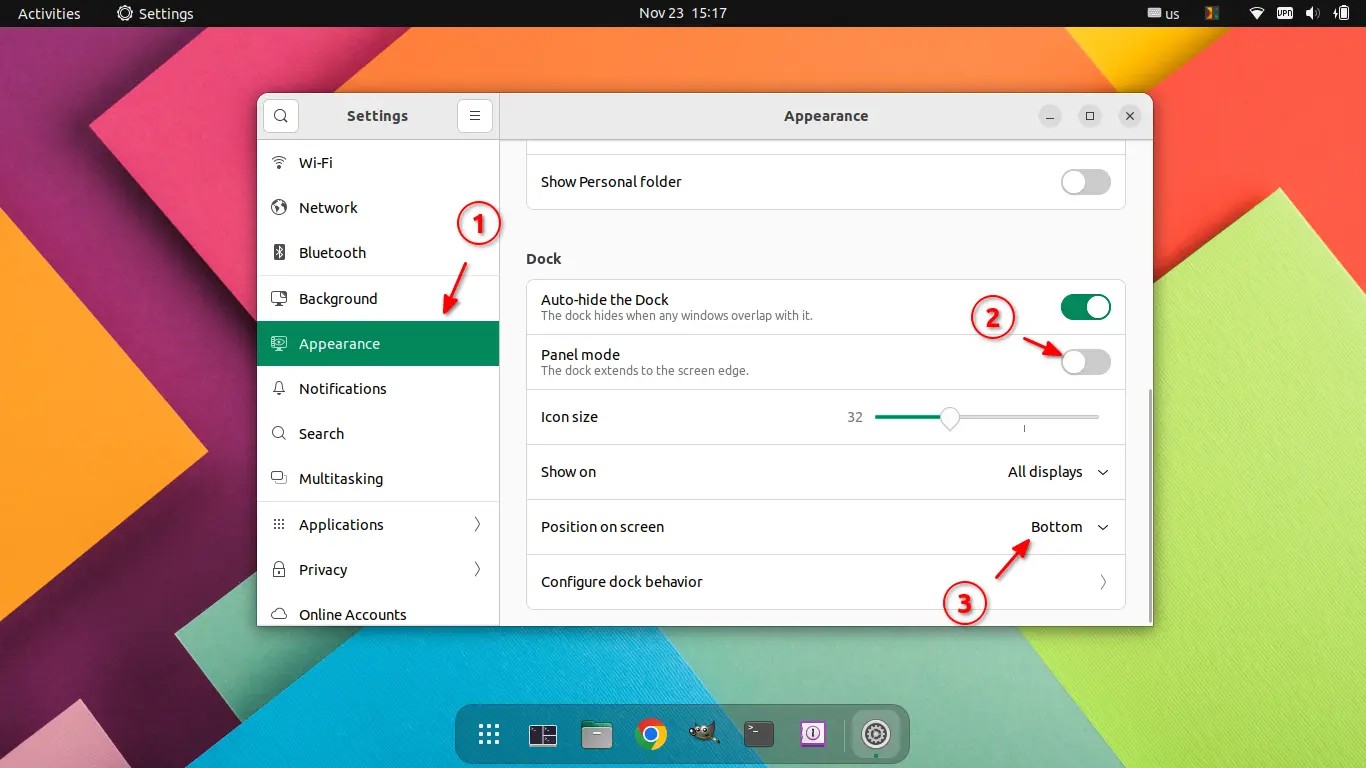
Then navigate to “Appearance” settings page and do:
- Turn off ‘Panel mode’.
- Set ‘Position on display’ to bottom.
Step 2: Install Themes for App window and Desktop
For the app window and desktop panel/menu appearance, here’s a popular WhiteSur GTK Theme to make it look like macOS.
First, download the theme package via the link button below:
Then, right-click on the .zip package in file manager, extract, and select “Open in Terminal” from its right-click context menu.
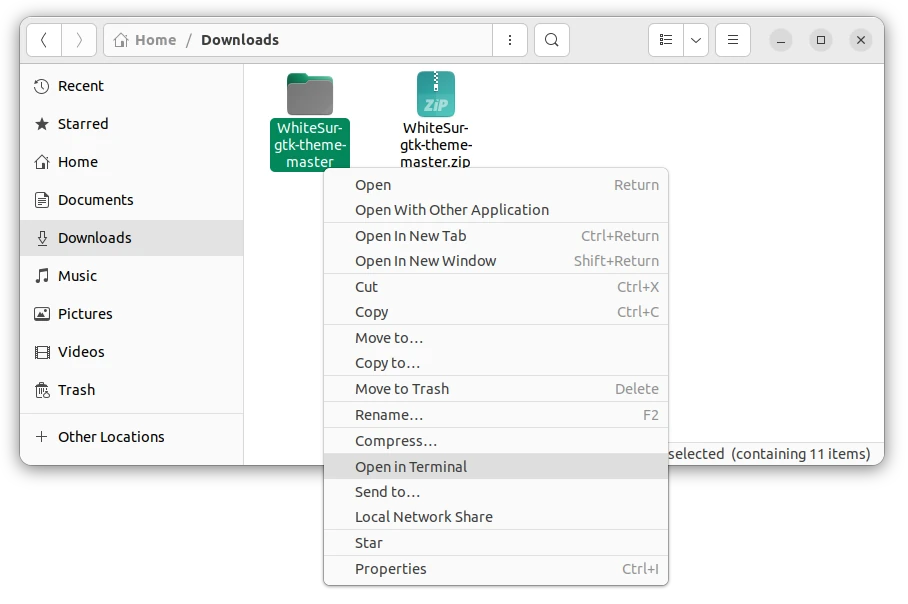
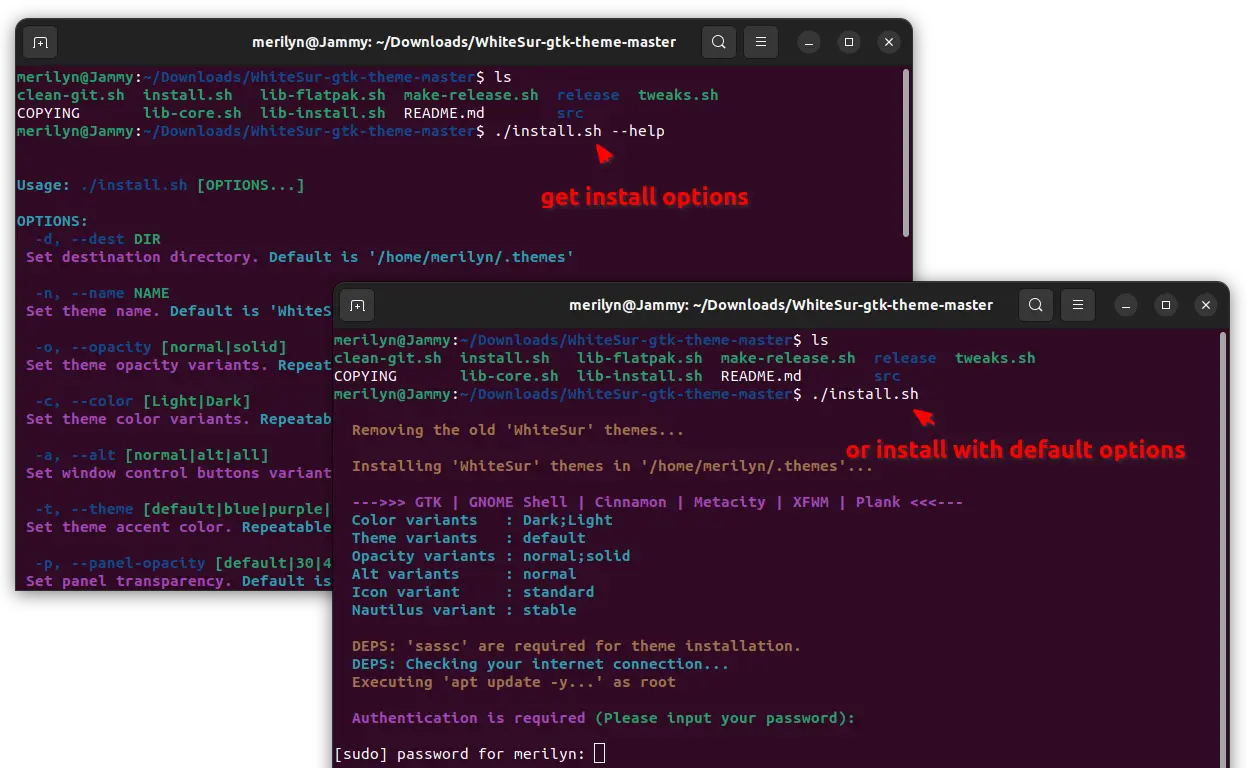
When terminal opens, use ls command to list folder content, and run ./install.sh command to install the theme with all default options. Or, use ./install.sh --help to show options and run it with custom parameters.
As well, install Flatpak, Snap (however not work for me) and Firefox themes by running command ./tweaks.sh -f -F -s.
Apply the GTK/Desktop Theme
To apply the new themes, you need Gnome Tweaks tool and ‘User Themes’ extension for loading themes from local folder.
- First, open Ubuntu Software, search for and install GNOME Tweaks and Extension Manager.
- Launch Extension Manager, and use it to install User Themes extension (Enable it if already installed).

- Launch Gnome Tweaks and navigate to ‘Appearance’ tab, finally do:
- select WhiteSur light/dark for Applications theme.
- select WhiteSur light/dark for Shell theme.

Step 3: Install Icon Theme
For the macOS style icons, click to download the theme package from the link below (or you may visit the project page):
Then extract the zip, right-click on source folder and select “Open in Terminal”. Finally, run the install script to install the icons theme.
./install.sh
Apply the icons
Similarly, open GNOME Tweaks and navigate to ‘Appearance’ tab to apply the icon theme you just installed.
![]()
Step 4: Get the Wallpapers
For the macOS wallpapers, click on the button below to download the zip (or visit the project page):
Also, extract the zip in file manager, right click source folder and select ‘Open in Terminal’. Finally run ./install-wallpapers.sh to install them.

Apply new wallpaper
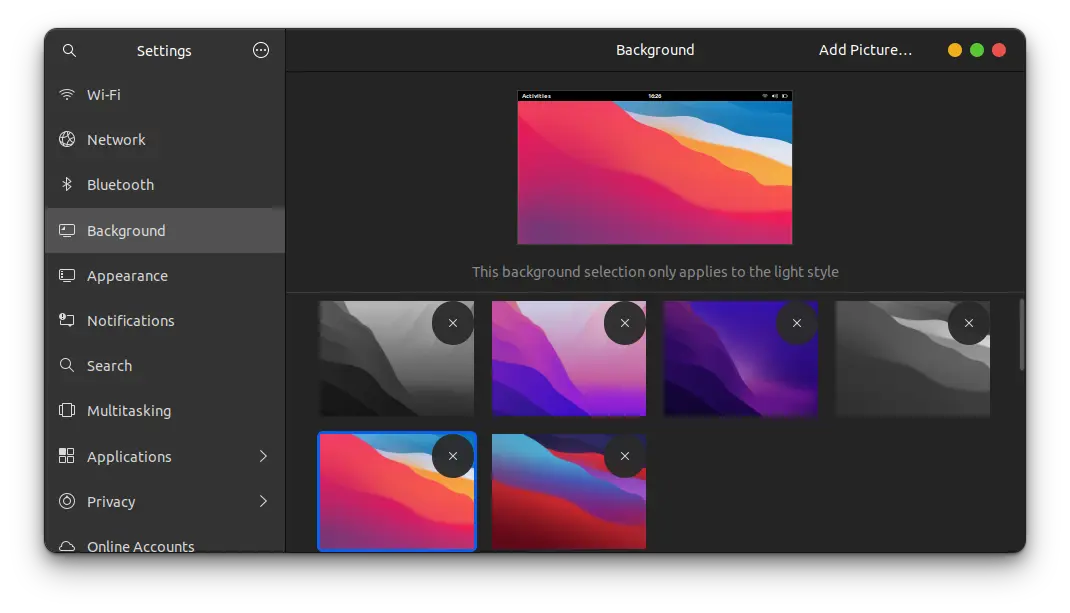
After installing the wallpapers, open System Settings (aka GNOME Control Center) and apply one of them from ‘Background’ settings page.
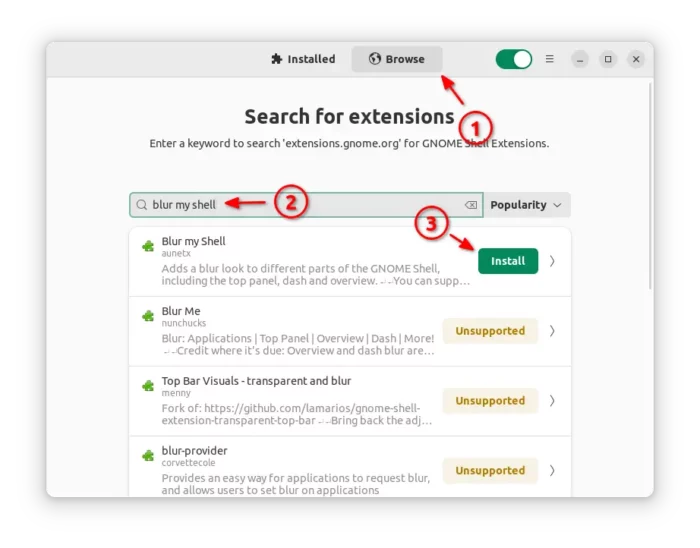
Step 5: Install Blur My Shell & Magic Lamp
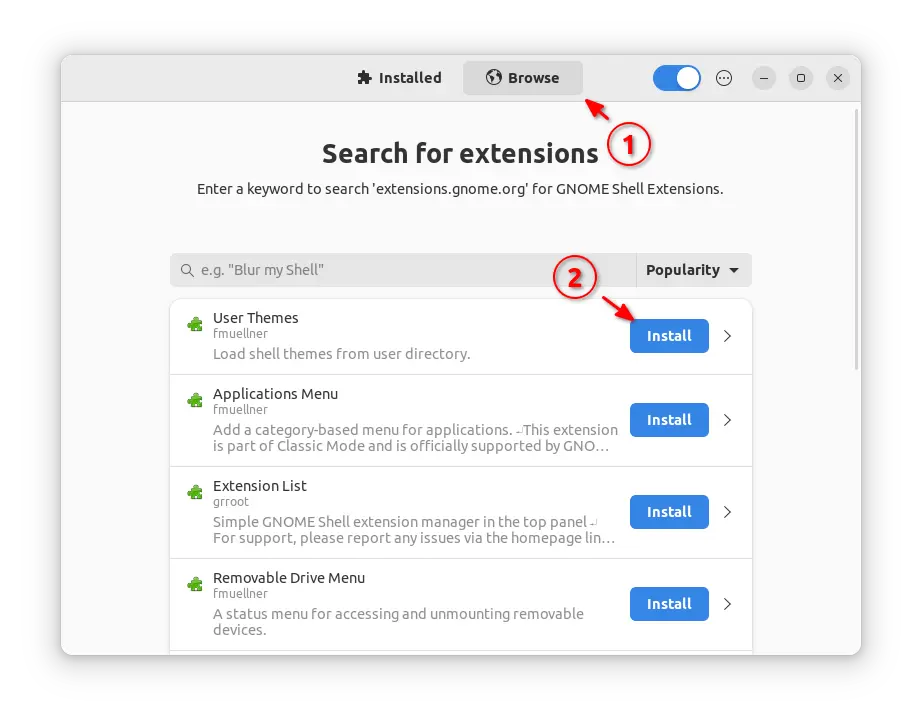
After following Step 2, you should have “Extension Manager” app installed on your system.
Launch the tool from ‘Activities’ overview, then you can search for and install “Blur My Shell”.
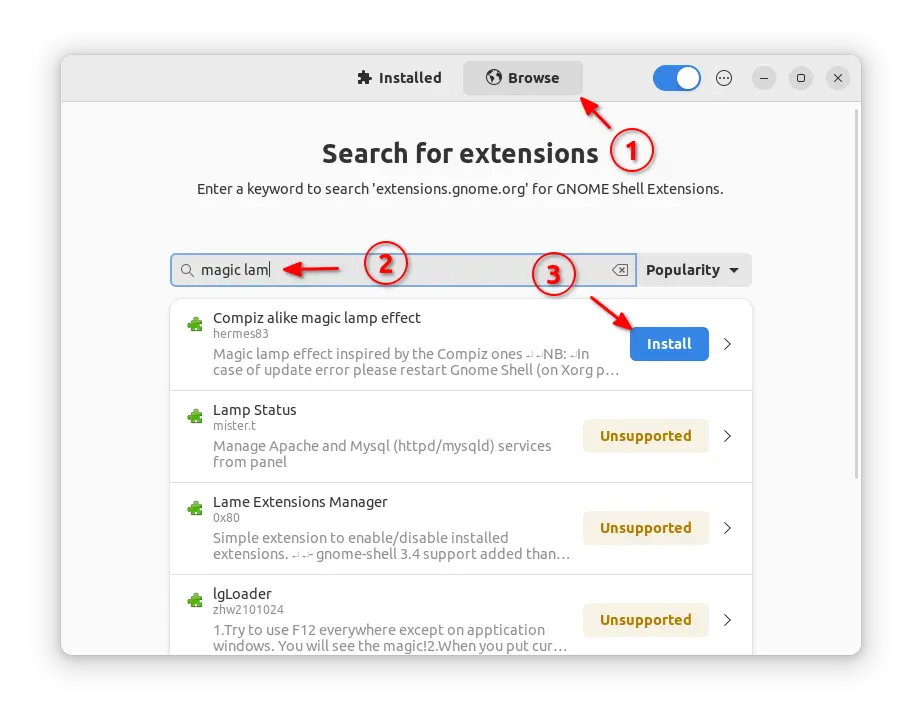
And ‘Compiz alike Magic Lamp effect’ extension for even better experience.
Summary
Generally, install and apply WhiteSur-gtk-theme, WhiteSur-icon-theme, and WhiteSur-wallpapers can make your Ubuntu 22.04 desktop look like macOS.
Though, for Firefox (native .deb rather than pre-installed Snap) and Flatpak apps, user need to run ./tweaks.sh -f -F while installing the GTK theme. A -s flag is also available for Snap, but it does not work in my case.
To make the theme work for Flatpak GTK4 apps, also run command in terminal:
sudo flatpak override --filesystem=xdg-config/gtk-4.0
LibAdwaita apps do not support custom themes, though user may run ./install -l while installing the GTK theme as a workaround.