


This simple tutorial shows how to change CPU frequency, turn on/off CPU cores, enable/disable Turbo boost in Ubuntu & Debian (with GNOME) on the fly.
I brought a new mini-ITX PC case recently (see image below), which has only about 2.5 L in capacity. And, I put Intel i5-10400 along with b560i motherboard into it.
It seems good, but sometimes running too hot, and even reboot automatically on heavy load because the 120W charger is a bit not enough for the PC.

To save money, I decided to limit the CPU frequency, rather than buy a new charger, which also makes the PC running a bit cooler.
In my mind, there are quite a few ways to tune CPU frequency. GNOME even has built-in power mode settings, however, it does not stop overheating unless running in power-saving mode. BIOS settings has an option to disable Turbo boost, but I don’t want to always run it in 2.9 GHz.
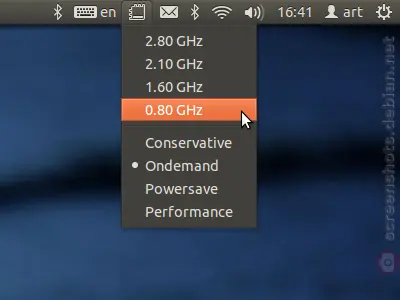
Indicator-cpufreq was a great choice, which added an indicator applet in top-panel to change CPU frequency on the fly. However, it does NOT work in my case in current Ubuntu releases.
Finally, I turned to cpufreq Gnome extension, which is working perfectly in my case in Ubuntu 22.04.
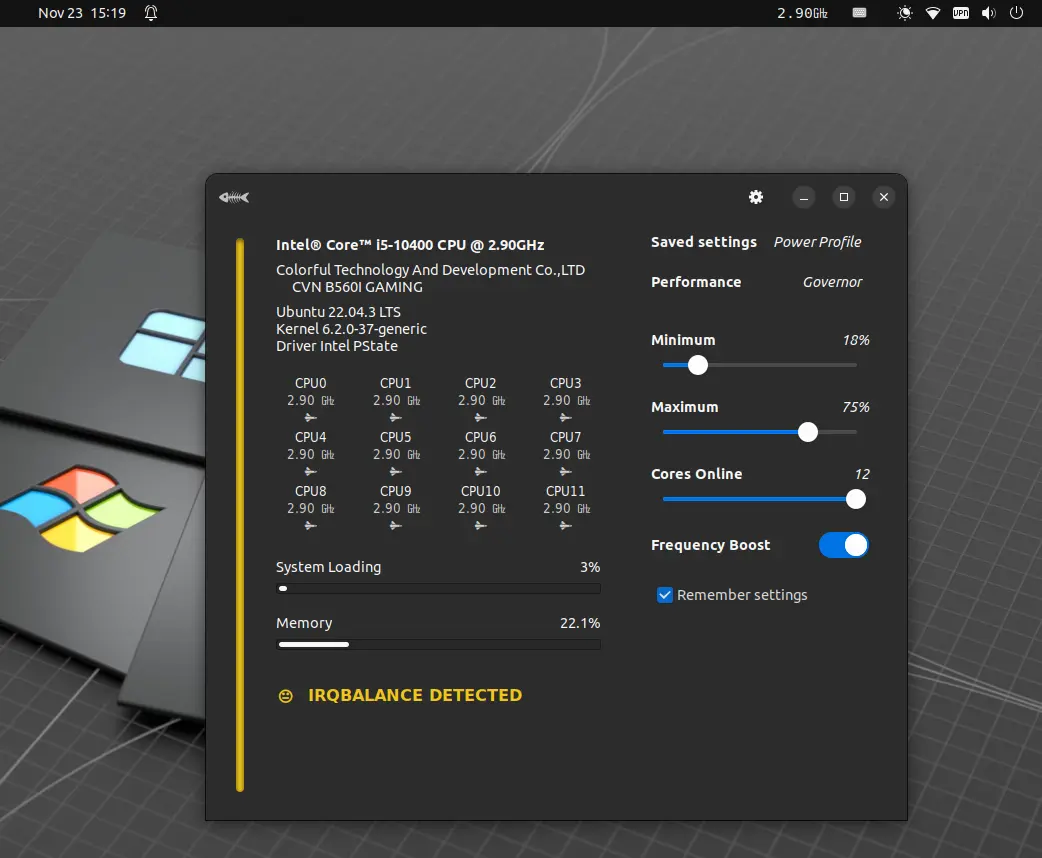
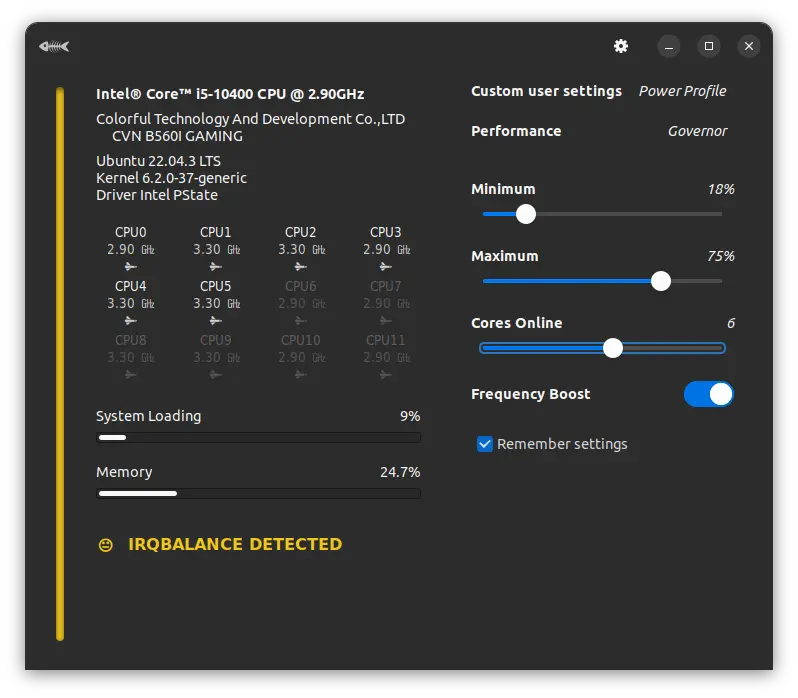
It adds an indicator applet in top-panel, showing the real-time CPU frequency. And, provides a configure dialog to:
- tune CPU frequency on the fly by setting minimum and maximum limit.
- enable/disable Turbo boost (Frequency Boost).
- Turn off CPU Cores, by setting how many cores online.
As well, it monitors CPU frequency on per-core basis, system loading, and memory usage. And, it supports power profiles (with custom settings) that can switch automatically for Laptop running on battery or not.
Step 1: Install the Gnome Shell Extension
At the moment of writing, the extension supports for GNOME from version 3.14 up to 44. Meaning, you can try it in Ubuntu 20.04, 22.04, 23.04 with default GNOME Desktop, Fedora 37/38, Debian 11/12, RHEL, and other Linux with GNOME older than 44.
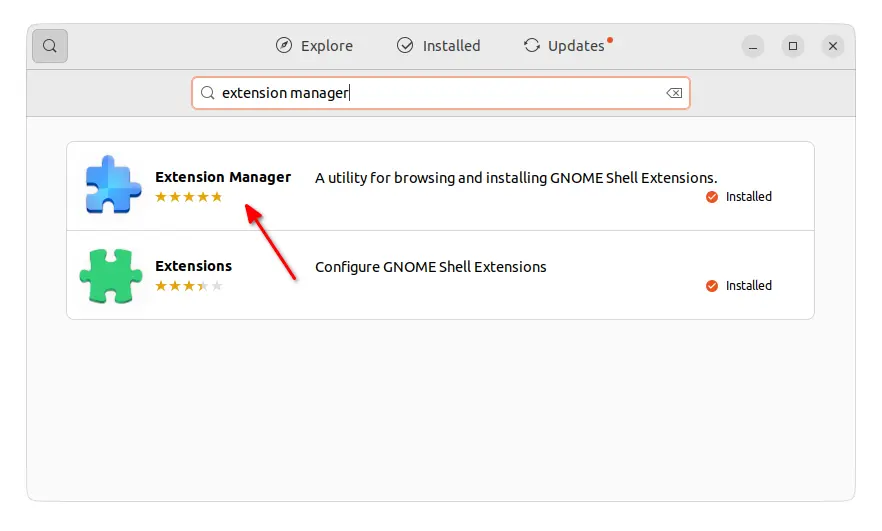
For Ubuntu 22.04, firstly search for and install “Extension Manager” app from Ubuntu Software.
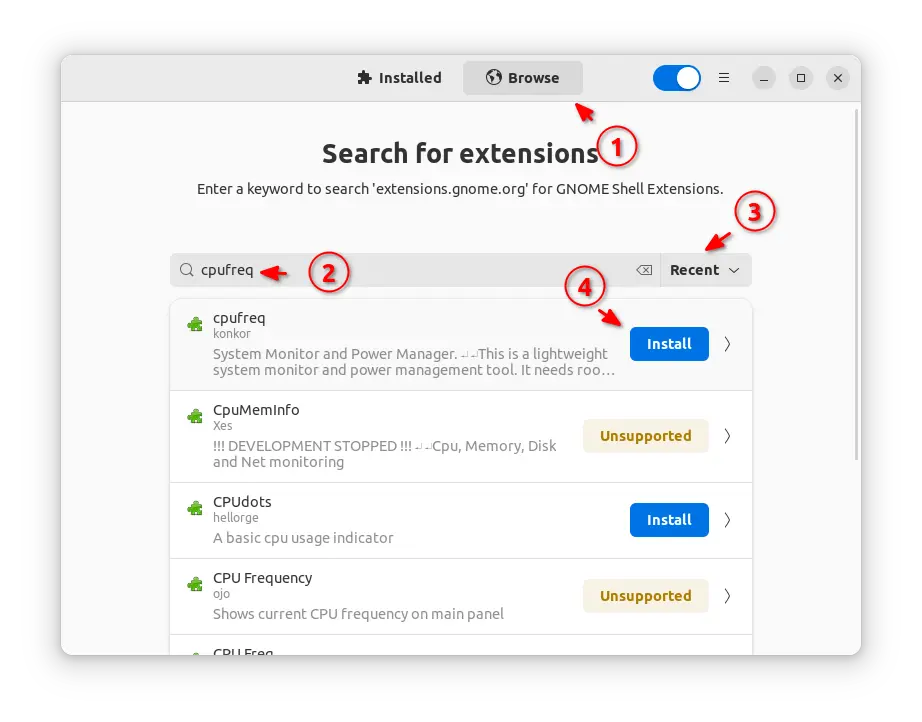
Then, launch “Extension Manager”, navigate to Browse tab, and finally search & install the ‘cpufreq’ extension (the one from konkor).
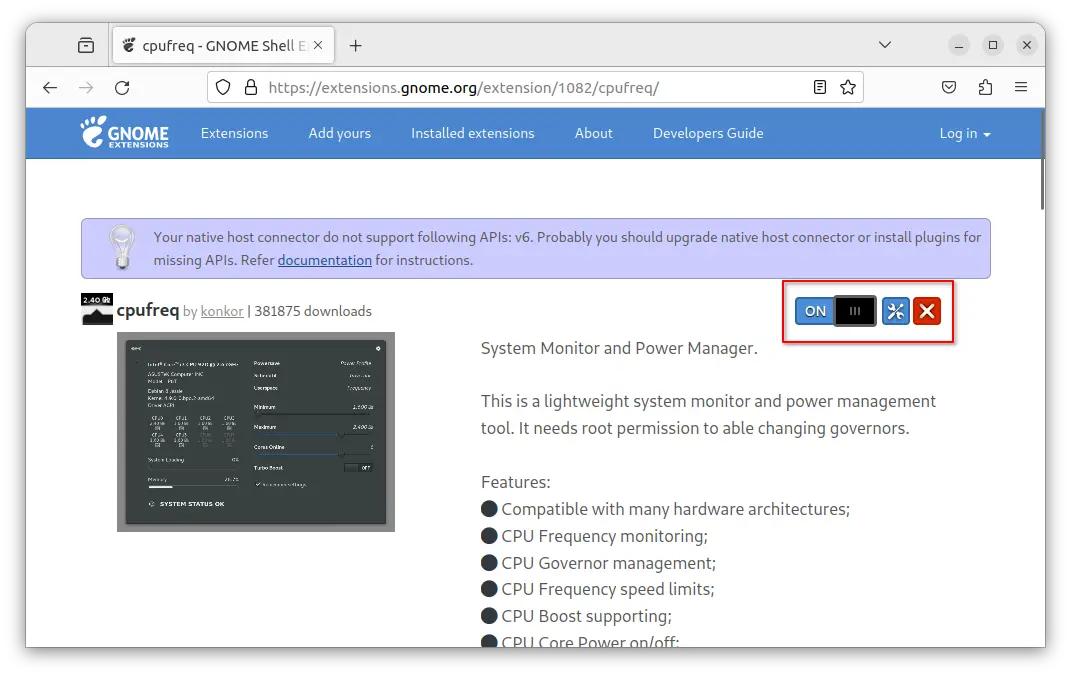
For other Linux (including Ubuntu 20.04), just go to the extension page on EGO via the link below:
Then, use the ON/OFF switch to install it. If you don’t see the toggle switch, install browser extension via the link in that page and refresh.
Ubuntu 20.04 needs to open terminal (Ctrl+Alt+T) and run sudo apt install chrome-gnome-shell to install the agent first.
Step 2: Setup Power Manager
The indicator applet should appear immediately on panel after installing the extension, showing current CPU freqency. If NOT, try log out and back in.
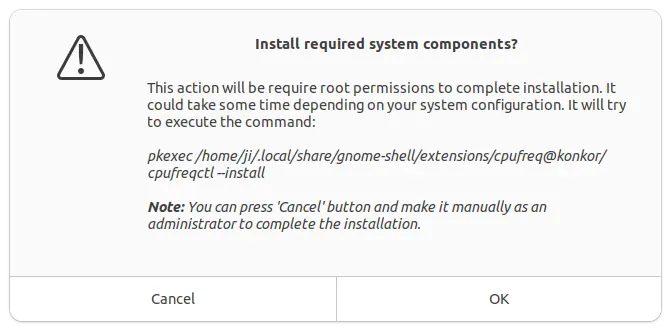
For power management, it needs root permission. Just click on the applet icon on panel, will launch the dialog (see the screenshot below) asks to grant permission to run setup.
By clicking OK, and typing user password in authentication dialog will run the process automatically.
The desktop session crashed in my case after this action. Not sure if it’s something to do with the extension, but it works great after reboot.
Step 3: Tuning your CPU freqency
After done the previous steps properly, just click on the new indicator applet at any time will launch the configuration dialog. Finally, move the sliders to tune CPU with your favor!
That’s all. Enjoy!