

Want to install Pop!_OS 22.04 on your PC/laptop? Here’s a step by step guide with screenshots that shows you how in details.
Step 1: Create Bootable USB Installer
Before getting start, you need to burn the iso image into a USB stick so it’s possible to boot the live system and start the installer wizard.
You need to prepare following things first:
- A USB stick with 4GB+ memory.
- Download iso image from system76 website.
- PC running Windows, MacOS or Linux
Then burn the iso into USB using your favorite application: here are 6 USB creating tools.
Step 2: Boot the live system via USB
After burning the live system into USB, plug it into the machine that you want to install Pop!_OS into. Then select boot USB in BIOS/UEFI settings.
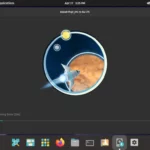
NOTE: You may need to first disable secure boot to make the live system boot! Once it boots successfully, it should bring your into the following screen:

You may either close the wizard and try out Pop OS with the live system, or select your language and click “Select” button to get start installing the system.
Step 3: Setup language, keyboard
The first few screens ask you to select language, country, keyboard layout and input language. Just choose the options accordingly and click on the bottom right “Select” button to go next:

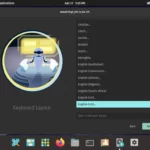

Step 4: Clean Install or Custom
After setup language and keyboard, it will prompt to choose the install method:
- Clean Install – Use the whole disk for Pop!_OS only. All disk data will be cleared!!
- Custom (Advanced) – go to partition table and assign where to install the system manually.
Unfortunately, there’s NO “install beside Windows” or any other option for beginners do not want to use the whole disk for Pop!_OS.
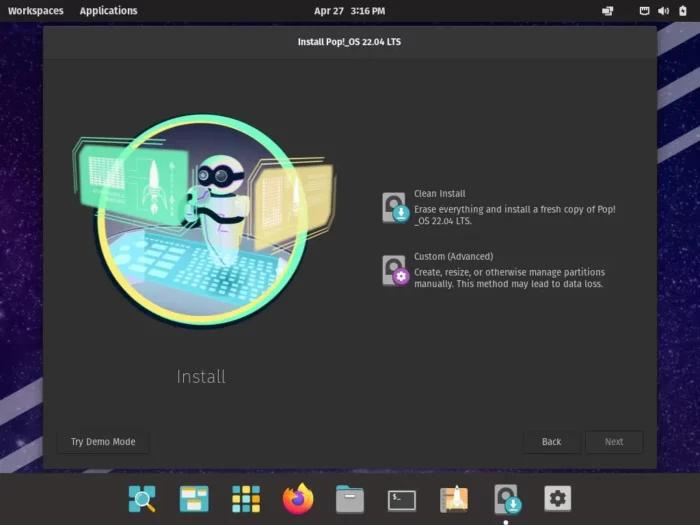
Step 5: Create system partition manually
If you don’t plan to use your PC for Pop!_OS only, click on “Custom (Advanced)” option in the picture screen above and hit “Next”.
You’ll see something like the screen below shows:
Here you need following partitions:
- EFI/BIOS_Grub. If you are installing Pop!_OS on an UEFI-capable computer with an installed operating system, like Windows 10 for example, it is very likely that you already have an EFI system partition. So you don’t need to create it again if already exist.
- linux-swap. (OPTIONAL) A swap area as large as RAM. It’s optional since you can lately use a system file as swap area instead. Or you just don’t need it if you have large RAM and don’t need hibernation feature.
- /boot. (OPTIONAL) It’s possible to create a separated /boot partition, though it’s optional if you don’t use LVM, system encryption.
- Root (/). This is required for system partition.
So, if you’re not going to install Pop!_OS on top of an existing disk partition, click on “Modify Partitions” button (see previous picture) to create them manually!
Modify Partitions
Once you click that button, it opens the “GParted” dialog. It seems NOT so friendly compare to Ubuntu’s partition table. Let’s go add/delete new partitions on your disk!
Do following steps carefully!! DON'T touch your Windows partition that usually marked via "msftdata" flag.
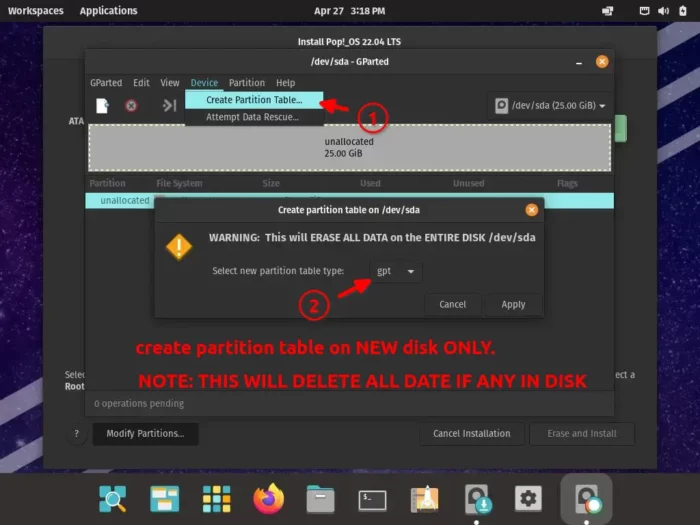
For an empty disk only (usually Virtualbox virtual disk), you may first go to “Device -> Create Partition Table” and select create gpt partition table.
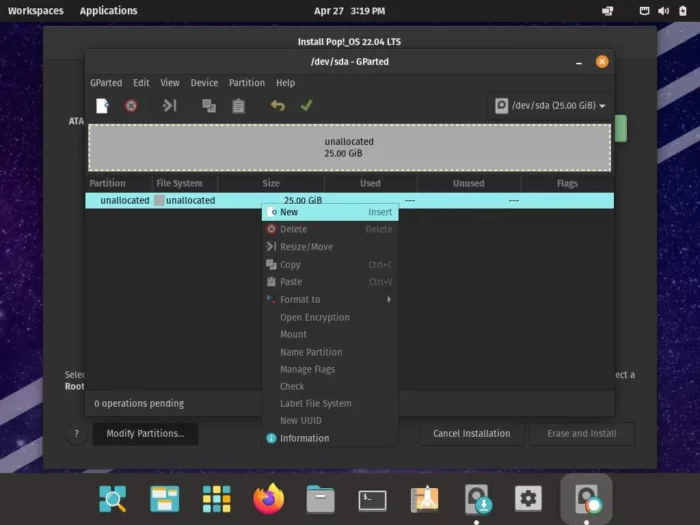
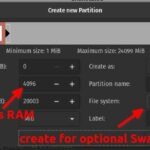
You can now right-click on “unallocated” volume and select “New” to create a partition.
You may delete useless partitions by their right-click menu to get more unallocated spaces
As mentioned above, you need to create:
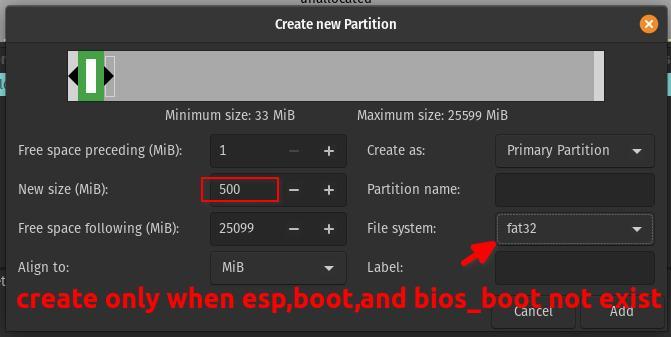
- 500MB fat32 partition only when “boot,esp,and bios_grub” not exist.
- linux-swap (optional) as large as RAM.
- 1024 MB Ext4 partition for separated “/boot” (DON’T recommend unless you require system encryption, as it cause installation fails in my test)
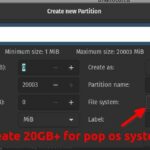
- 20 GB+ Ext4 partition for system, as large as you can assign.
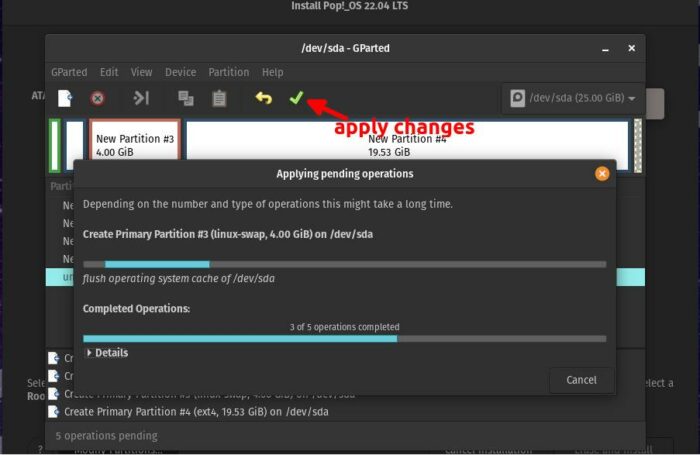
After creating required partitions, click on the green tick button to apply changes on the disk. DO check carefully!!
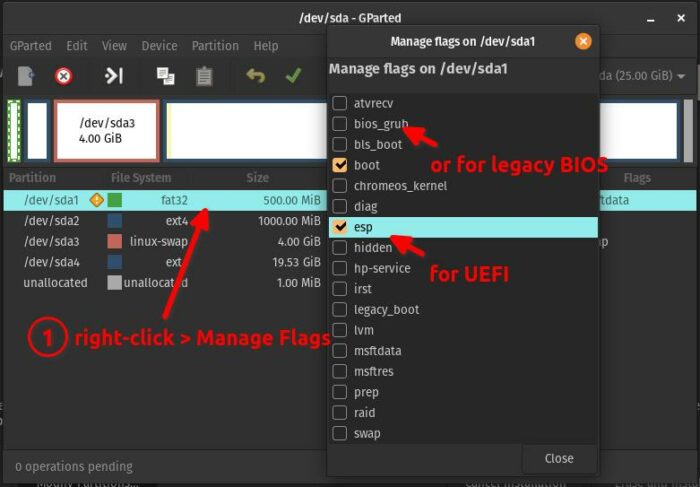
If you just created the “fat32” partition, right-click on it and select “Manage Flags” and finally select esp (for UEFI mode) or bios_grub for legacy BIOS mode. (SKIP if the flag already exists)
Finally, close the “Gparted” dialog and in the installer wizard, select “swap” (if any) and enable it to use as swap, click the Ext4 partition and select use as Root (/).
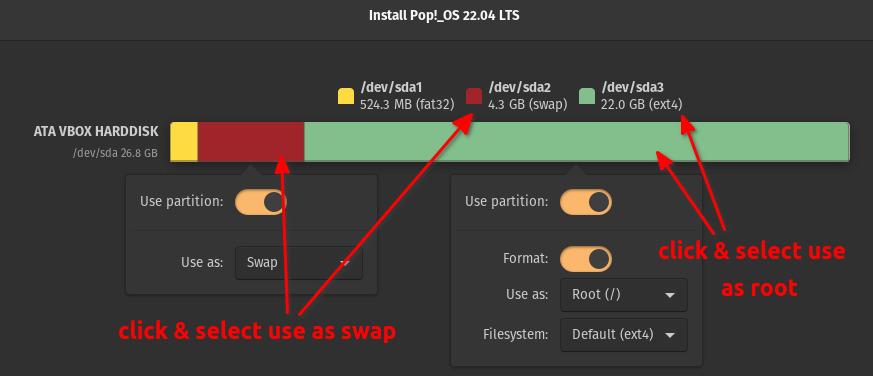
Then click on “Erase and Install” button to start the installing process.
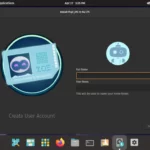
Step 6: Setup Account and Wait until done!
In next screens, type a name and password, and just wait the process until done!
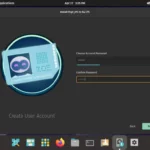
If not error occurs, it should finally prompt you to “Restart” the computer.
Final words
The Pop!_OS itself is great for beginner use! However, the 22.04 installer wizard is totally NOT friendly for beginners, especially for those want to install it on disk with Windows (or other OSes) dual boot.
And, you see there’s NO option to set computer name during the process, though it’s not hard to manually change host-name lately.