

Got a HP printer or scanner, but it does not work out-of-the-box in Debian? Here’s step by step guide shows how to install and setup the driver.
Debian 12 by default uses cups (Common UNIX Printing System) printing system, which supports a wide range of printer devices. If cups does not work for you, then there’s also HPLIP available for HP printer and scanners.
HPLIP, stands for HP Linux Imaging and Printing, is a free open-source driver developed by HP and community contributors. It aims to provide full printing, scanning, and faxing support for HP’s inkjet and laser printers.
Step 1: Install HPLIP in Debian 12
You have 2 choices to install HPLIP in Linux:
- the package from system repository.
- Or, the latest installer from HPLIP download page.
Option 1: Install HPLIP from system repository
HPLIP package in system repository is a bit old, but easy to install. So far, Debian 12 includes HPLIP 3.22.10 in its system repository. Meaning, it should support all the devices released before October, 2022.
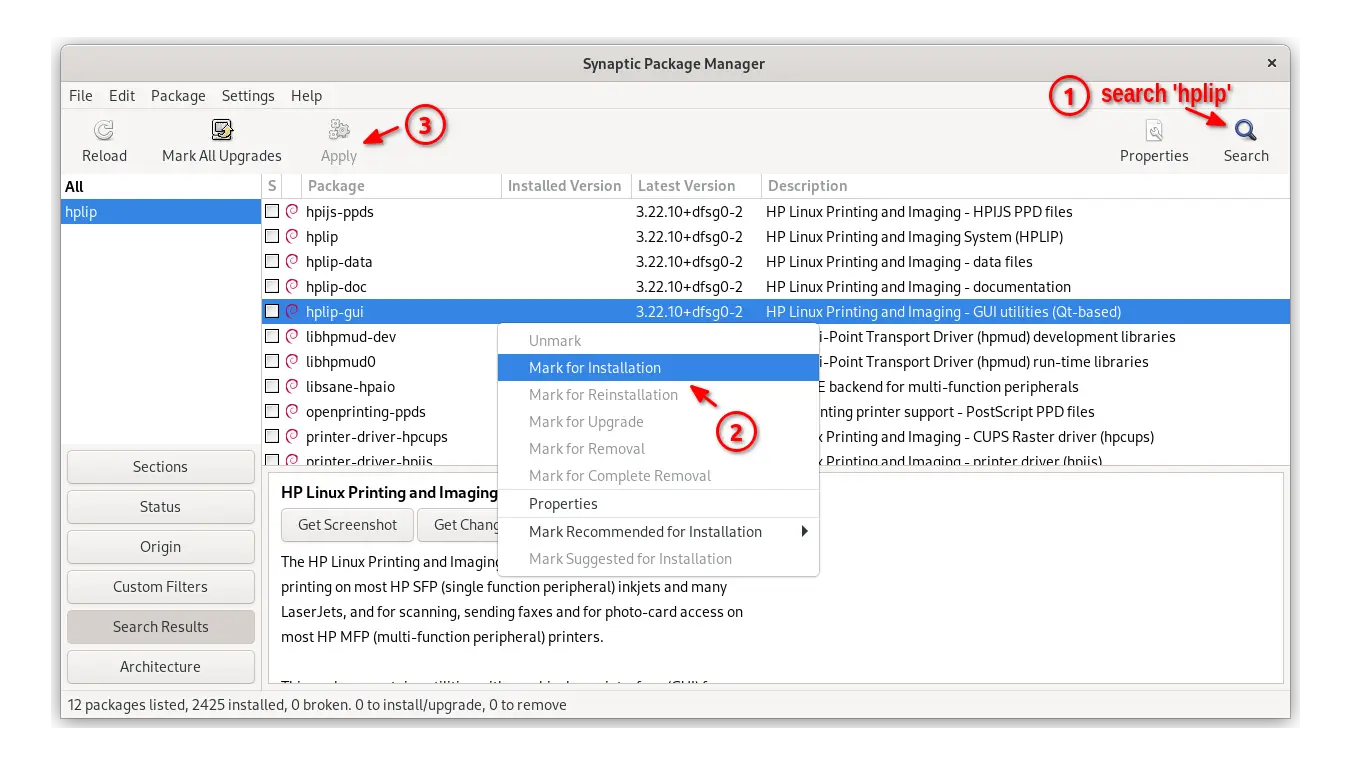
To install it, first launch “Synaptic Package Manager“. Then, do:
- Search ‘hplip’ package.
- Right-click on ‘hplip-gui’ package, and select ‘Mark for Installation’.
- Confirm in pop-up dialog, and finally click “Apply”.
Or, launch terminal and run 2 commands below one by one to install hplip:
sudo apt update

sudo apt install hplip-gui
Option 2: Install HPLIP via the latest installer
If you've installed HPLIP from system repository, then go 'Step 2' directly to setup and see if it works.
For the newer devices, you may install the latest HPLIP driver via the official installer.
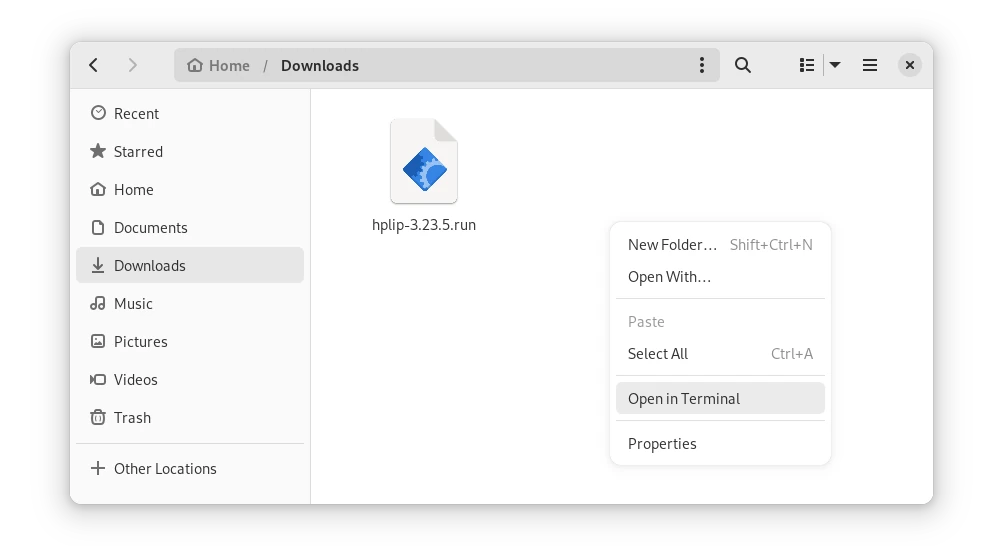
1. First, select download the latest ‘hplip-x.xx.x.run‘ package from the link below:
2. Then, open your ‘Downloads’ folder. Right-click on blank area and select “Open in Terminal“. It will open a terminal window, and automatically navigate to ‘Downloads’ folder as working directory.
3. Finally, run commands to start the HPLIP installer.
- First, add executable permission by running command:
chmod u+x ./hplip-*.run
- Then, run the installer to start installing HPLIP:
./hplip-*.run
Finally, follow the terminal output until the installation process done!
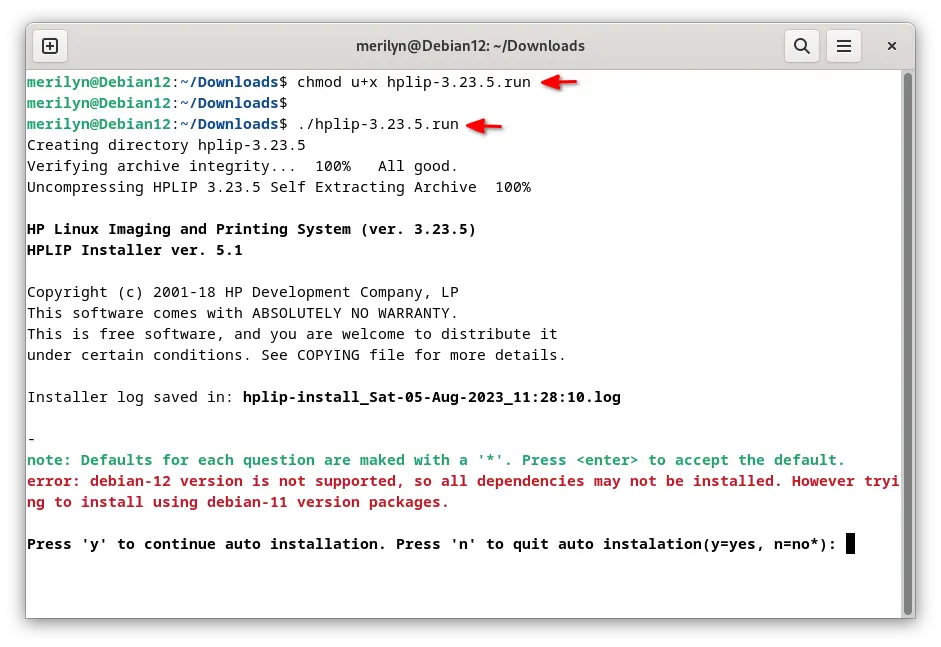
4. As the last screenshot shows, the latest HPLIP so far does NOT support Debian 12. In the case, quit the installer and run following steps instead to install HPLIP.
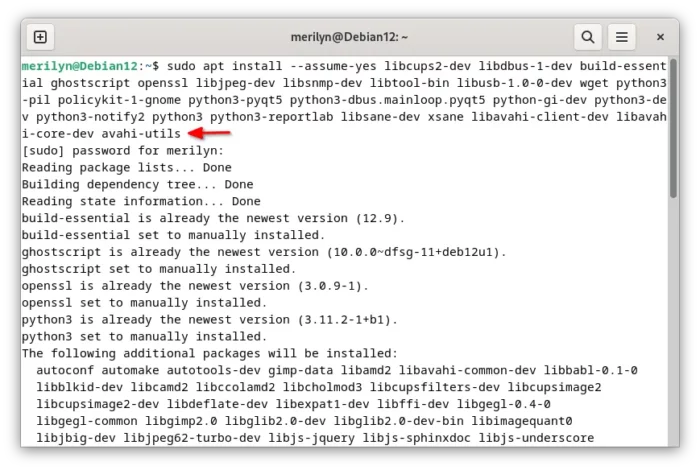
- First, launch terminal and run single command to install the dependency libraries:
sudo apt install --assume-yes libcups2-dev libdbus-1-dev build-essential ghostscript openssl libjpeg-dev libsnmp-dev libtool-bin libusb-1.0-0-dev wget python3-pil policykit-1-gnome python3-pyqt5 python3-dbus.mainloop.pyqt5 python-gi-dev python3-dev python3-notify2 python3 python3-reportlab libsane-dev xsane libavahi-client-dev libavahi-core-dev avahi-utils
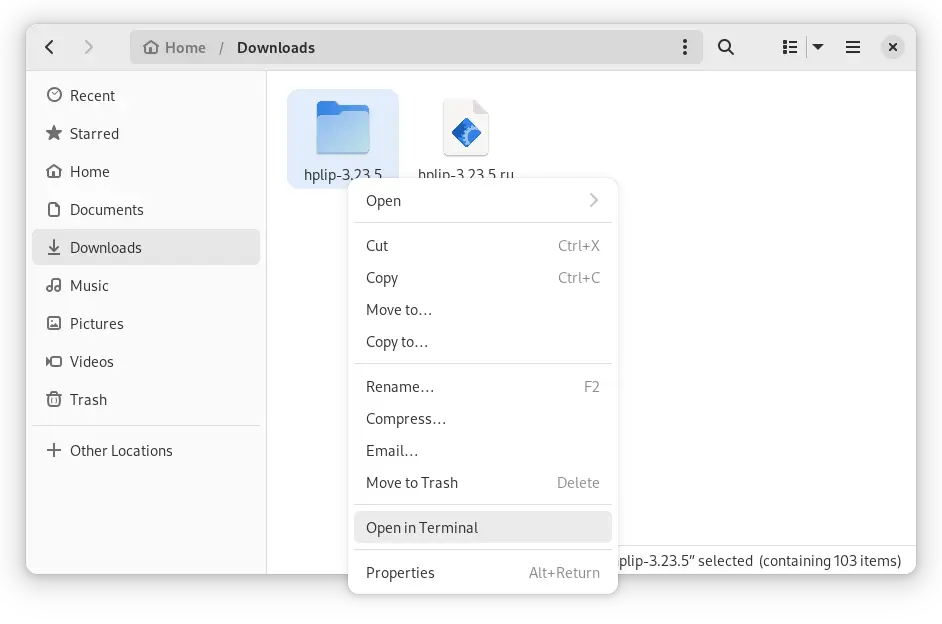
- Then, right-click on the HPLIP source folder and select “Open in Terminal“. The folder was created automatically while running
.runinstaller.If you don't see that folder, run command
cd ~/Downloads/ && ./hplip-*.run --target hplipto create it.
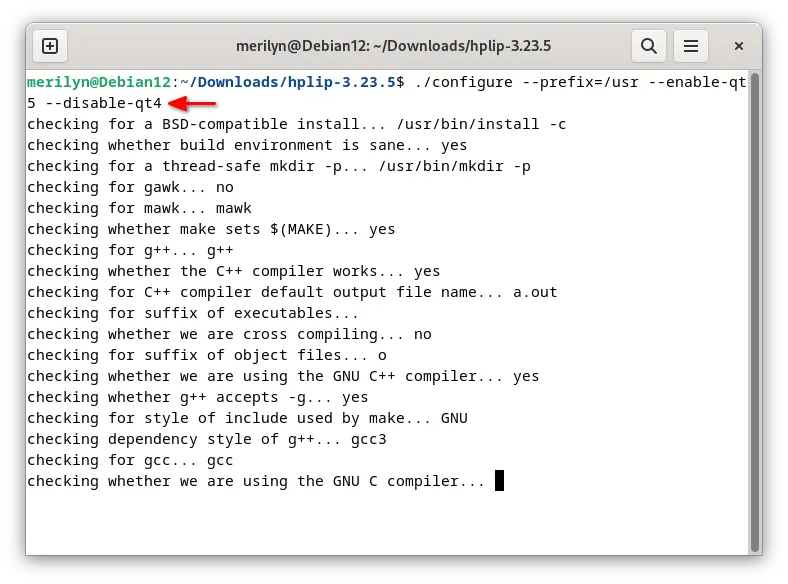
- When terminal opens with that hplip folder as working directory, run the command below to configure the source:
./configure --prefix=/usr --enable-qt5 --disable-qt4

- Finally, run the 2 commands one by one to make and install HPLIP:
make -j4
sudo make install

Step 2: Setup your HP printer/scanner
After installed HPLIP driver, connect or re-connect your HP device, then do the steps below to make new driver take place.
For GNOME Desktop
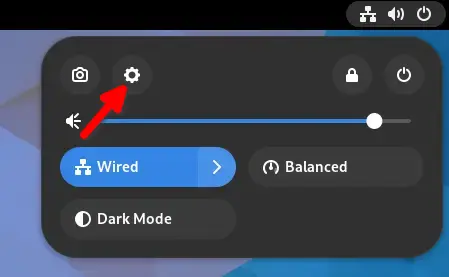
For GNOME, first open “Settings” from top-right corner system menu (Quick Settings).
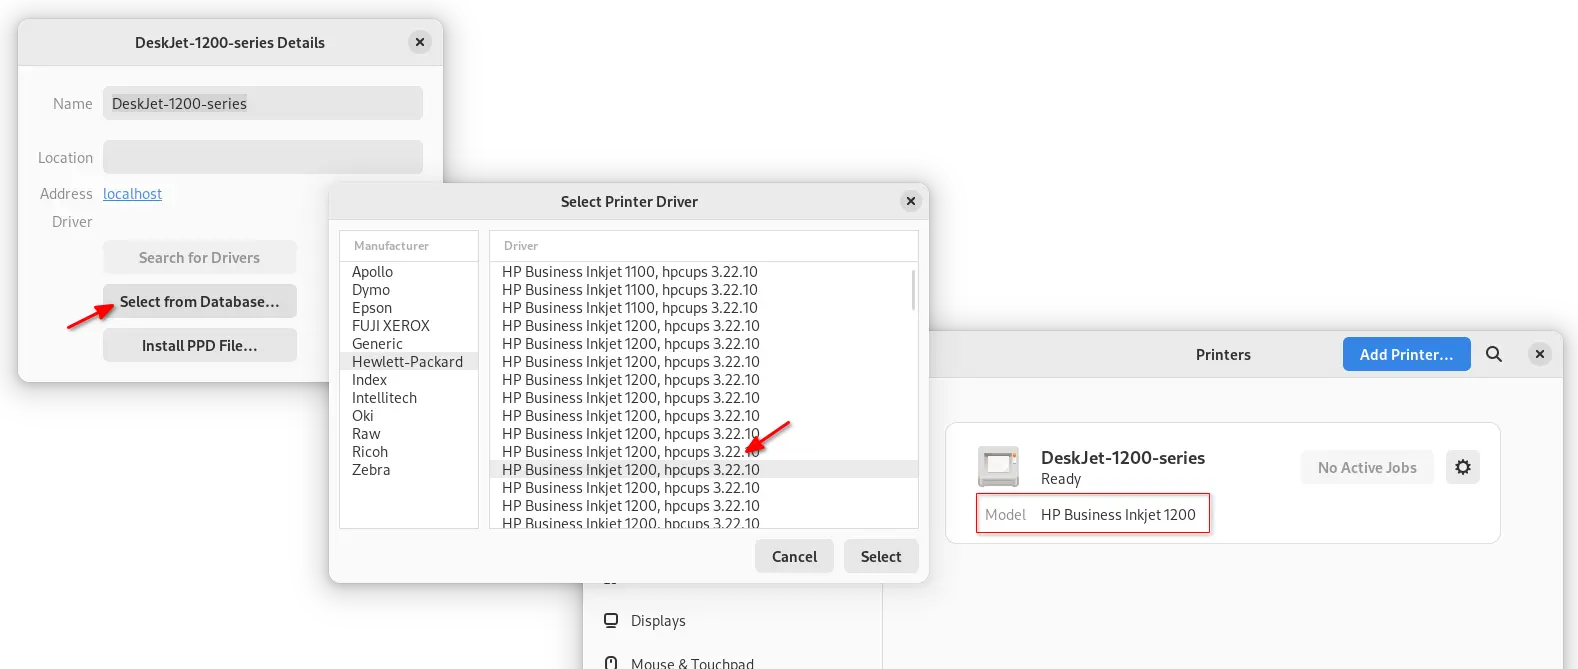
Then, navigate to ‘Printers’ from left pane, unlock, and click on gear icon for your printer and select “Printer Details“.
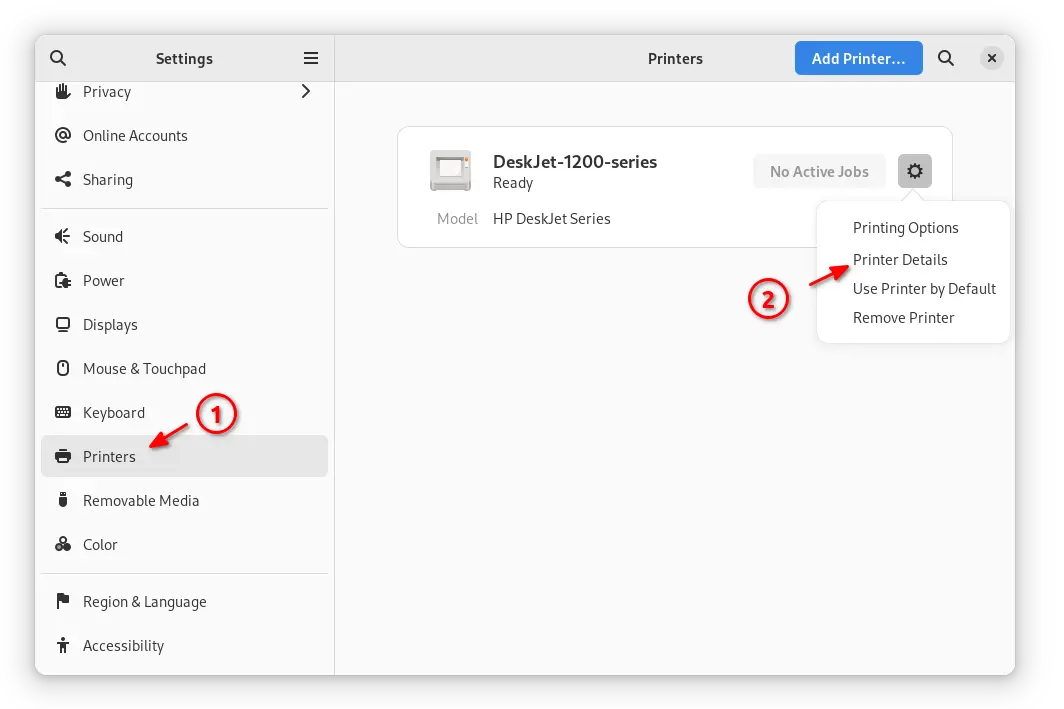
In next dialog, click “Select from Database” -> “Hewlett-Packard” -> your printer series. When done, you’ll see the new driver (model) in use for your device.
Use system-config-printer
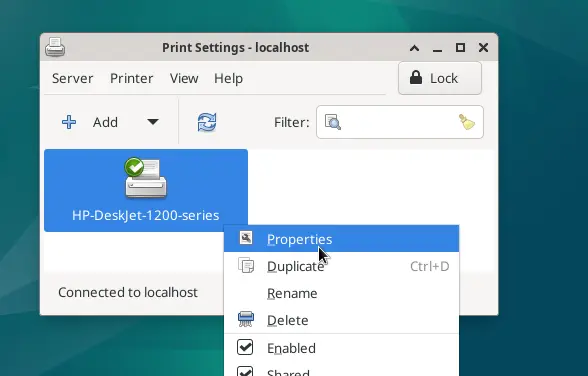
For any desktop with ‘system-config-printer’ settings dialog. Launch it either from start menu or by running system-config-printer command in terminal.
Then, unlock and right-click on your printer device and select “Properties”.
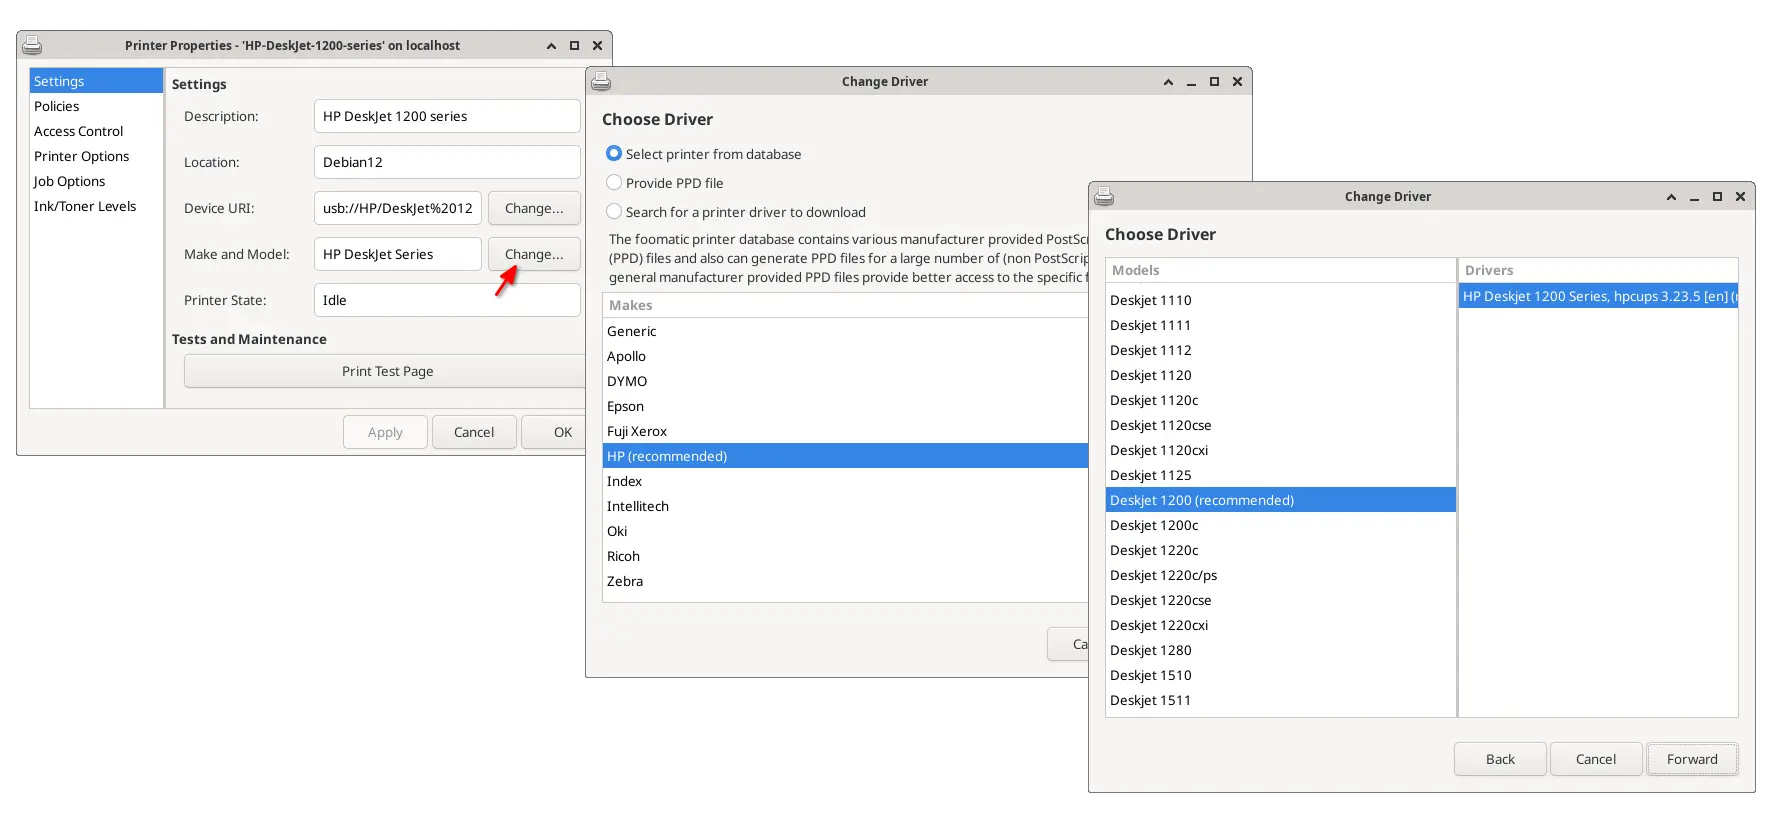
In next dialog, navigate to “Settings” tab and click the “Change” button for Make and Model. Finally, follow the wizard to choose HP -> your device series and driver.
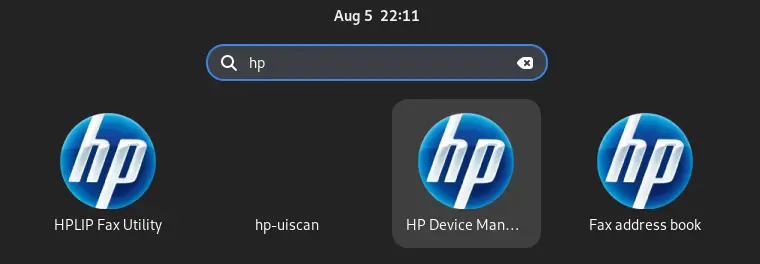
Use HP Device Manager (Universal)
HPLIP has a device manager tool to help setup your device. Which, should work for any desktop environment.
First, launch “HP Device Manager” from start/application menu or ‘Activities’ overview depends on your desktop environoment.
When the tool launches, just click “Setup Device” then follow the pop-up wizard to setup your printer until done.
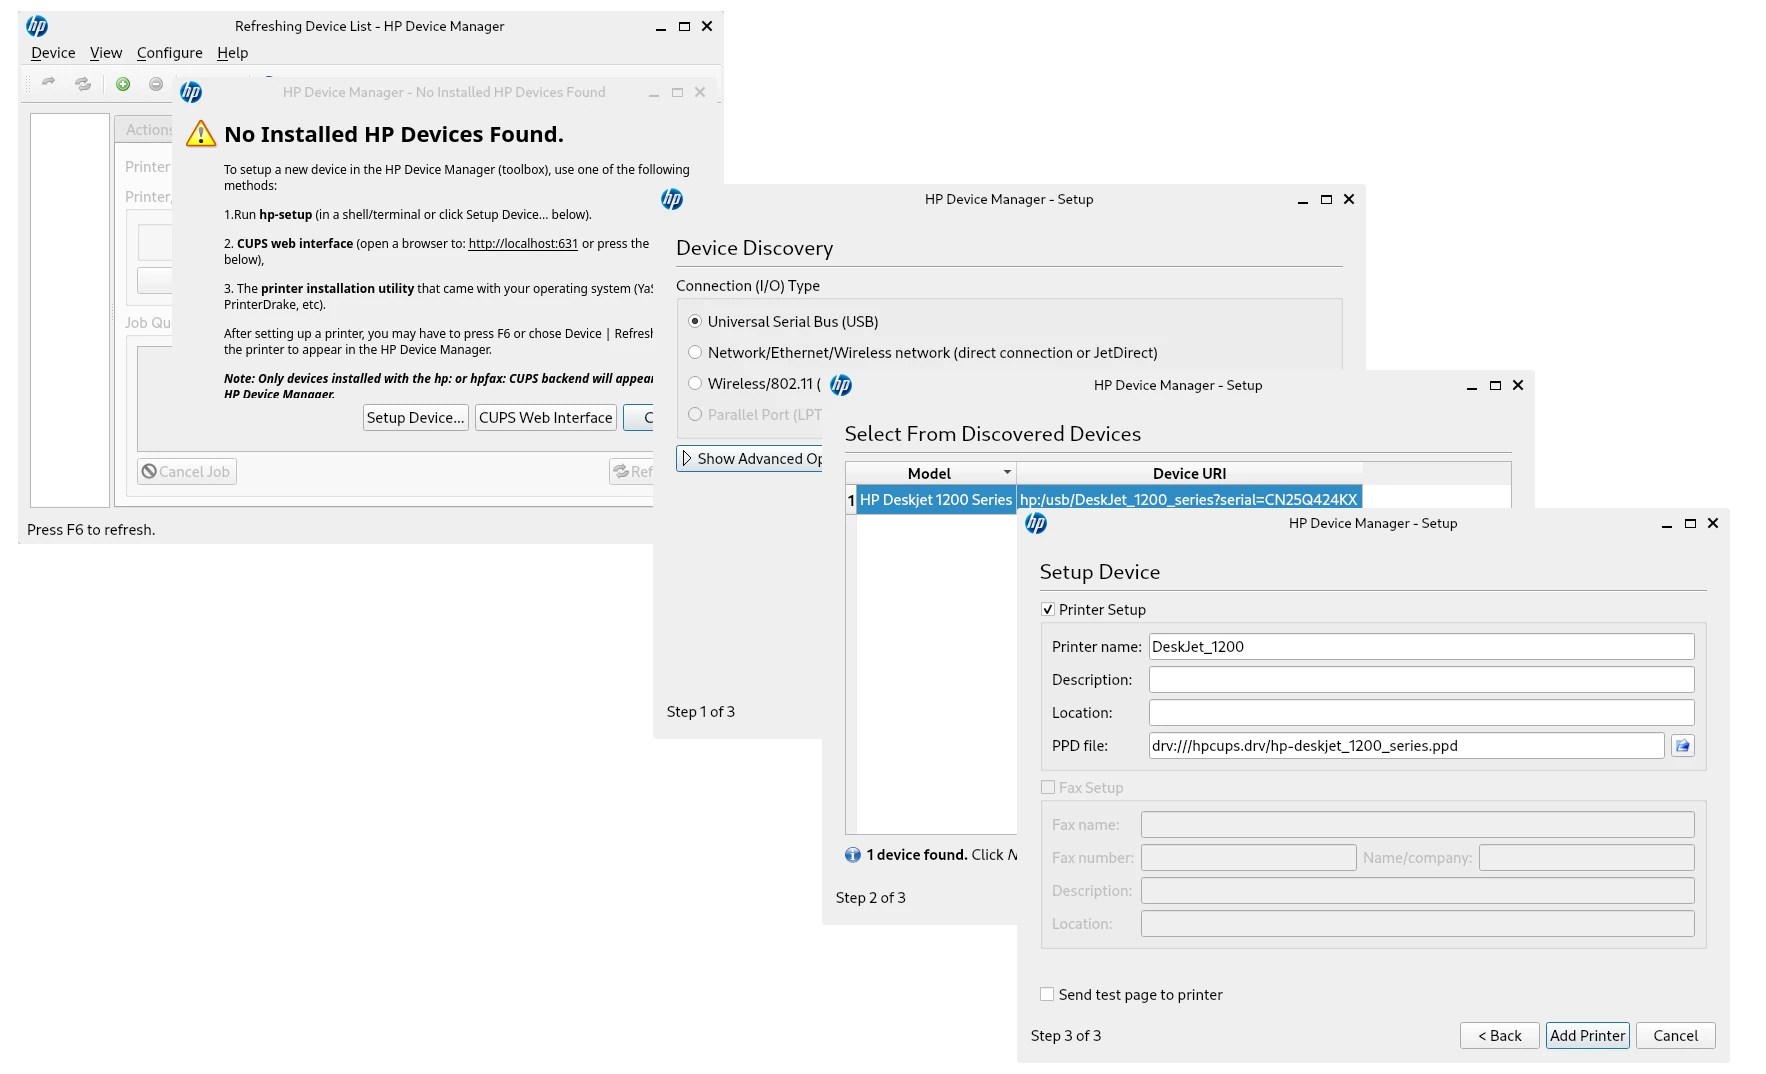
NOTE 1: HPLIP device manager needs you type username and password to authenticate before being able to add new device.
NOTE 2: The device manager adds a new device, which may cause 2 printers present in your settings page. You may remove the original one created by system.