

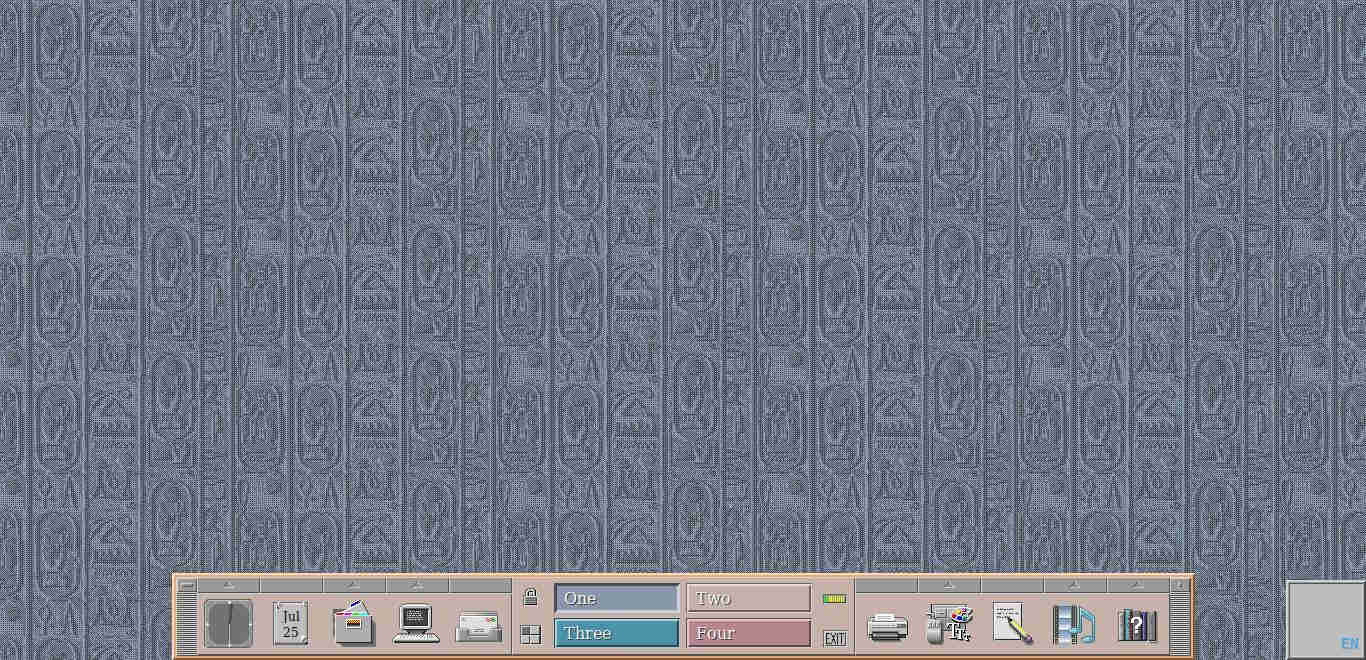
Looking for how to get retro CDE desktop (Common Desktop Environment) in your Linux? Try NsCDE!
NsCDE, stands for Not so Common Desktop Environment. It’s a free open-source project based on FVWM, trying to revive the look and feel of the Common Desktop Environment, but with more powerful and flexible framework for modern day computing.
If you insist on installing CDE, here’s a tutorial shows how to do it in Ubuntu though only tested on old Ubuntu 18.04 and Ubuntu 20.04.
The goal is a comfortable retro environment which is not just eye candy toy, but a real working environment for users who contrary to mainstream trends really like CDE, thus making semi-optimal blend of usability and compatibility with modern tools with a look and feel which mainstream abandoned for some new fashion, and … in a nutshell, giving to user the best of the both worlds.
In general, NsCDE is a lightweight hybrid desktop environment with CDE look & feel, but with a couple other free software components and custom FVWM applications and a lot of configuration.
How to Get NsCDE:
It’s easy to install the desktop environment, as it provides official .deb package for Debian/Ubuntu, .rpm package for Fedora, and .pkg.tar.zst for Arch Linux.
1. First, select download the package from the github releases page:
For Debian/Ubuntu, grab the “amd64.deb” for modern PC/laptop, and ‘arm64/armhf.deb‘ for ARM devices such as Raspberry Pi.
2. To install the package, you need to open terminal from system start menu or ‘Activities’ overview.
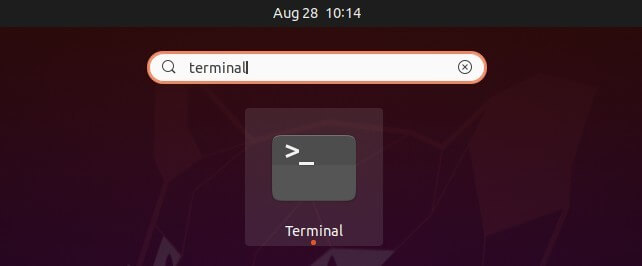
3. When terminal opens, select run one of the commands below depends on your system:
- For Debian and Ubuntu based system, run:
sudo apt install ./Downloads/PACKAGE_NAME.deb
- Fedora user may install it by running command:
sudo dnf install ./Downloads/PACKAGE_NAME.rpm
- And, for Arch Linux and Manjaro, use command:
sudo pacman -U ./Downloads/PACKAGE_NAME.pkg.tar.zst
Instead of manually type PATH to downloaded file, the "./Downloads/PACKAGE_NAME.*" part, you may simply drag and drop file into terminal.
UPDATE for Debian 12 Bookworm:
Thanks for @Adam, Debian 12 is missing the stalonetray dependency package for installing the latest NsCDE 2.3.
I don’t know why Debian 12 excluded the stalonetray package in its repository, but you may simply install the package from Debian 11 Bullseye repository.
You don’t have to add Debian 11 repository, just go the the link page below and click download the package for your CPU architecture type:
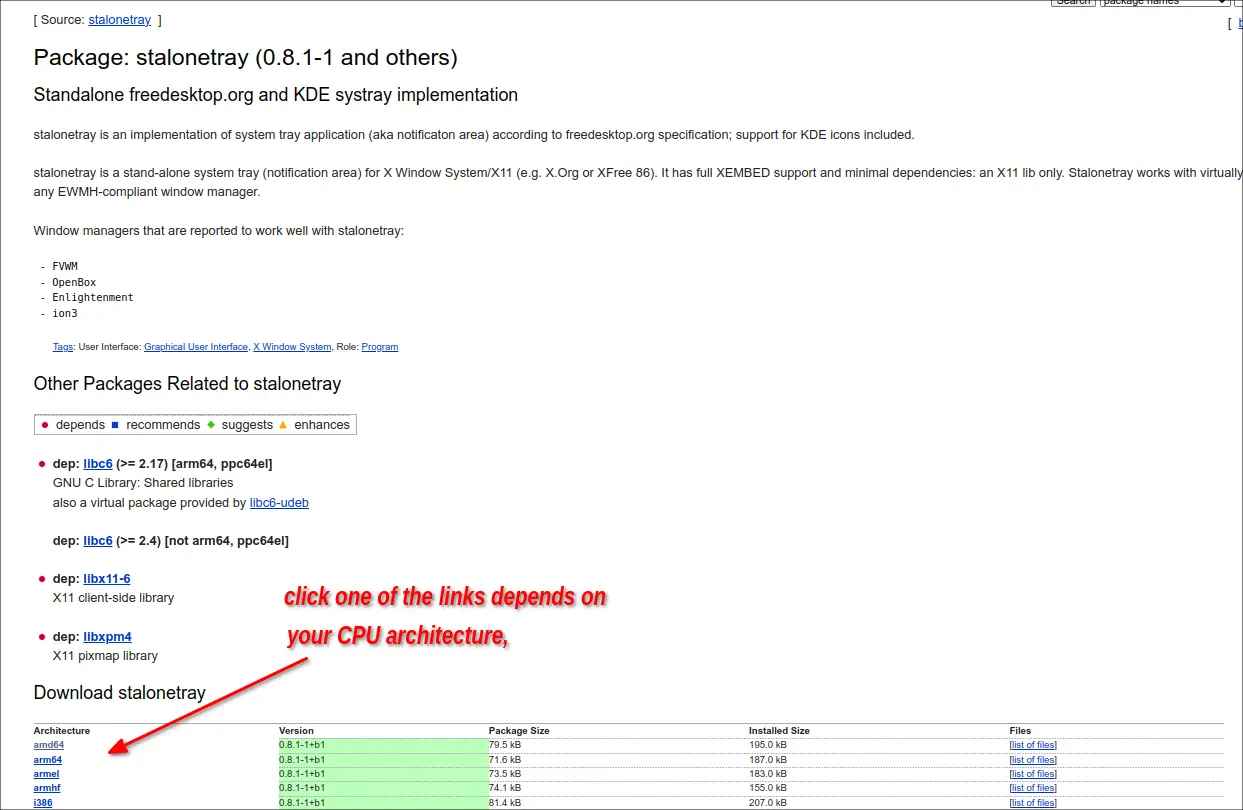
In the package download page after choosing CPU architecture type, the links MAY NOT work. Because today’s web browsers deprecate http link. In the case, copy the best download link, open terminal and run command to download it:
curl --output stalonetray.deb http://link-to-the-package
For example, download the x86_64 (amd64) package from the first link under ‘North America’ via command:
curl --output stalonetray.deb http://ftp.us.debian.org/debian/pool/main/s/stalonetray/stalonetray_0.8.1-1+b1_amd64.deb
Once you got the package, install it via sudo apt install ./stalonetray*.deb command.
3.After installation, save your work and log out. In the login screen, you’ll see the new “NsCDE” in session selecting dialog. Just choose it and login.
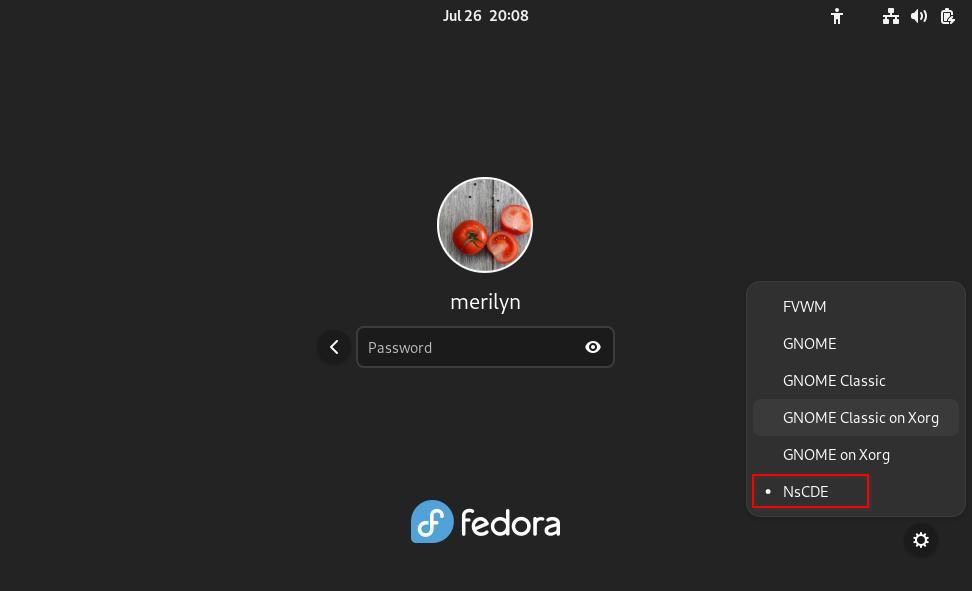
The first time login will run setup automatically, before being able to use this retro desktop environment. Just hit Enter, and answer on-screen questions to choose your favorite options.

It will finally bring you into the desktop when everything’s done successfully. Enjoy!