


This is a step by step screenshot guide, shows how to install the NixOS in your machine, that can dual or multiple boot with Windows or other Linux.
NixOS is an independent Linux distribution supports reproducible and declarative system-wide configuration management as well as atomic upgrades and rollbacks. The latest version at the moment of writing is NixOS 23.05.
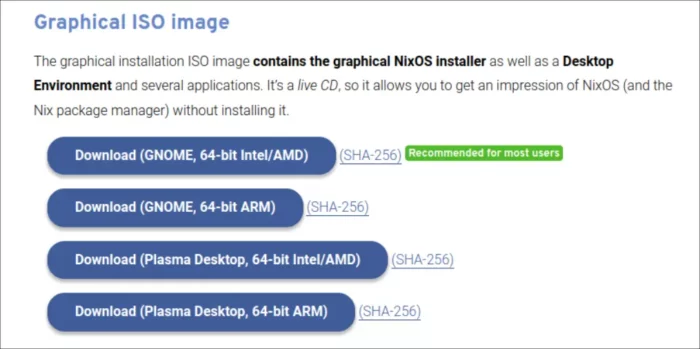
Step 1: Download NixOS
Firstly, download the .iso image from its website via the link below.
Select ’64-bit intel/amd’ from modern PC/laptop, or ‘ARM’ for mobile deices such as Apple M1 and Raspberry Pi.
Step 2: Verify ISO file integrity
After downloading the .iso file, clicking the “(SHA-256)” for the original file’s hash code (see the image above).
Then, you can run one of commands below to check the hash code of the file you just downloaded:
- If you downloaded the file in a Linux system, run command:
sha256sum ~/Downloads/latest-nixos-*-linux.iso
- If you got it in a Windows PC, open ‘cmd’ and run command:
cd Downloads && certutil -hashfile latest-nixos-gnome-x86_64-linux.iso SHA256
- For MacOS, check the hash code of downloaded file by running command:
shasum -a 256 ~/Downloads/latest-nixos-*-linux.iso
NOTE: In the commands above, replace file-name to yours! And replace ‘Downloads’ if you saved it in another location.
Once you got the hash code for local .iso file, compare it to the one from download page. They must be same before continuing the following steps!
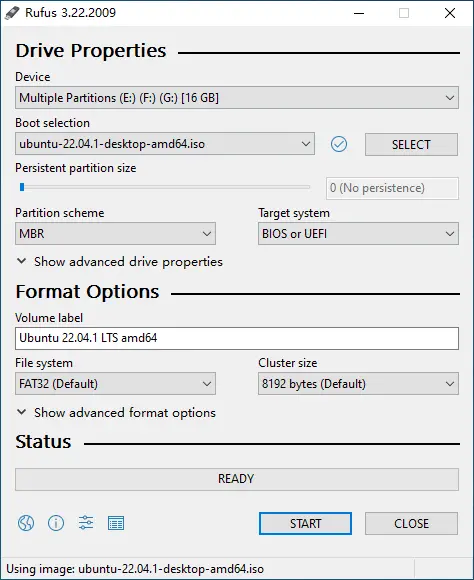
Step 3: Burn .iso file into USB as boot-able installer
There are quite a few tools for burning .iso file into USB, and I’ve written a tutorial about it. For USB stick with large storage, I’d recommend to use Ventoy.
For Windows, just download and use Rufus:
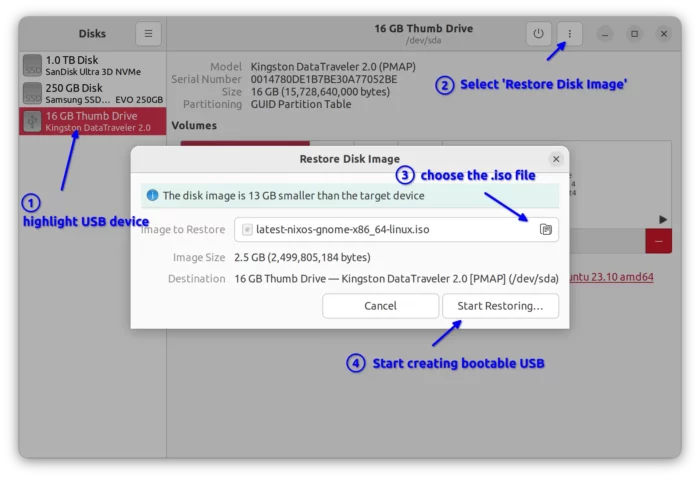
For Ubuntu, Fedora, and other Linux with GNOME, search for and open “GNOME Disks”. When it opens, highlight the USB device, and go to “⋮ -> Restore Disk Image”. Finally, choose the .iso file in pop-up dialog and click “Start Restoring”.
Step 4: Boot from the USB stick
Once you created the boot-able USB installer for NixOS, plug it into the destination computer/laptop. And boot it!
Depends on your machine, you have to press Esc, Del, F2, F8, or F12 etc shortcut key while booting. So to get into BIOS or menu to choose which device to boot!
Once you successfully boot the USB, you’ll get into the menu looks like below:
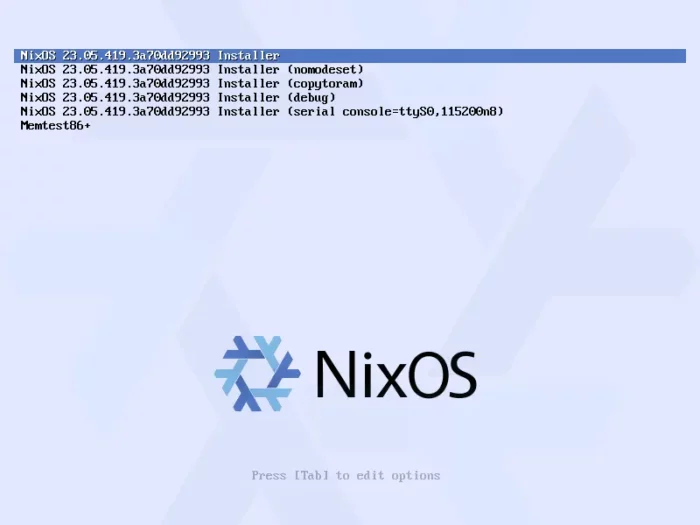
Just hit Enter to boot into the live system and start installing NixOS!
Step 6: Start Installing NixOS
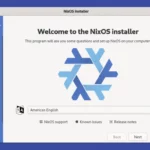
Once you boot into the live system, it opens the installer wizard automatically.
But before getting started, you need to plug in the power supply (for laptop), and connect to internet.
If need, you can close the installer wizard and try out the live system first. Then, re-open the installer either from start menu or ‘Activities’ overview.
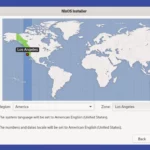
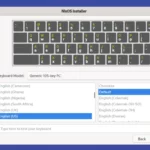
Setup Language, Timezone, Keyboard, etc
The first screens in the installer wizard are to setup the language, your location, and keyboard, etc.
They are so easy that I don’t need to write too much about it, just follow the screen to choose your desired options.
Create User
The 4th page asks to create a user account. Just type your desired name and password. And, it’s recommended to enable “Use the same password for the administration account“. So that account will have admin permission.

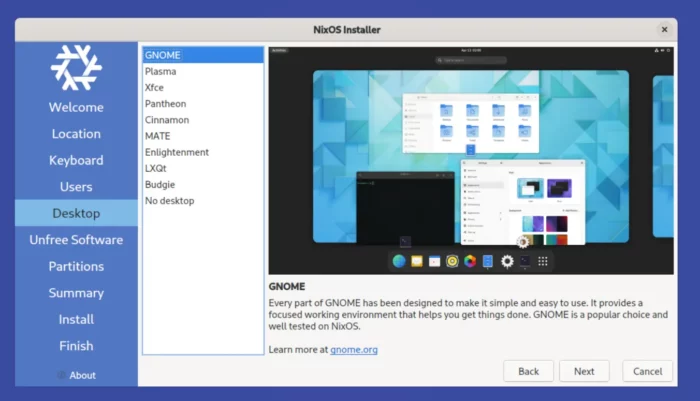
Choose which desktop to install
Not only for GNOME or KDE Plasma, the installer allows to choose install any other supported desktop environments, though you need internet connection for the installing process.
So far, they are Xfce, Pantheon, Cinnamon, MATE, Enlightenment, LXQt, Budgie. You can of course select ‘No desktop’, so it will boot into black and white text mode every time, just like a Linux server.
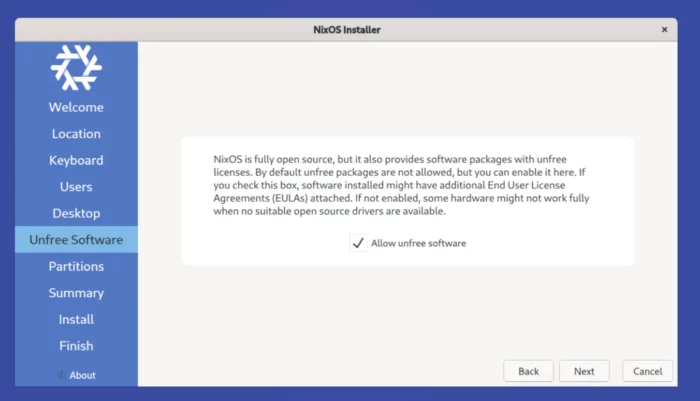
Enable non-free content or not
For legal reasons, proprietary drivers, codecs, and other non-free contents are NOT enabled out-of-the-box. But there it provides a check-box for user to manually enable this feature and also accept the license.
Select Where to Install the NixOS
If you have more than one Hard Disks (or SSDs) on your machine, you have to select which disk to use for NixOS.

Then, it will show you a few options depends on the disk status:
- Install alongside – choose this option if there’s enough free space ( meaning un-allocated space. see image above, it shows you in bottom). And it will automatically create partitions for NixOS.
- Replace a partition – this option usually appear when there’s another Linux system already installed on your system. It will replace it with NixOS.
- Erase disk – choose it if you want to use the whole disk for NixOS only!
- Manual partitioning – manually free up space (if need), and create partitions for NixOS.
Manual Partitioning
If you chose ‘Manual Partitioning‘ in the previous screen, it goes to the partition table with options to create, edit, delete partitions.
First, if there’s NO enough free space (at least 30 GB IMO, but as large as possible for long time use), choose useless partitions and delete them!
BE CAREFUL when deleting partitions! Don’t touch those that you don’t know what they are. And, back up things first!! You can connect another USB drive, and use file manager in this live system to copy & paste data from your disk to USB.
And for brand new disk without partition table, click “New Partition Table” to create one.
Once you got enough free space, highlight it in the table, and use “Create” button to create partitions.
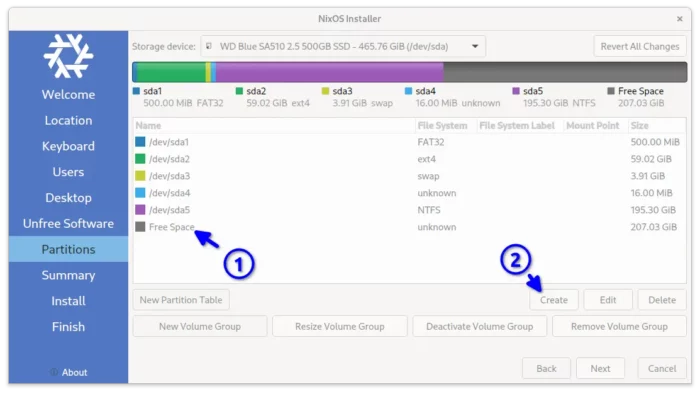
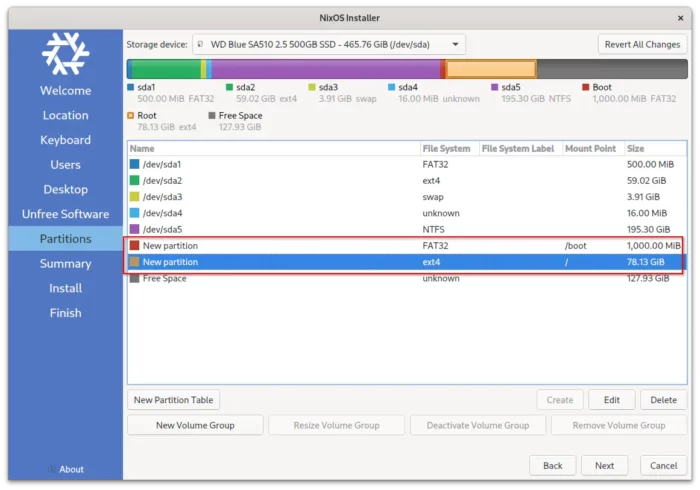
For installing NixOS, create following partitions one by one:
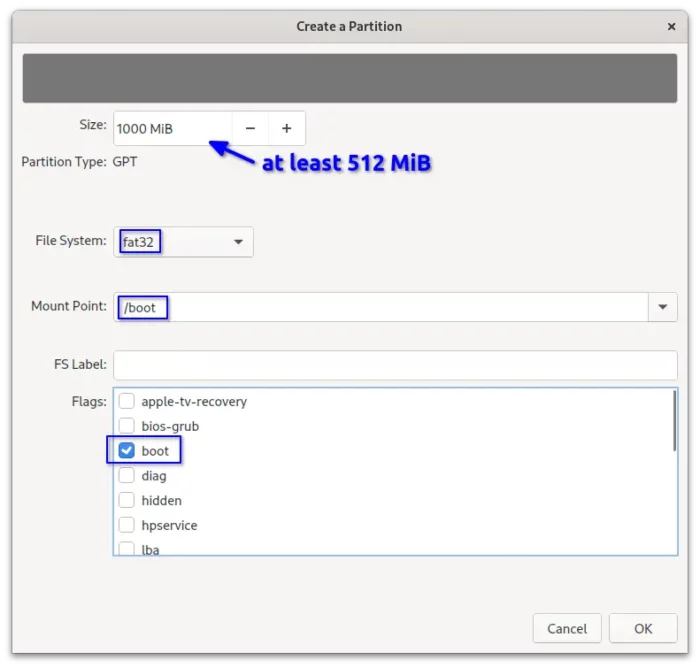
- EFI partition. For boot, create a 512 MB or higher partition with FAT32 file-system, mount at /boot with boot flag.
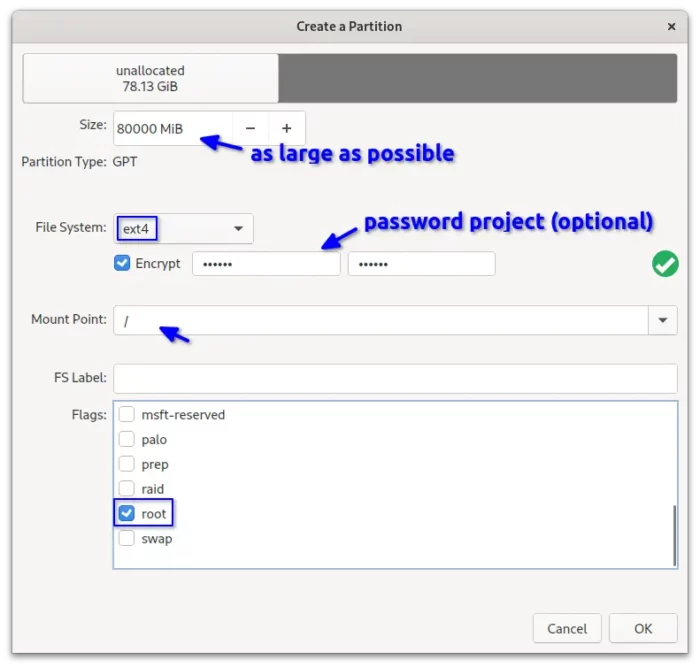
- root partition. For system files, create a 30 GB partition or as large as possible for long time use. Mount at ‘/’, ext4 file-system, with or without password protection. Flag as root.
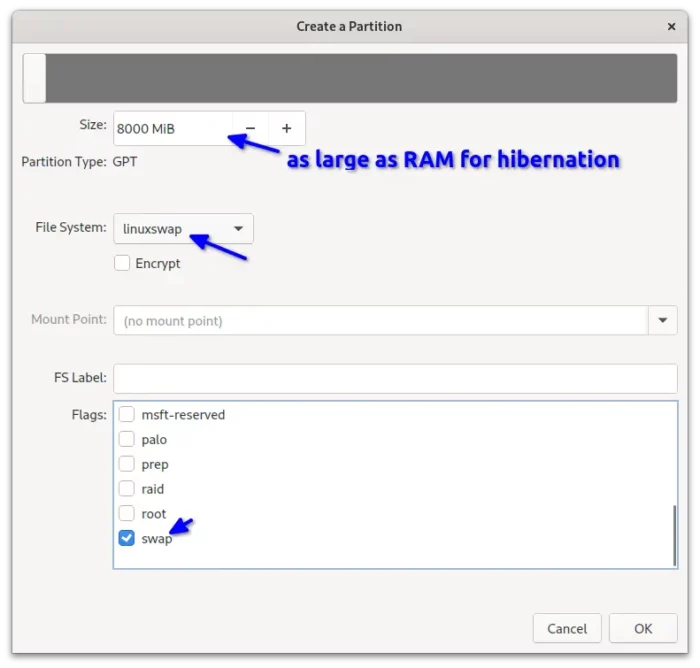
- Swap partition (Optional). For small RAM memory, or hibernation function. You can skip this partition, since its possible to create a swap file later after installation.It’s linuxswap file-system with swap flag, and usually set size to as large as RAM.
In my case, the partition table looks like the screenshot shows after created the 2 partitions (without Swap). And I have Ubuntu (/dev/sda2), Windows 10 (/dev/sda5) on the disk for multiple boot.
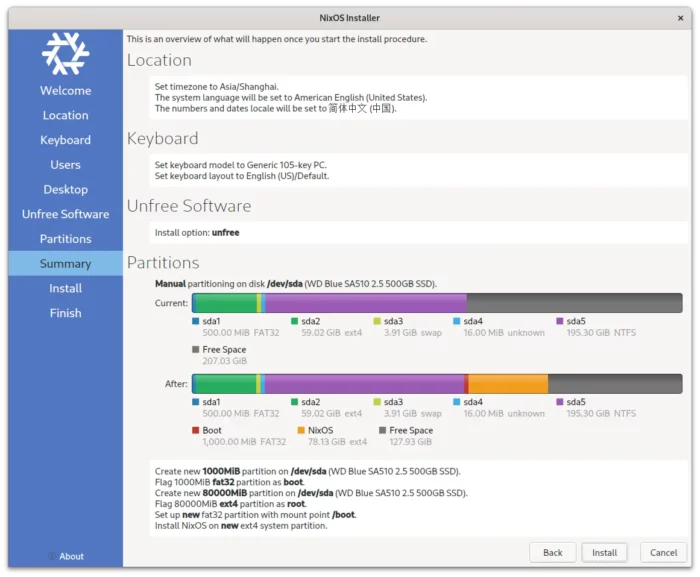
Confirm and start installing
When done creating partitions, it goes to the ‘Summary’ page shows all the option you did. If everything’s OK, you can click “Install” button to start the installing process.
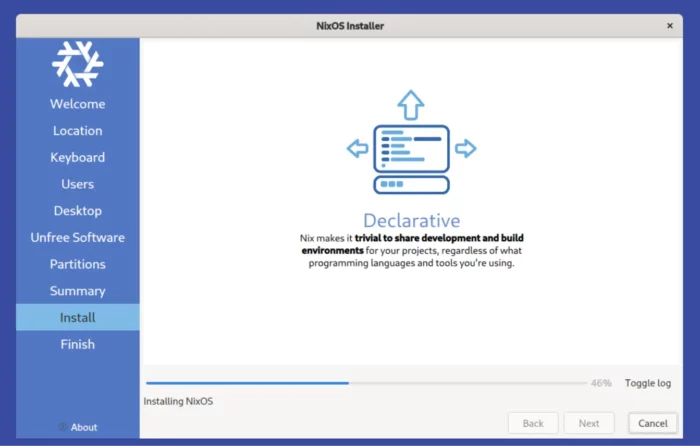
The process needs internet connection to download something, or it may stuck. Depends on your PC specs, it may take quite a few miniutes.
If NixOS is installed successfully, it shows you something like below with option to restart.
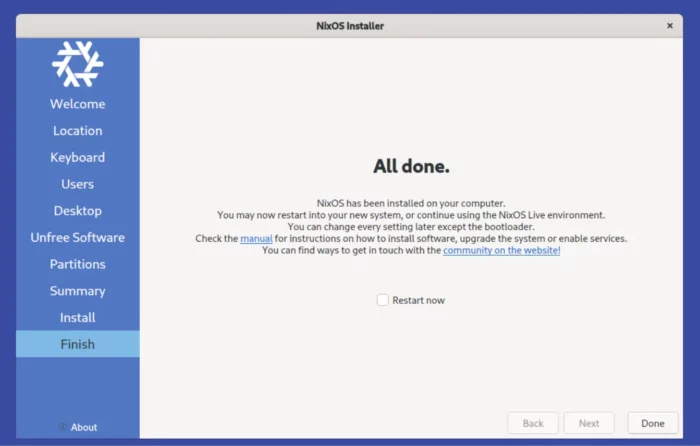
You may choose to restart and boot the newly installed OS, or continue trying the live system. Done!