


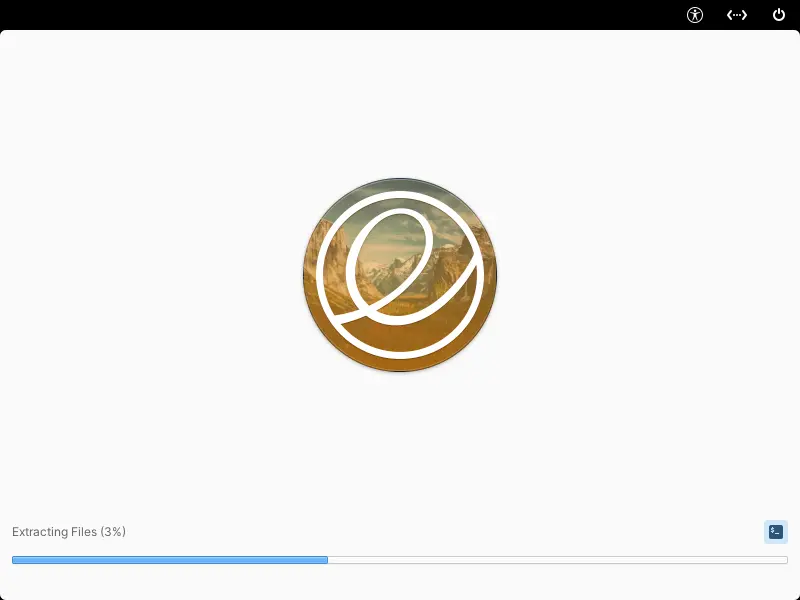
This is a step by step guide with many screenshots show beginners how to install Elementary OS 7 in your computer!
NOTE: This tutorial is tested and works by installing Elementary OS as dual-boot with Microsoft Windows 10. Though, part of the screenshots here are taken from Virtualbox for better visibility.
Preparation
Before getting started, you must have at least 20 GB (but as large as good for long time use) unallocated space on your disk! If NOT, you may need to delete some partitions (e.g., D:, E: disks in Windows) during the installing process.
Also, you need a USB stick with more than 4 GB space for burning the iso image into it.
In short, you need to prepare following things:
- at least 20 GB disk space, or backup your data on the partitions to be deleted during installing process.
- 4 GB+ USB stick
Create boot-able USB installer
Firstly, you need to download the iso image from its website:
Depends on which operating system you’re currently running, there are a few tools to create boot-able USB installer. The thing is usually plug-in USB stick, start the app, select the USB and .iso image and finally click burn.
Though I personally prefer to use Ventoy, there are a few other tools for choice.
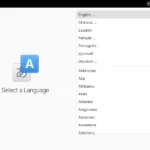
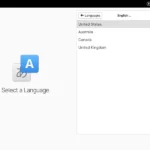
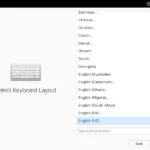
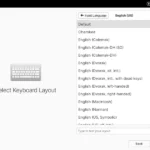
Boot USB installer, Select Language and Keyboard
After creating the USB installer, plug it into the destination machine and boot it.
TIP: In some cases, you need to disable secure boot in BIOS to be able to boot USB. Then, re-enable it after successfully installed the OS.
The default boot entry will directly go to the wizard for language and keyboard layout selection. Which will apply to current installer and/or live system only!
The default options are usually OK for QWERTY keyboard, though you may type anything in input box to confirm. And, here are the screenshots for them.
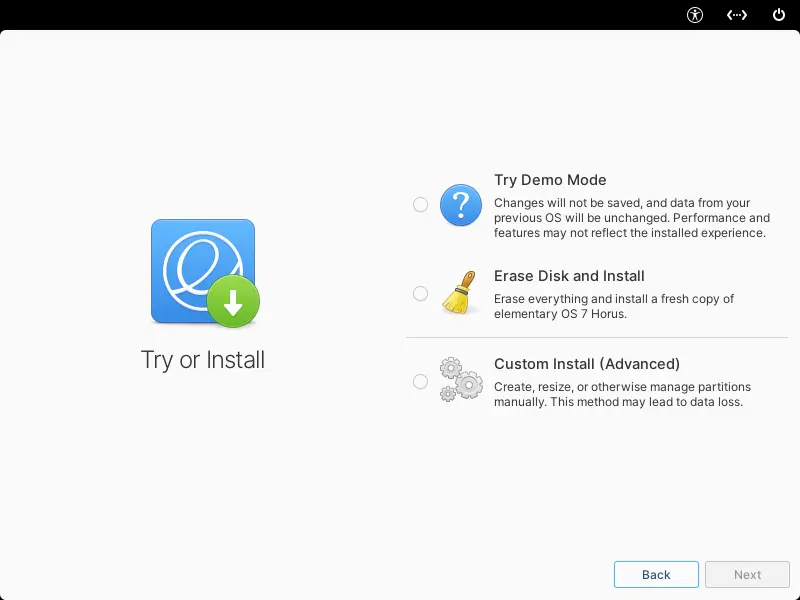
Try Demo or select install mode
After that, it will show you the page to select between:
- Try Demo Mode.
- Erase Disk and Install.
- Custom Install (Advanced).
The first choice lets you to try the operating system without installing it. Though, nothing will be saved when shutdown. From the live system, you can launch the installer wizard again.
The second “Erase Disk and Install” will delete all data in the selected disk!! Then use the whole disk for Elementary OS only. If you select this mode, then just follow the wizard and all later things are quite easy!
If you have other operating systems (such as Windows in the disk), or you want to keep some disk space for other use, click Custom Install (Advanced) and continue.
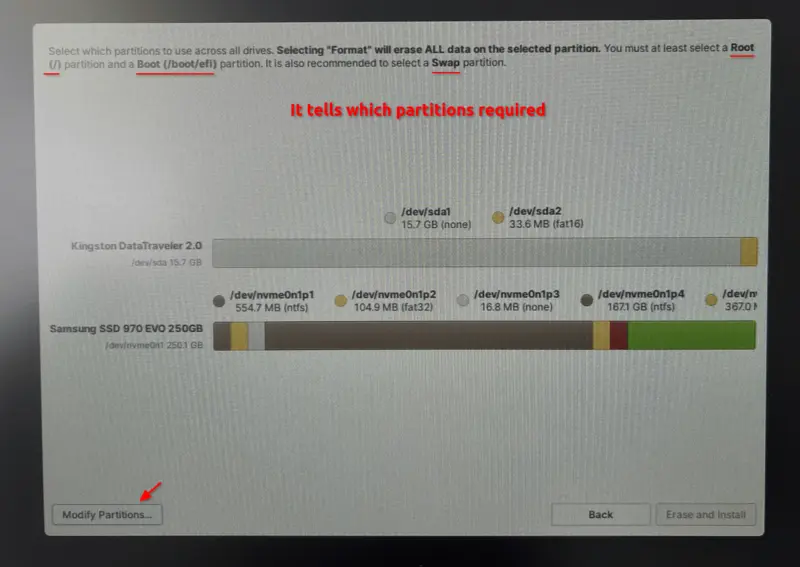
Create Partitions (for Custom Install)
Once you selected Custom Install (Advanced) in the previous step, it goes into the page for your disk partition tables.
In the page, keep an eye on the text in header! It tells you which file partitions you need for installing eOS:
- Root (/) (must have).
- Boot (boot/efi) (must have in most real machines, but optional in virtual machine).
- Swap area (optional).
If you don’t have the partitions above, click bottom left “Modify Partitions” to create them!
Create Root, Boot, and Swap partitions
By clicking on “Modify Partitions” button in previous page will open the Gparted partition tool.
In the page, firstly do:
- make sure the correct disk is in select!
- delete unused partitions if no enough unallocated space (Be careful, data in deleted partition will be removed once you click Apply!)
- (Optional) For brand new unallocated disk, go “Device -> Create Partition Table” to create gpt table.
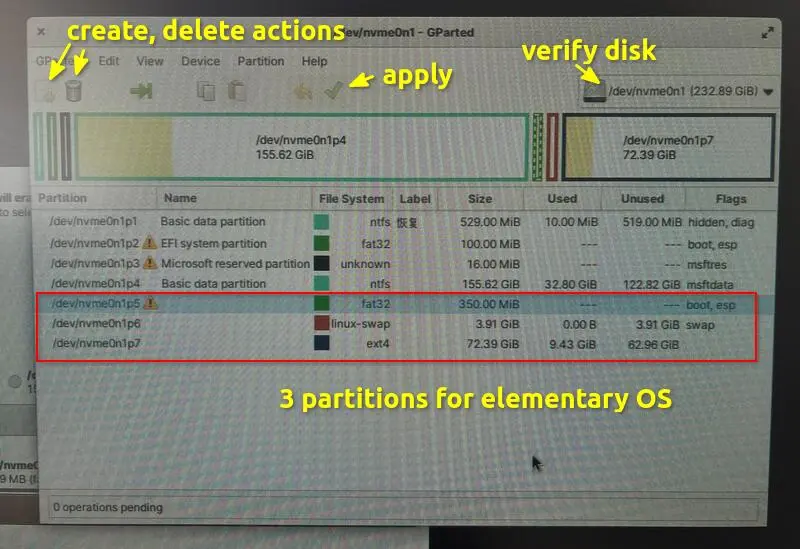
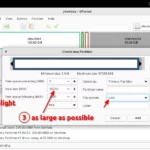
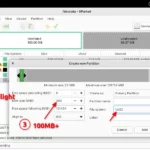
Finally, highlight unallocated space and create following partitions one by one in case you don’t have them:
- Boot (boot/efi) – “fat32” file system with 100 MB or higher space.
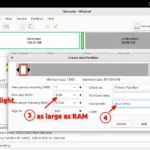
- (optional for hibernation) Swap – “linux-swap” file system with size as large as RAM memory.
- Root (/) – “ext4” file system with 20 GB or as large as possible for long time use.
When done, don’t remember to click “Apply” ✅ to make changes.
After that, also right-click on the “/boot/efi” partition you created and select “Manage flag” and set to “boot“.
Take use the Root, Boot, and Swap partitions
After created the partitions and apply changes, close Gparted window, and go back to the installer wizard.
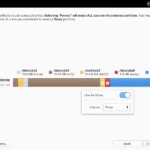
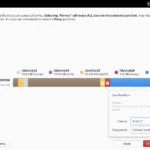
In the colorful partition bar (with hidden scrollbar if long enough…), select the 3 partitions you created and click “Use Partition” one by one.
- Keep an eye on mount point (“Use as” section).
- There will be a checkmark means correctly selected.
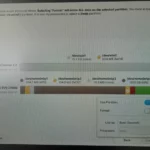
If everything goes well, you can now click on “Erase and Install” button to start installing elementary OS 7.
When installation done, restart your computer. On first boot, it will show your the setup page, ask for selecting language and keyboard layout again, as well as creating username and password.
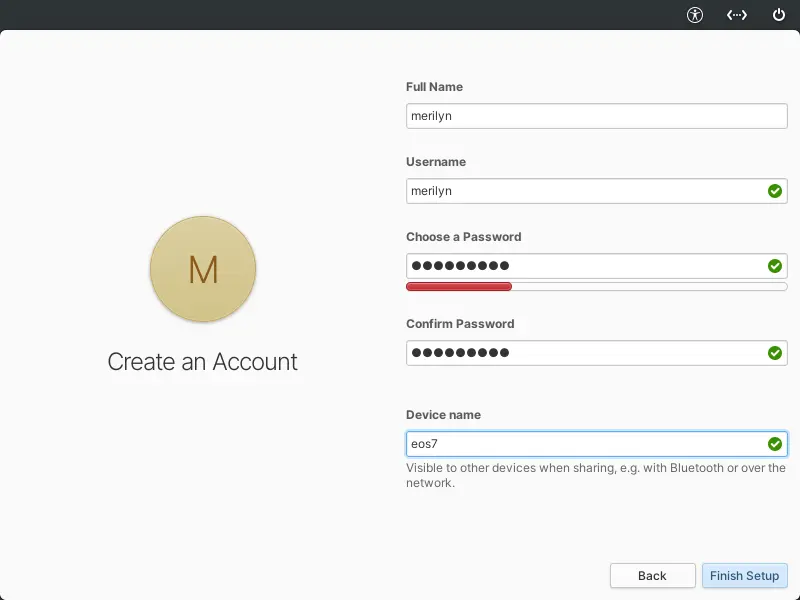
When done the setup wizard, login with username and password and enjoy!