

I’ve bought a cheap HP printer recently, and here’s what I did to make it work in my Ubuntu 22.04 machine, as well as share over local network for printing remotely.
1. Setup your printer in Ubuntu
Linux today has built-in drivers for most common printer and scanner devices support. And it’s quite easy to setup.
- First, power on your printer device and connect it into Ubuntu machine.
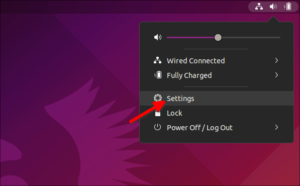
- In Ubuntu, open ‘Settings‘ from top-right corner system tray menu.
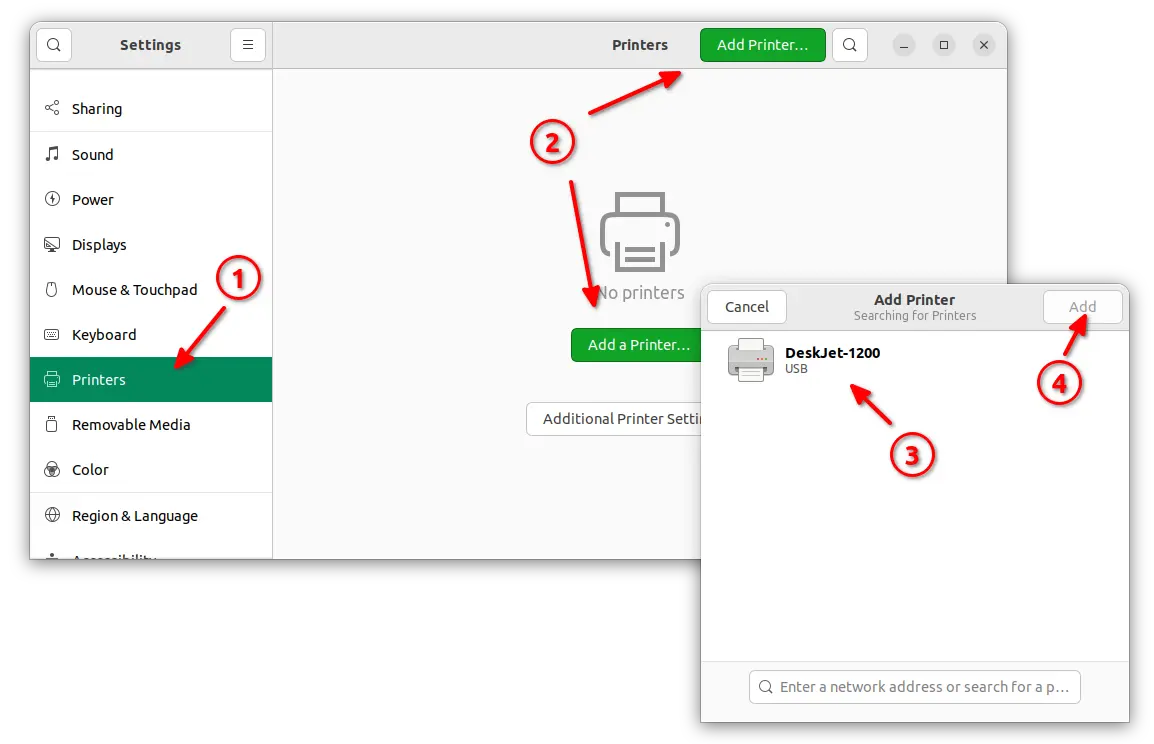
Open Settings - When system settings dialog opens, navigate to ‘Printers‘ in left pane, and click ‘Add Printer‘ button.
- It should automatically detects your printer and list in pop-up dialog. Just select it and click on the ‘Add’ button to add it to your system.
After that, you can try printing a web page, photo image, document, or PDF file via your app’s menu option.
2. Install HPLIP driver in case previous step does not work
Your system may detect the printer but refuse to print anything. In the case, you can try installing the latest HPLIP driver.
For Canon printers, take a look at this PPA repository for the drivers.
HPLIP is an open-source printer/scanner drivers for Linux, developed by HP and contributors.
- First, go to the link below to download the latest driver package (usually ‘
hplip-x.xx.x-run‘): - Next, press Ctrl+Alt+T on keyboard to open terminal. And, run command to add executable permission (here assume you saved the
.runinstaller in Downloads folder):cd ~/Downloads/ && chmod u+x hplip-*.run
- Finally, run the
.runfile to start installing the driver:cd ~/Downloads/ && ./hplip-*.run
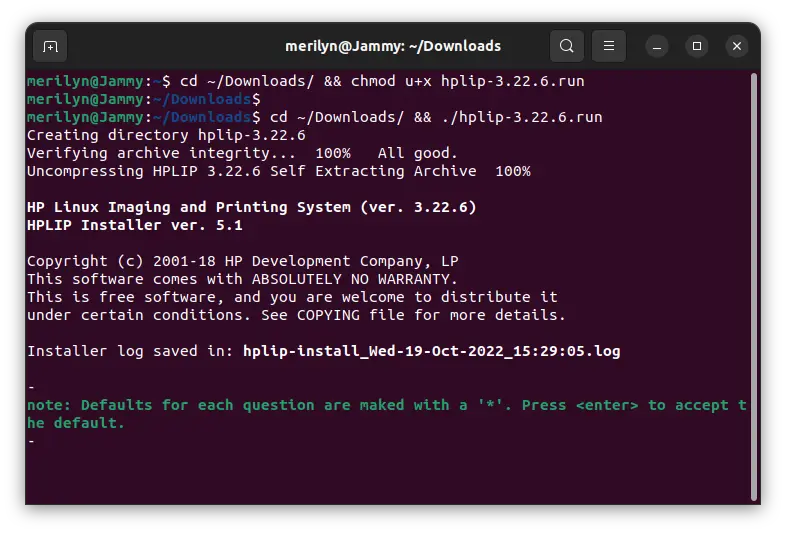
The installer will ask for some questions and need you to type user password before the installing process. When installation done, it will prompt to re-plug printer device to configure it for your system:
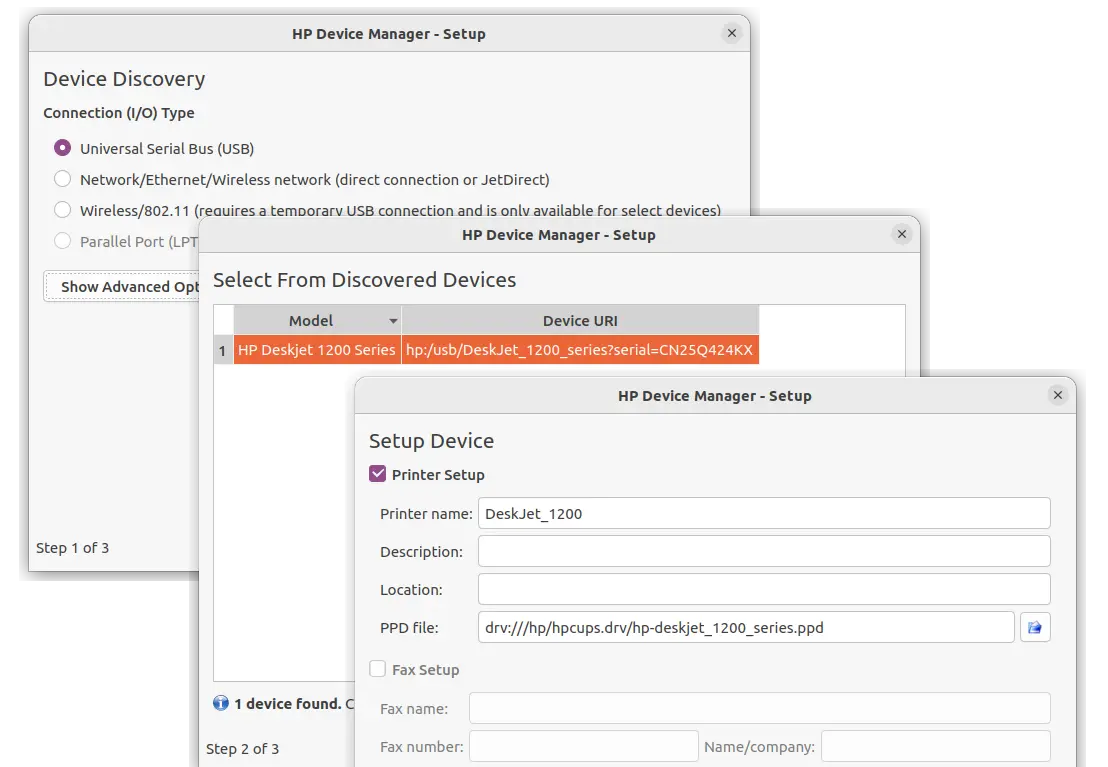
The default options in setup dialog are usually OK. And, there’s a ‘Send test page to printer‘ to test printing via your device.
3. Share your printer for network use
If your printer is working now in the local Ubuntu machine, let’s configure to make it work for remote machines.
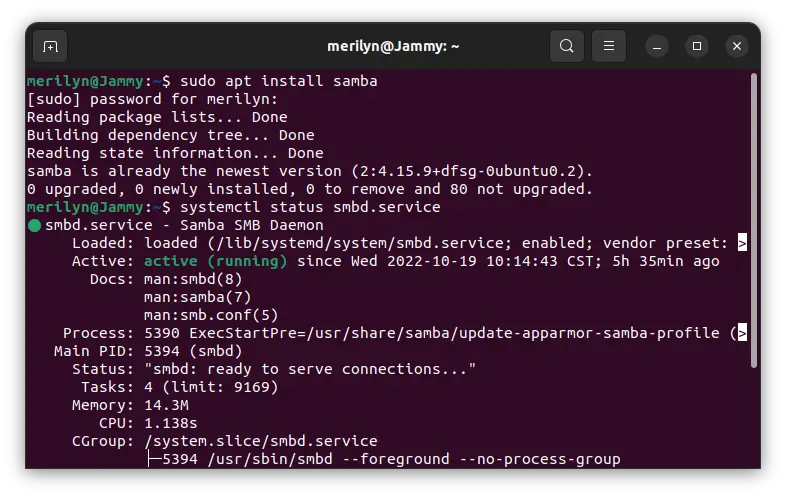
Install samba
By default, it uses samba file and printing service for sharing printers over network. You need to first press Ctrl+Alt+T on keyboard to open terminal, and run command to install the service:
sudo apt install samba
Then check if it’s running via systemctl status smbd.service command. In case it’s NOT active, run systemctl enable smbd.service and systemctl start smbd.service.
Enable remote printing
Again, open ‘Settings‘ from top-right corner system tray menu. Then navigate to ‘Printer‘ settings page.
There click on ‘Additional Printer Settings‘ button. And go to ‘Server -> Settings‘ in pop-up dialog. Finally, enable the following 2 options:
- Publish shared printers connected to this system.
- Allow printing from the internet.
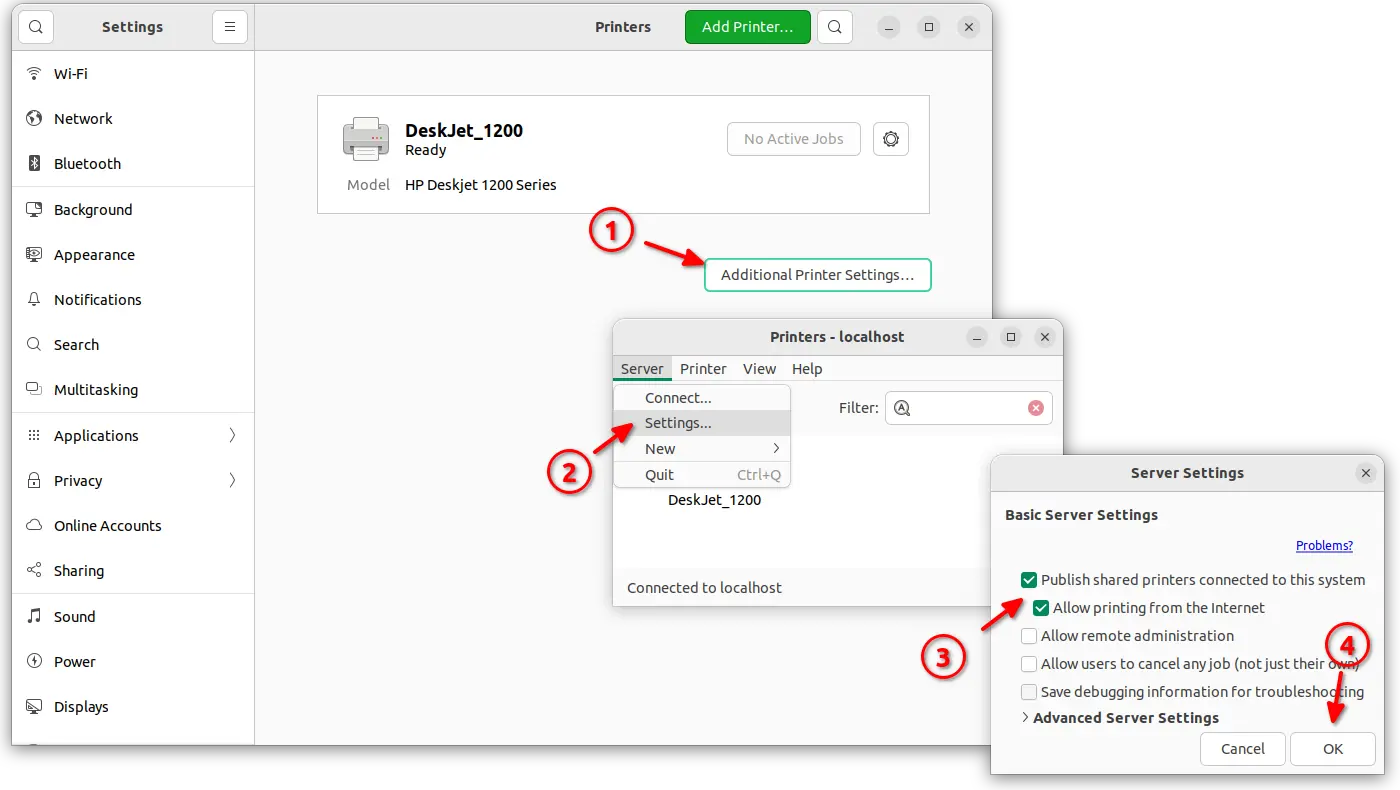
Also, you may click “Printer -> View Print Queue” to open the dialog for managing printing jobs.

4. Try printing from a remote machine
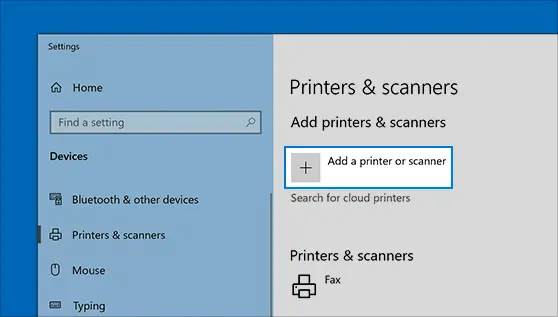
In a Windows 10 machine, go to Settings -> Devices -> Printers & scanners. Click ‘Add a printer or scanner‘ in right. It will scan and list your printer, allowing to connect to print remotely.
To connect from a remote Ubuntu machine, go to Settings -> Printers and click add printer like you did in step 1.