

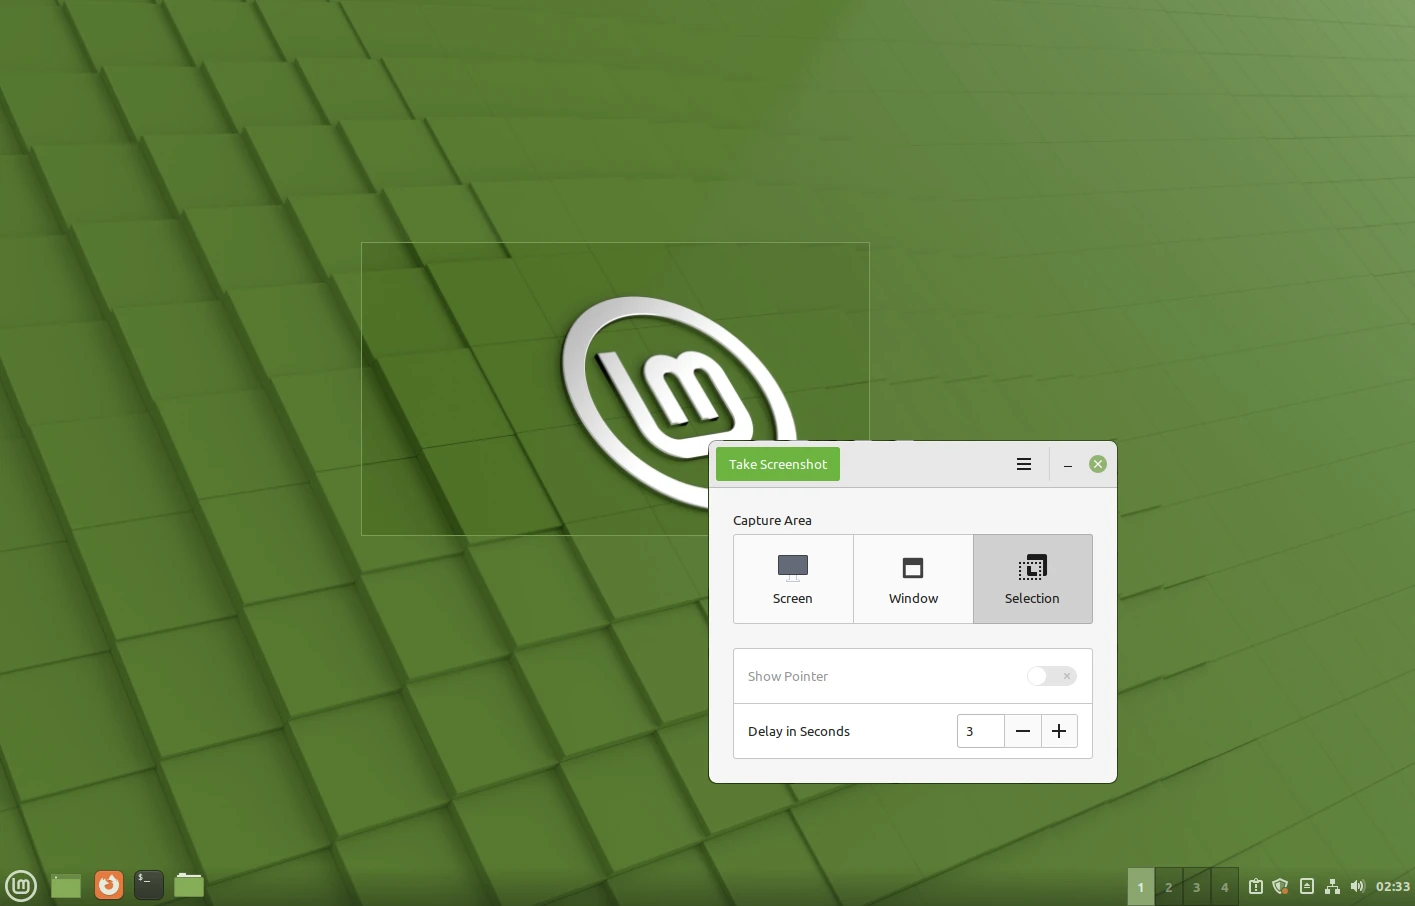
In Linux Mint 21/20, Ubuntu 20.04, or current Ubuntu 22.04, the GNOME Screenshot tool always uses whole ‘Screen’ at default capture option at launch.
This can be quite annoying if you use ‘Window‘ mode or ‘area selection‘ more often! And, here’s the quick tip shows you how to make GNOME Screenshot use your desired capture option.
GNOME Screenshot (and also mate-screenshot) has command line options to select capture mode. Though there’s no graphical option to set default option, user however can edit the config file and configure the value of ‘Exec‘ to do the job:
gnome-screenshot --interactive --windoworgnome-screenshot -iw– launch the tool in window selection mode.gnome-screenshot --interactive --areaorgnome-screenshot -ia– launch it in area selection mode.
Step 1: Edit the shortcut config file
The app shortcut is controlled by /usr/share/applications/org.gnome.Screenshot.desktop file for all current Ubuntu and Linux Mint releases.
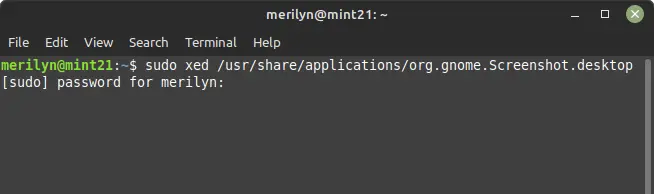
First, open a terminal window either by pressing Ctrl+Alt+T on keyboard or from start menu. When it opens, run command to edit the file:
sudo gedit /usr/share/applications/org.gnome.Screenshot.desktop
In the command, replace gedit with your favorite text editor, such as xed for Linux Mint or use nano command line editor that should work in most Linux.
For Ubuntu MATE user, edit the /usr/share/applications/mate-screenshot.desktop file instead.
Step 2: Set window/area capture mode & disable DBusActivatable
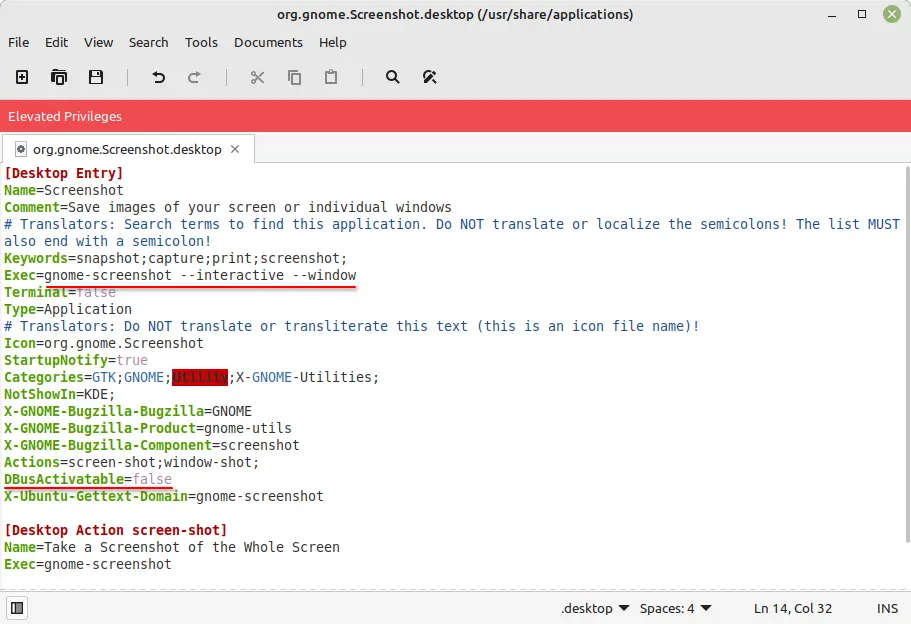
When the file opens in your text editor, do following changes:
- Under
[Desktop Entry]section, find out the line starts with ‘Exec=’. In the end of that line, add either--windowto start it with window capture mode as default or--areato start in area selection mode. So it will be:Exec=gnome-screenshot --interactive --window- or
Exec=gnome-screenshot --interactive --area
- Disable the line DBusActivatable=true (if any) by either adding # at its beginning or setting value to false. According to Gnome Wiki, enable D-Bus activation will make ‘Exec‘ value not function.
Finally, save the file. For nano text editor, press Ctrl+X, type y, and hit Enter. The screenshot tool should now starts as either window or area mode as default a few seconds later.
Tip: For app icon on the desktop, you need to remove and then re-add it.
(Optional) Copy the shortcut config file to local folder
As you may know, the changes you made via the previous steps might be overridden after a system update. To make it permanent, you may copy the config file in to local folder.
- First, open terminal and run command to copy the config file:
sudo cp /usr/share/applications/org.gnome.Screenshot.desktop ~/.local/share/applications/
- Then, change the file ownership via:
sudo chown $USER:$USER -R ~/.local/share/applications/
- Finally, edit the file (replace
geditaccordingly) and change the content according to Step 2:gedit ~/.local/share/applications/org.gnome.Screenshot.desktop
That’s all. Enjoy!