


Running many applications with portable AppImage packages in your Linux? Here’s how to automatically create app shortcuts for them, so you may search for and launch AppImage applications from start menu (or ‘Activities’ overview), and add app icon to panel or desktop.
It’s not hard to create an app shortcut. Just create a .desktop file under user’s ‘.local/share/applications‘ directory and write similar rules below to refer to the AppImage will do the trick.
[Desktop Entry]
Type=Application
Name=name-of-the-application
Comment=
Icon=/path/to/icon-file
Exec=/path/to/appimage-file
Terminal=false
StartupNotify=true
However, it can be painful to add (or remove) shortcut every time you get (or remove) a new AppImage package. So, the free open-source AppImageLauncher software was born to automate the process.
The tool will automatically move (or keep its location if you want) AppImage package to a custom folder on first launch. Then create shortcut to make it visible in system application launcher or Activities overview.
Step 1: Install AppImageLauncher
For Ubuntu/Linux Mint based systems
Ubuntu 20.04, Ubuntu 22.04 and their based systems may install it from the official PPA repository.
Simply press Ctrl+Alt+T on keyboard to open a terminal window and run the commands below one by one to install it:
-
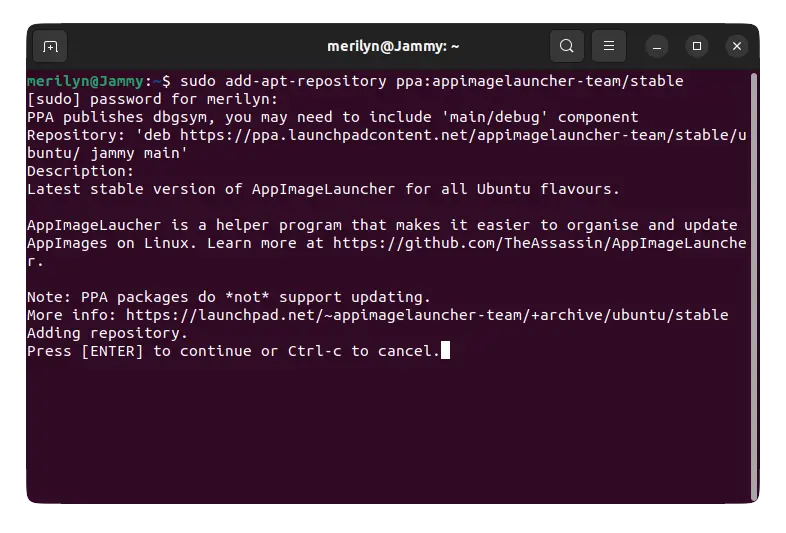
- Add the PPA via command:
sudo add-apt-repository ppa:appimagelauncher-team/stable
- Add the PPA via command:
-
- Refresh package cache:
sudo apt update
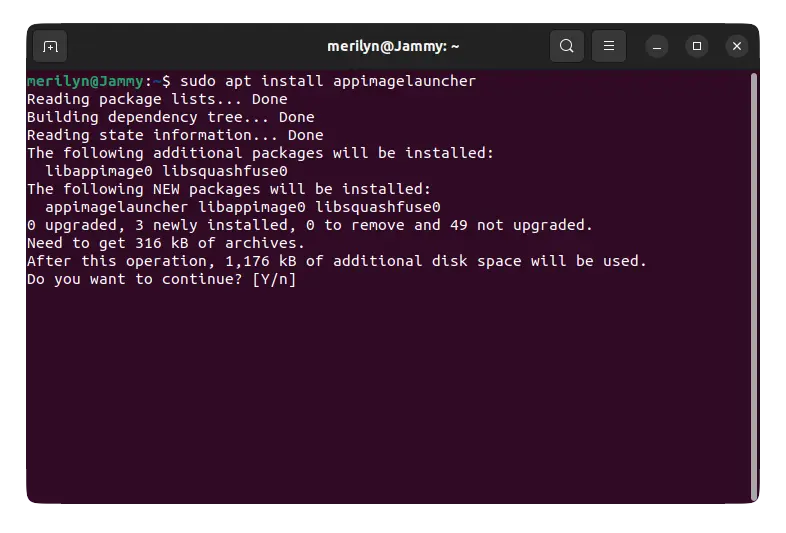
- Finally, install the app via:
sudo apt install appimagelauncher
- Refresh package cache:
For Fedora, Rocky Linux, etc
RPM based systems, just grab the software package from the github release page:
Select download x86_64.rpm for modern 64-bit PC/laptop, or armhf.rpm for ARM device. Then either click install via system package manager or run sudo dnf install ~/Downloads/packagename.rpm command in terminal.
For Arch, Manjaro
Simply open a terminal window and run command:
sudo pacman -S appimagelauncher
Step 2: Setup AppImageLauncher
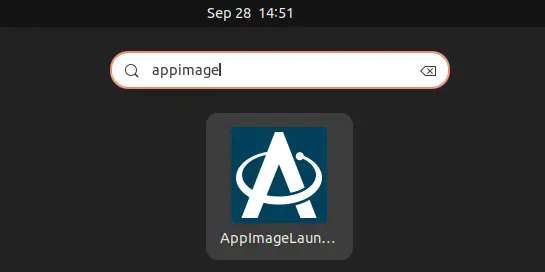
After installation, search for and launch it from start menu or ‘Activities’ overview depends on your desktop environment.
The default configurations are OK. You may however, set a custom folder to store your AppImage files. With “Ask whether to move AppImage files into applications directory” enabled, it will pop-up a dialog every time you click launching a new AppImage. Which, will ask whether to move the package and create app shortcut.
Without this option, you have to manually move AppImage to that folder. So it will create app shortcut after first launch.
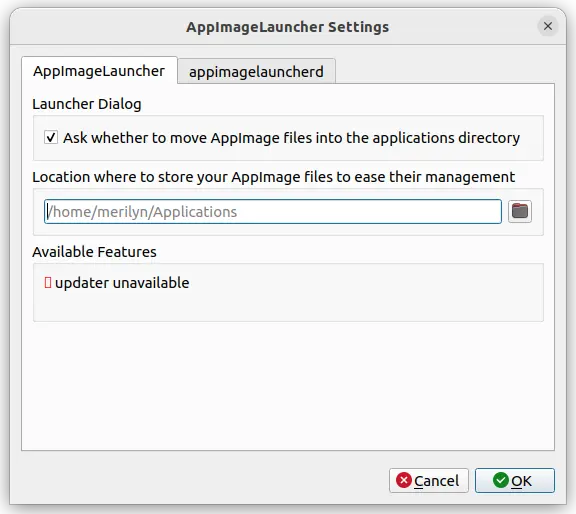
Besides the custom folder you set (or default ‘Applications’ in user home), user may add more directories in the second tab. So, any AppImage apps in the directories will be made visible in start menu after first launch.

Step 3: Run your AppImage packages
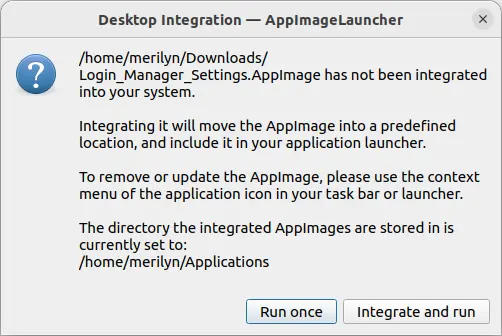
Finally, double-click on any AppImage package in file manager, even without adding executable permission. It should pop-up a dialog ask to:
- Run once – Run app in the normal way.
- Integrate and run – Move the package to custom folder (‘Applications’ by default), create app shortcut, and launch the app.
If you disabled the dialog in previous step, just move AppImage to the folders you set and click launching it for the first time.
After all, search for and open the AppImage applications from start menu or ‘Activities’ overview and enjoy!
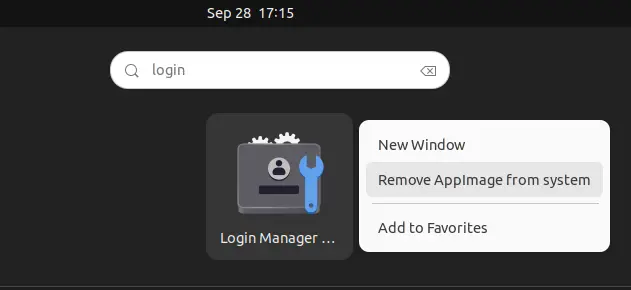
At any time you want to remove the application, just right-click on the shortcut icon and click “Remove AppImage from system“. It will remove the package file as well as the .desktop shortcut file.
And for any issue, you may reach the corresponding shortcut file by opening the .local/share/applications folder (press Ctrl+H to view hidden folders) and report to the project page.