Got cool photo images, and want to set them as desktop background that changes automatically? Here’s how to do the trick in Linux!
Linux has so much distributions. They use different desktop environments and different software suites.
Some Desktops (e.g., XFCE and KDE) have built-in support for wallpaper slideshow that changing background image automatically, but some do not. So, you follow this tutorial depends on your desktop environment.
How to Tell Which Desktop you’re Running!
For beginners who even do not know which desktop environment is running, first launch terminal (konsole) from main menu, application menu or ‘Activities’ overview depends on your system:
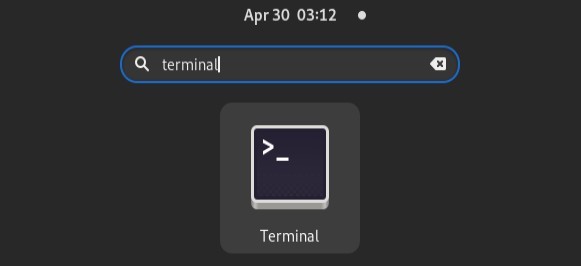
When terminal opens, run this command call tell your Desktop Environment in most cases:
echo $XDG_CURRENT_DESKTOP

Once you know which desktop environment is running, follow one of the titles below to get started.
Create Wallpaper Slideshow in KDE Plasma
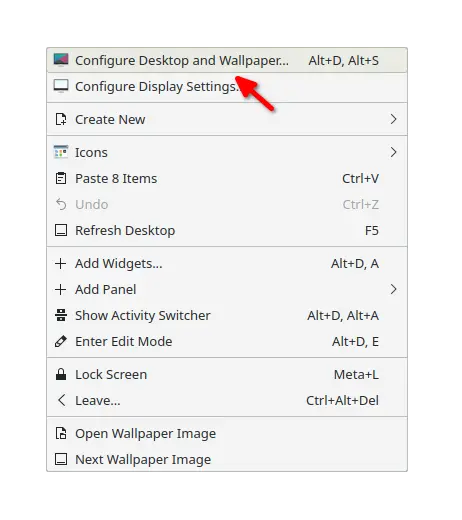
For KUbuntu, Ubuntu Studio, and other Linux with KDE Plasma 5 desktop environment, simply right-click on the desktop and choose “Configure Desktop and Wallpaper” menu option.
In the pop-up dialog, set ‘Wallpaper type’ to ‘Slideshow‘. Then, configure the order, time interval, add folder that contains your photo images, and finally click “Apply” button to take effect!

Enable Wallpaper Slideshow in XFCE
For XUbuntu, Linux Lite, Kali Linux, and other Linux with XFCE desktop environment, the thing is also as easy as a few mouse clicks.
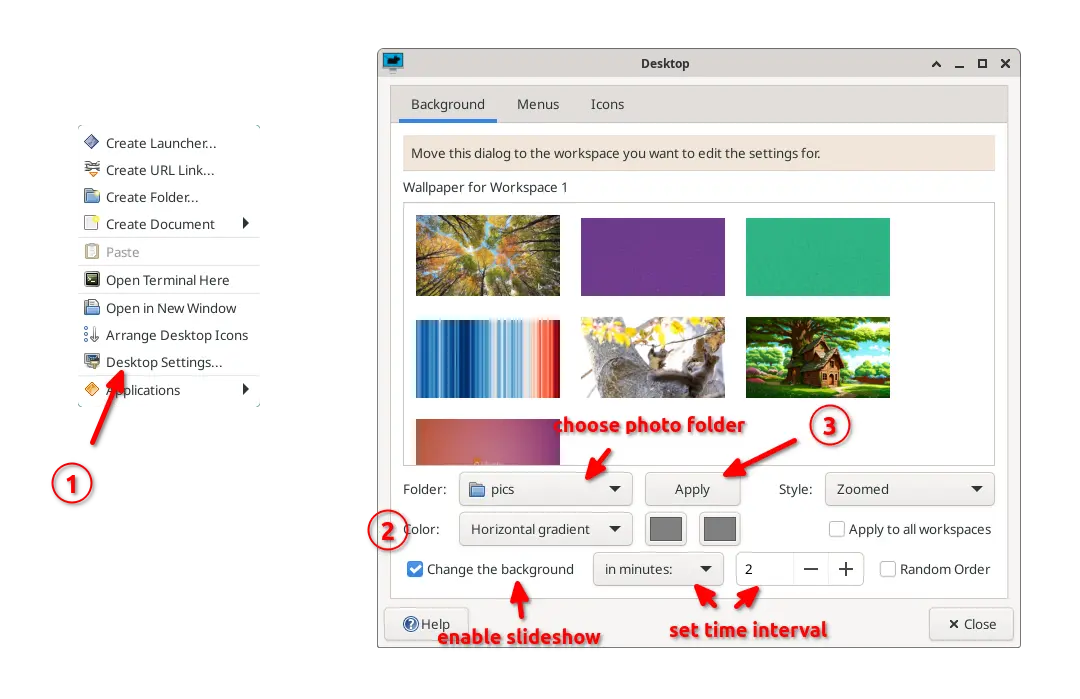
First, right-click on the desktop and choose ‘Desktop Settings‘ menu option.
Then, in the pop-up dialog, just use the bottom options to enable “Change the background”, set time interval, choose photo folder, and finally click ‘Apply’.
Enable Wallpaper Slideshow in Cinnamon
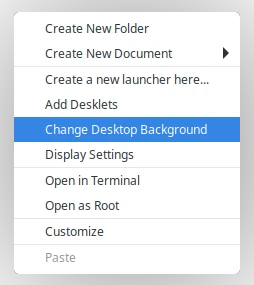
For Linux Mint, and other Linux with Cinnamon desktop, also right-click on desktop, and choose “Change Desktop Background” menu option.
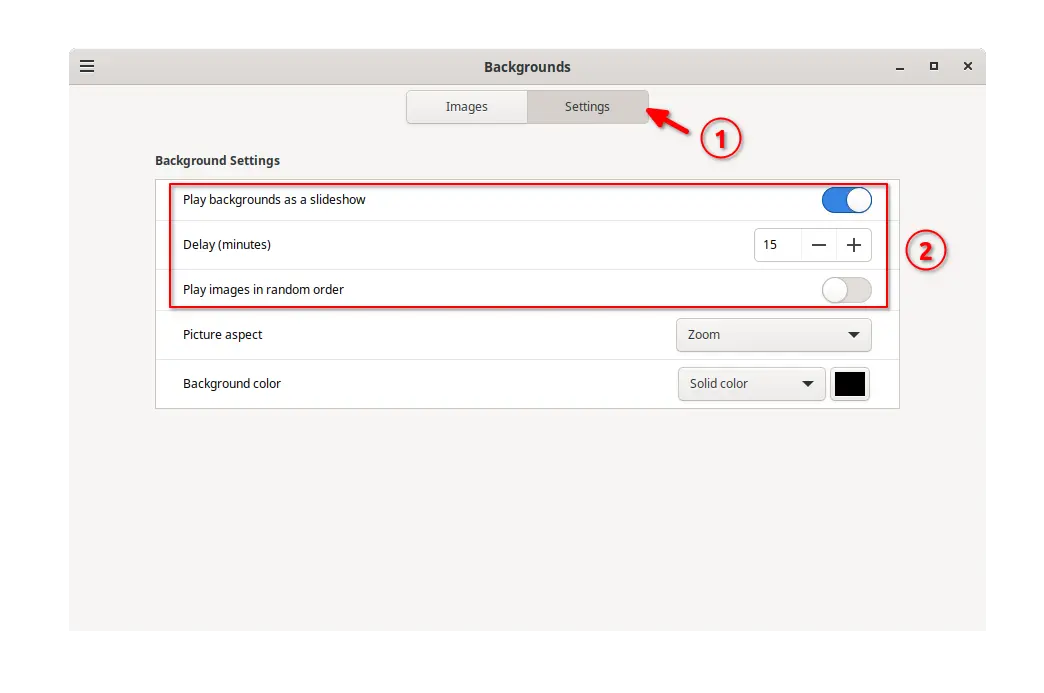
In the pop-up dialog, first navigate to “Settings” tab. Enable “Play background as slideshow” option, and configure the time interval.
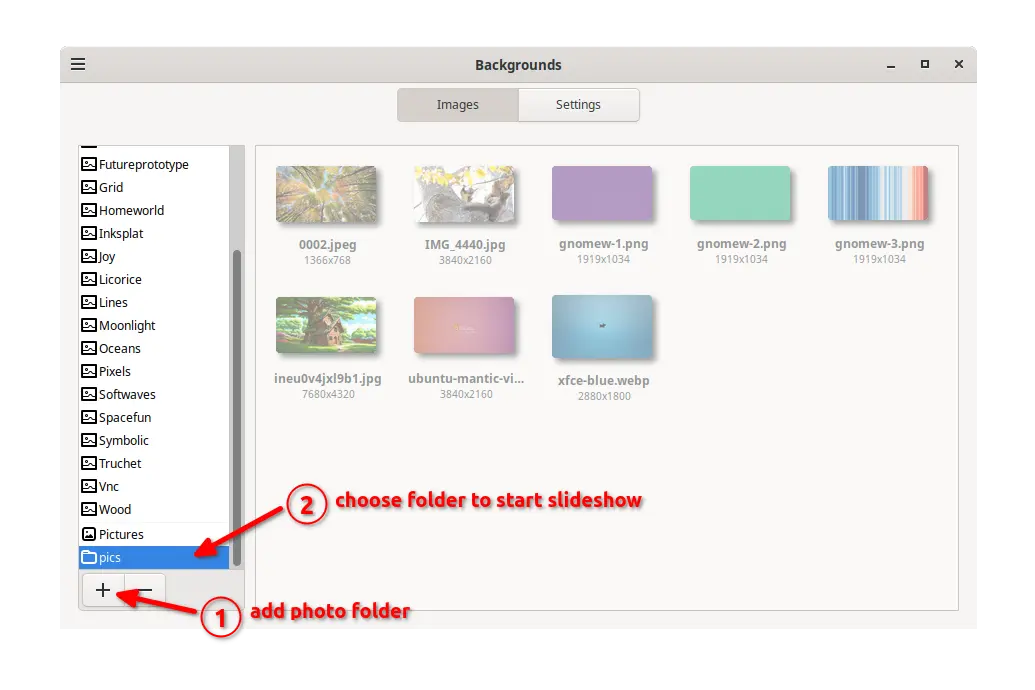
Finally, switch back to “Images” tab. Click on bottom left “+” icon to add your folder that contains the photo images. Finally, select a folder from left pane will start the slideshow!
You can add as many photo folders as possible, and switch folder by selecting from left pane to change slideshow images.
Enable Wallpaper Slideshow in Budgie
For Ubuntu Budgie and other Linux with Budgie desktop, it has a built-in tool to do the job, but not installed by default.
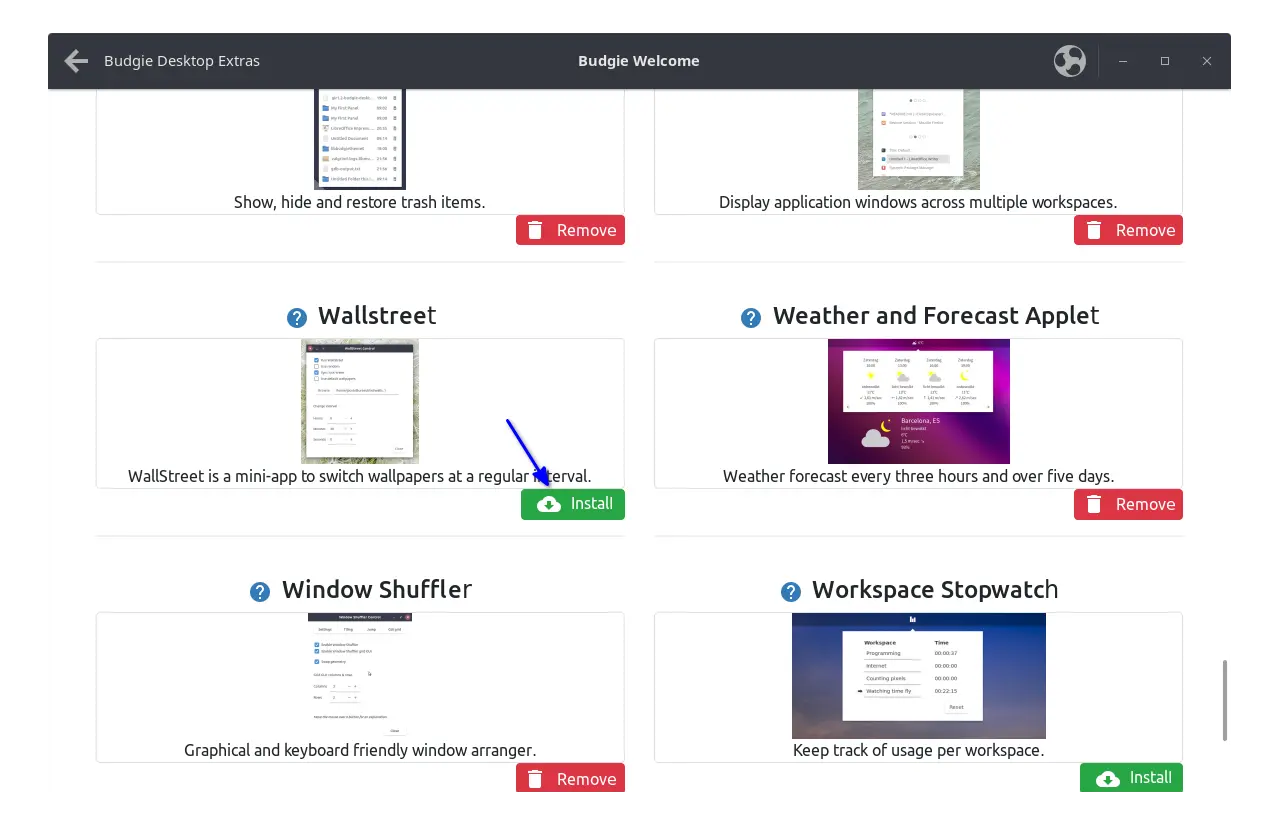
First, launch Budgie Desktop Extras, then scroll down, find out and click install Wallstreet.
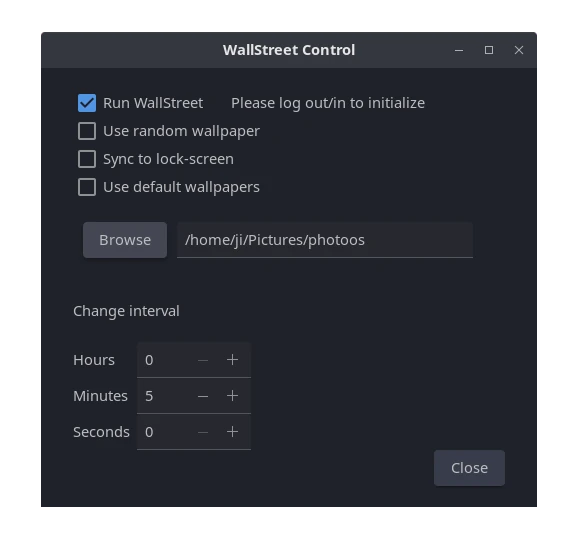
Then, launch Wallstreet from main menu. Disable “Use default wallpapers” then choose folder that contains your photo images. Change time interval and finally enable “Run WallStreet”. However, you need to log out and back in to make it work.
Enable Wallpaper Slideshow in LXQt
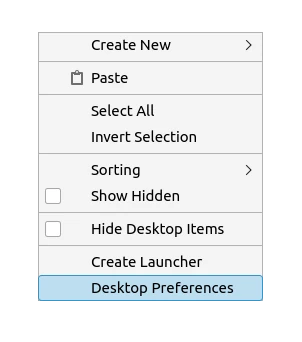
For LUbuntu and other Linux with LXQt desktop, also right-click on desktop and select “Desktop Preferences” menu option.
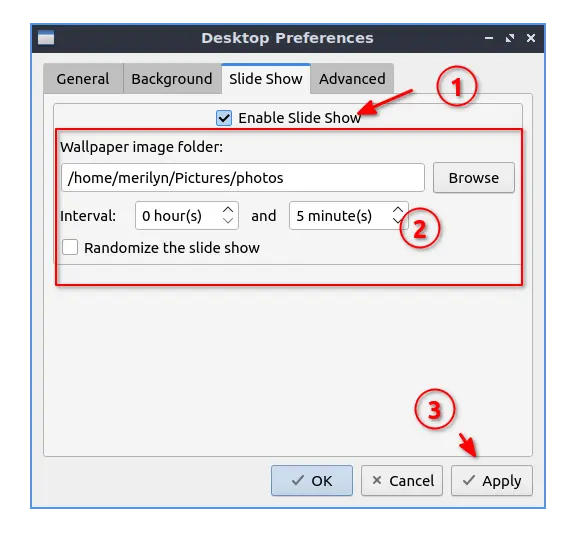
In pop-up dialog, navigate to “Slide Show” tab. Enable “Enable Slide Show” option, choose photo folder and set time interval. Finally click “Apply” and enjoy!
For GNOME, MATE, and Other Desktops
For Ubuntu, Fedora and other Linux with GNOME, MATE, you need a third-party application to do job.
Personally, I prefer to use Shotwell to create wallpaper slideshow, since it’s so popular that most Linux include it in system repositories, and Ubuntu has it pre-installed out-of-the-box.
Steps 1: Install Shotwell
Shotwell is a free and open-source image viewer and organizer. To install the app, just open your system package manager, app store, or Gnome Software. Then search and install “Shotwell”.
Or, open terminal and run one of the commands below to install it:
- For Debian and Ubuntu based system, run command to install shotwell:
sudo apt install shotwell
- And for Fedora Linux, use command:
sudo dnf install shotwell
- For Arch and Manjaro, etc, use command:
sudo pacman -S shotwell
In case shotwell is not available in your system repository, try installing it via Flatpak package.
Steps 2: Create Wallpaper Slideshow via Shotwell
Once you installed the tool, launch it, and go to “File -> Import from Folder” to import your photo images.
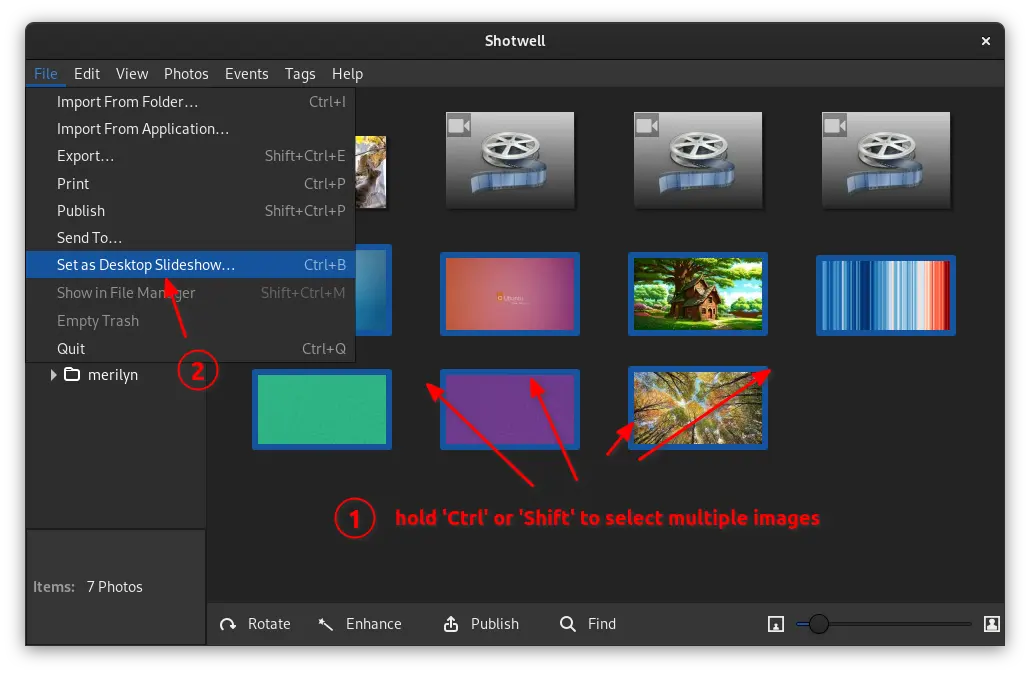
Then, press and hold either “Ctrl” or “Shift” to select all the photo images for slideshow.
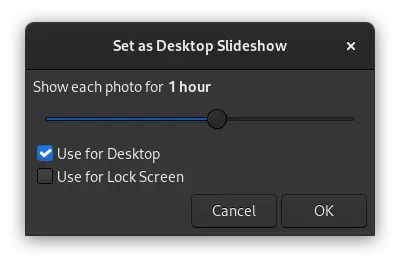
Finally, go to “File -> Set as Desktop Slideshow” to create wallpaper slideshow.
Next, in the pop-up dialog, move the slider to set time interval and finally click “OK”.
The wallpaper slideshow will start immediately once clicking OK, but may NOT for your desktop. In the case, you can follow next step to add the slideshow into “Background” settings.
Steps 3: Add the slideshow to ‘Background’ selection settings page
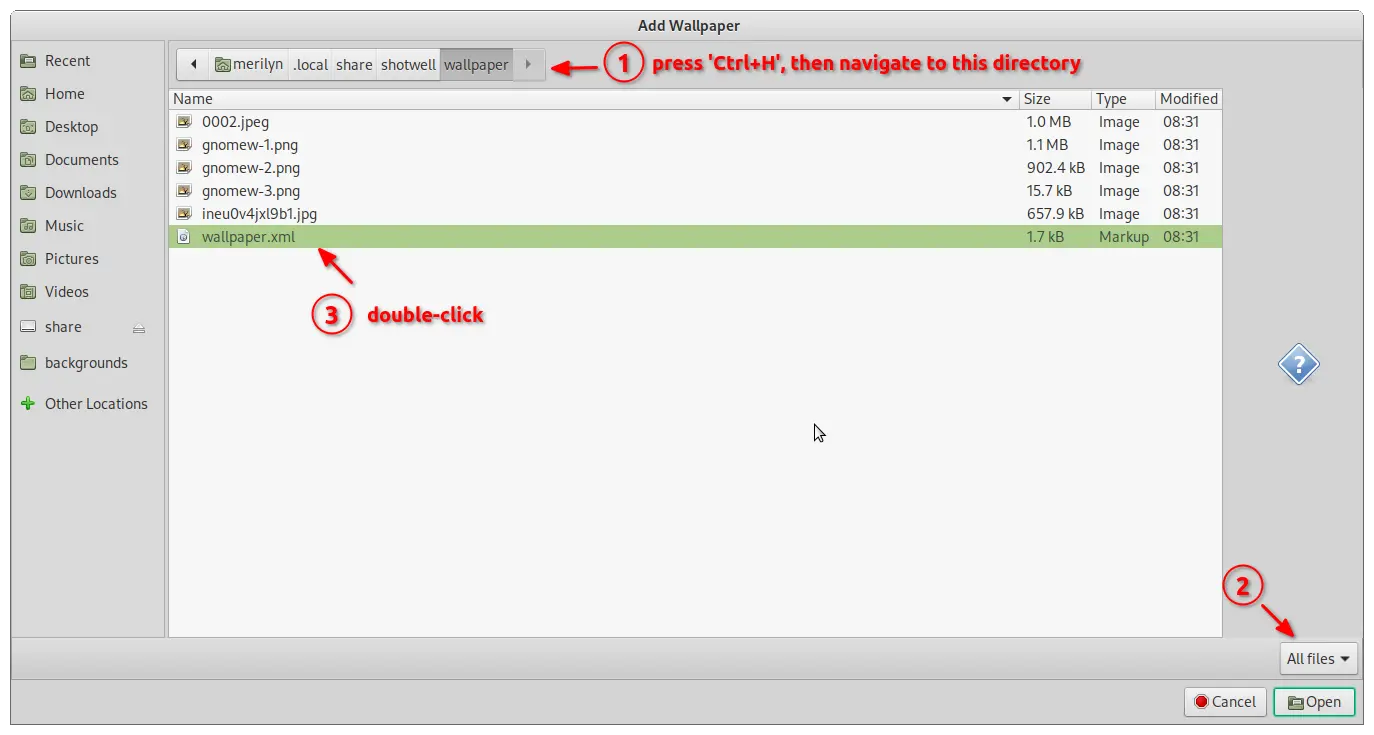
Shotwell automatically create a .XML file when using it to create Desktop Slideshow. The file as well as the copy of photo images are available in the following locations:
/home/YOUR_USER/.local/share/shotwell/wallpaper/for Shotwell installed as Native package./home/YOUR_USER/.var/app/org.gnome.Shotwell/data/shotwell/wallpaper/for Shotwell installed as Flatpak package.
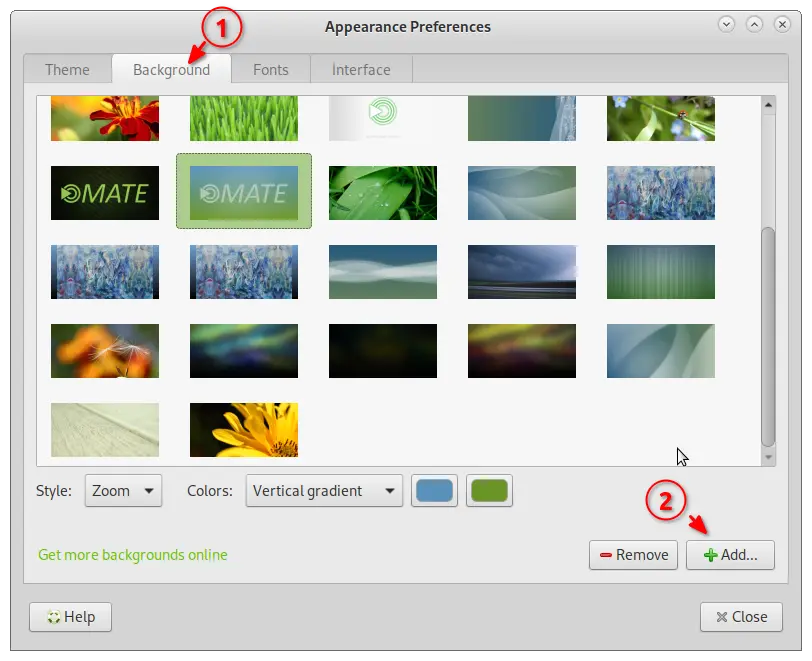
For MATE desktop, just launch “Appearance” and navigate to “Background” tab. Then, click on the bottom right “Add” button.
In pop-up file chooser dialog, press Ctrl+H to show hidden files/folders. Then, navigate to one of the previous locations, choose to show “All files” in bottom right corner, and finally click open the XML file.
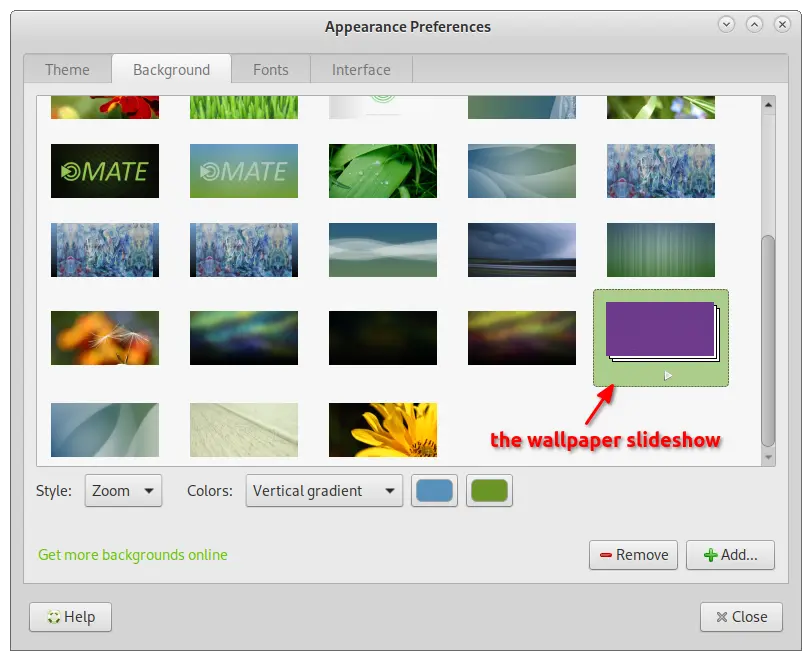
After that, you can choose the wallpaper slideshow just like a normal wallpaper image from the “Background” setting page.
For GNOME Desktop, you need to create another .XML file to make it visible in background selection page.
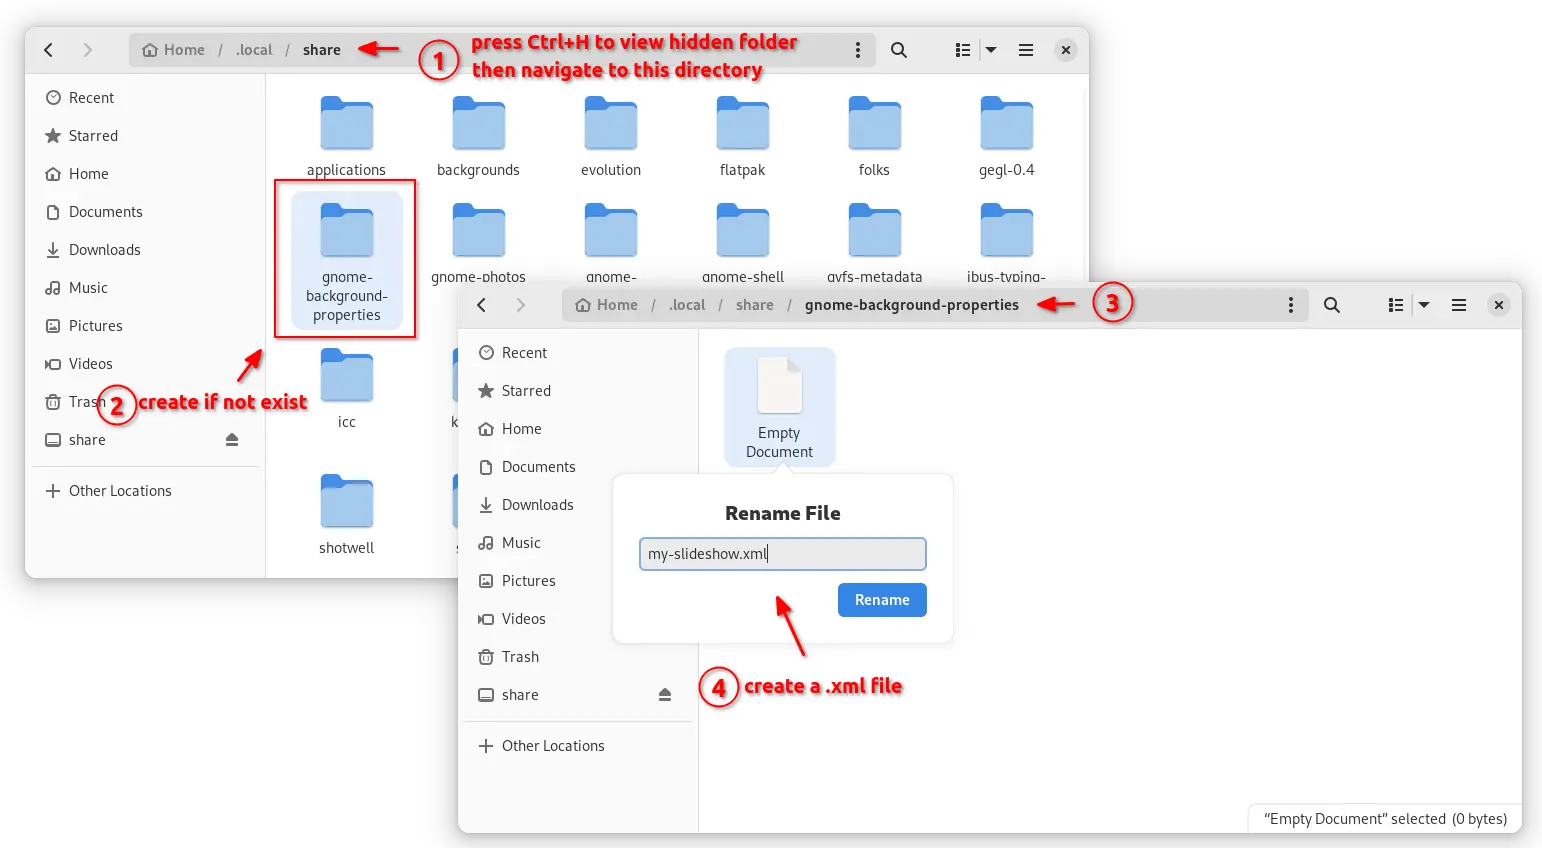
- First, open ‘Files'(Nautilus file manager). Press Ctrl+H to show hidden files/folders and navigate to .local/share
- Then, click open “gnome-background-properties” sub-folder, or create if it does not exist.
- Next, create a new document under that folder, and rename to a
.xmlfile with whatever name you want. See how to enable ‘New Document’ option in GNOME.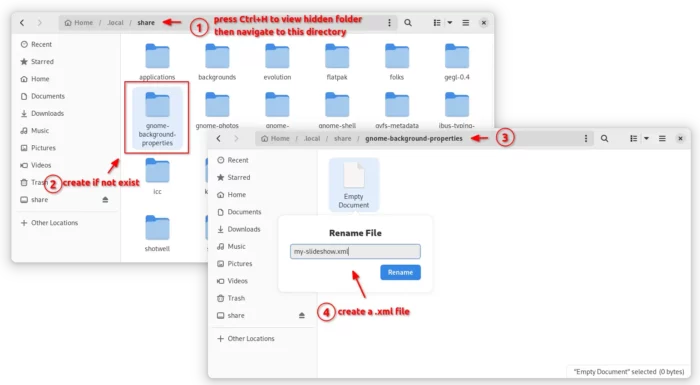
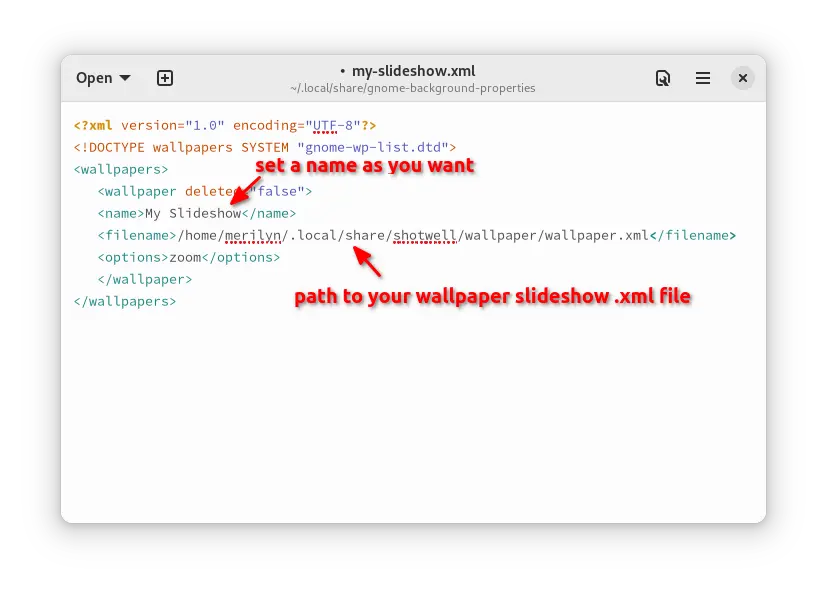
- Finally, click edit the new XML file and add following lines:
<?xml version="1.0" encoding="UTF-8"?>
<!DOCTYPE wallpapers SYSTEM "gnome-wp-list.dtd">
<wallpapers>
  <wallpaper deleted="false">
  <name>A NAME HERE</name>
  <filename>/PATH/TO/THE/SLIDESHOW/XML/FILE</filename>
  <options>zoom</options>
  </wallpaper>
</wallpapers>
Importantly, you have to replace
<name>content to whatever name that you want. And, replace <filename> content to one of the file location mentioned above (depends on which Shotwell package installed).
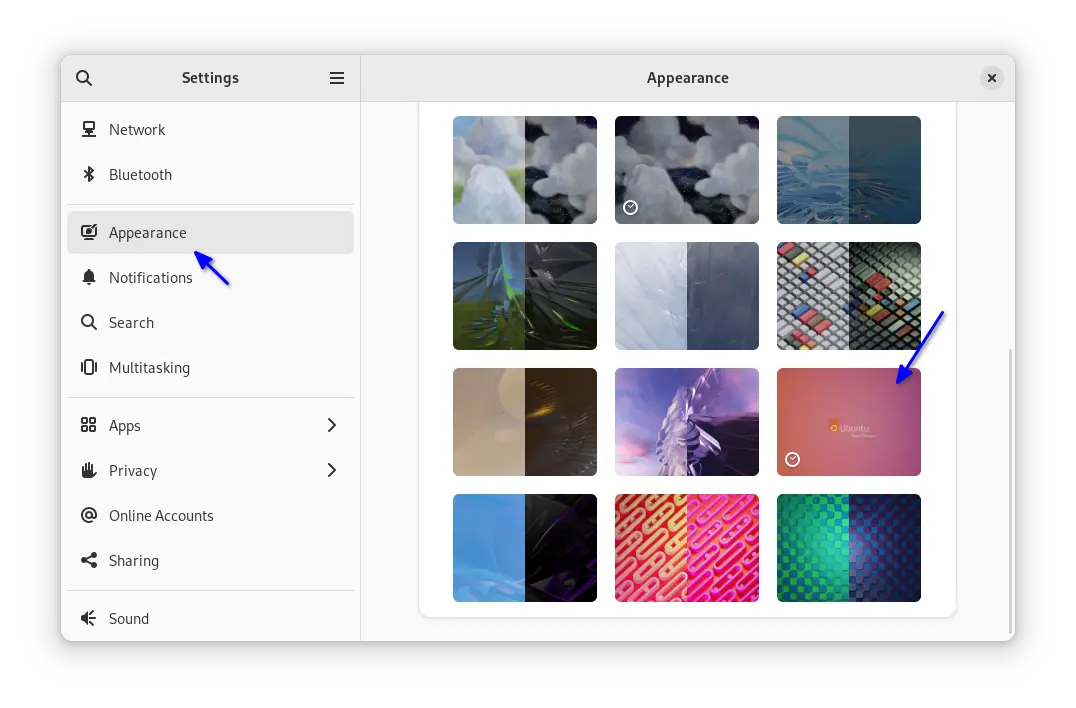
If you have everything done correctly, open “Settings” and navigate to “Appearance” will show you the new wallpaper slideshow as a new choice.