Want to remote desktop control your Ubuntu 22.04 Server or Desktop PC/laptop from a local machine? Here’s the step by step guide shows how to do the job via RDP protocol.
RDP and VNC
RPD, stands for Remote Desktop Protocol, is a proprietary protocol developed by Microsoft. It provides encrypted network communications. And, Windows has a built-in RDP client to connect remote servers.
VNC, stands for Virtual Network Computing. It’s a graphical desktop-sharing system that uses the Remote Frame Buffer protocol (RFB) to remotely control another computer. The communication is not encrypted except for the password.
GNOME desktop has built-in option to setup screen sharing via VNC (and RDP now), it’s better for remote control from another computer in the same network. Though, it supports open-source encryption plugin to make connection secure for accessing outside the local network.
RPD is more secure than VNC by default. It creates a desktop interface for each connection, and logs in via a (host) system user account and password. It could be “Remote Login” but not “Screen Sharing”.
Option 1: Setup Screen Sharing in Ubuntu 22.04 Desktop:
GNOME, the default desktop environments in Ubuntu, Fedora Workstation and other Linux has option in system settings (aka gnome-control-center) to enable screen sharing.
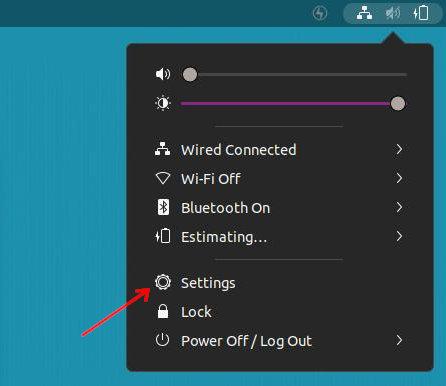
1. Firstly, open ‘Settings’ from upper right system tray menu.
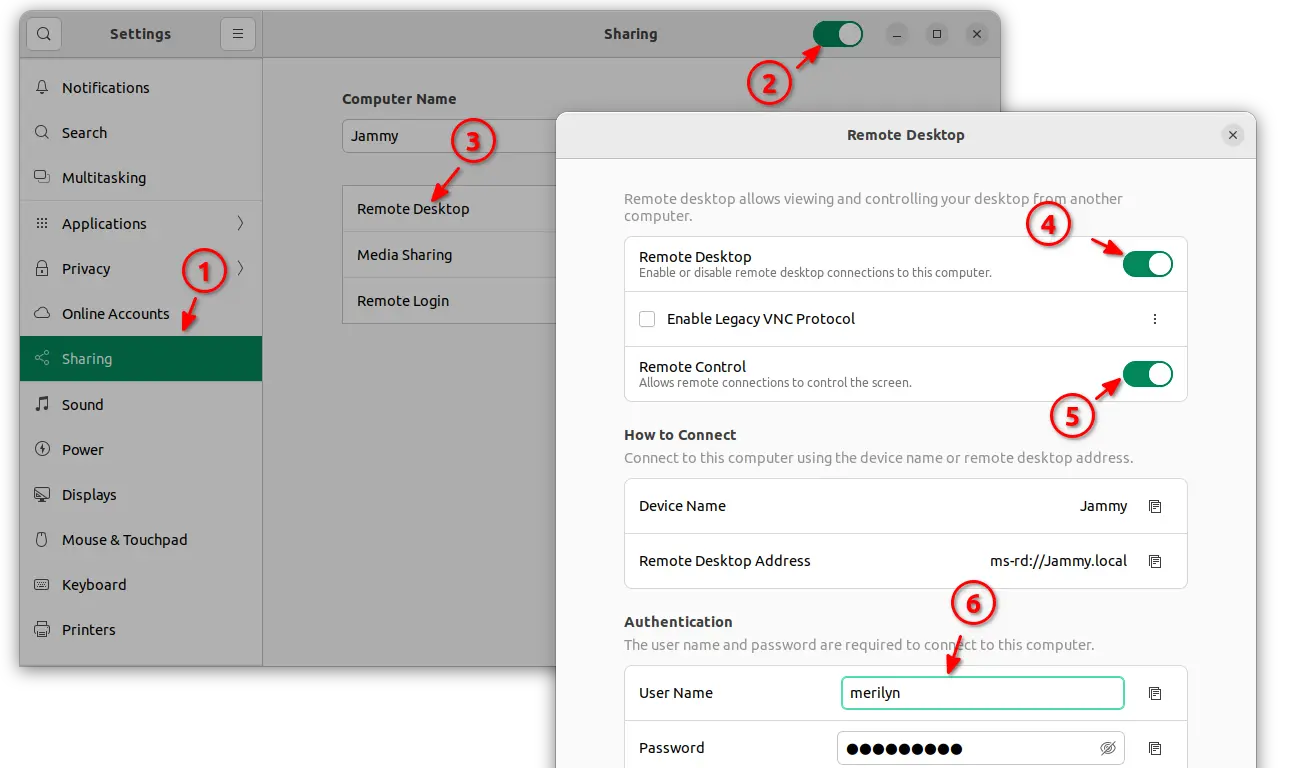
2. When it opens, go to ‘Sharing’ in left pane. Then turn on the toggle icon in the top-right. Finally, click “Remote Desktop” to get the settings dialog:
- Turn on “Remote Desktop” toggle option to enable the function.
- Enable “Remote Control” to allow client machine to control the screen.
- Setup username and password for client machines to login with.
After that, you may start connecting to this Ubuntu machine using either a RDP client remotely (see last step for details), or VNC client if you enabled ‘Legacy VPN Protocol’.
Option 2: Setup xrdp Remote Desktop in Ubuntu 22.04 Server:
So, if you have a Ubuntu 22.04 Server without a graphical desktop environment. Do the steps below to enable the remote desktop function via xrdp. You can even do this step in Ubuntu Desktop edition, if you found that ‘Option 1’ is not a perfect solution that requires host machine to be logged in.
1. Install xrdp server:
First, connect to your Ubuntu server either via ssh (ssh username@server-ip) or other login shell, and run command to install the xrdp package:
sudo apt install xrdp
It’s a free and open-source implementation of Microsoft RDP server, available in most Linux system repositories.
2. Install GNOME or Xfce Desktop:
This step is only for Ubuntu Server without a Desktop environment. It needs a desktop environment to create a graphical interface for use in remote connections.
To install XFCE4 desktop, which is HIGHLY recommended due to less memory and disk space usage:
sudo apt install xubuntu-desktop
If you prefer the default GNOME desktop, install it via command:
sudo apt install ubuntu-desktop
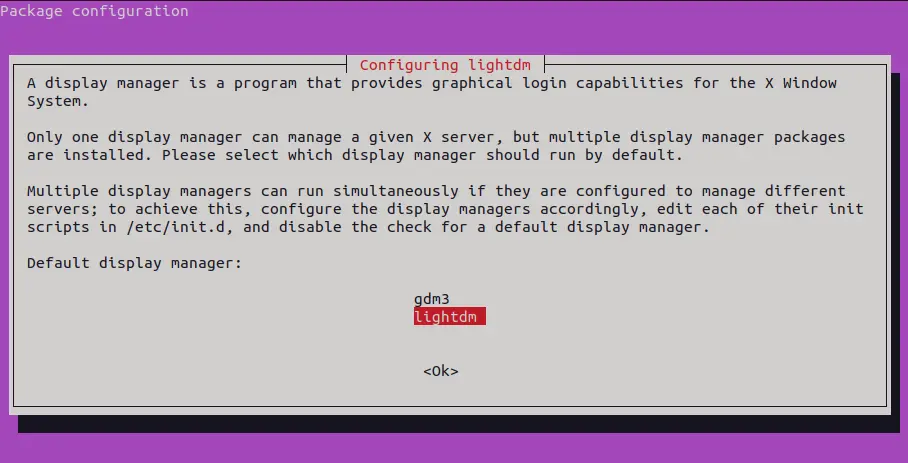
For Debian 11, use sudo apt install tasksel && tasksel to install a desktop environment. Press spacebar on keyboard to select/un-select an item. And use Tab key to switch to OK/Cancel buttons.
During the installation process, it may ask to choose a display manager for the login screen. Choose either one and hit Enter to continue.
3. Setup xrdp server:
Firstly, add user xrdp to the group ssl-cert for use of SSL key. To do so, use command:
sudo gpasswd --add xrdp ssl-cert
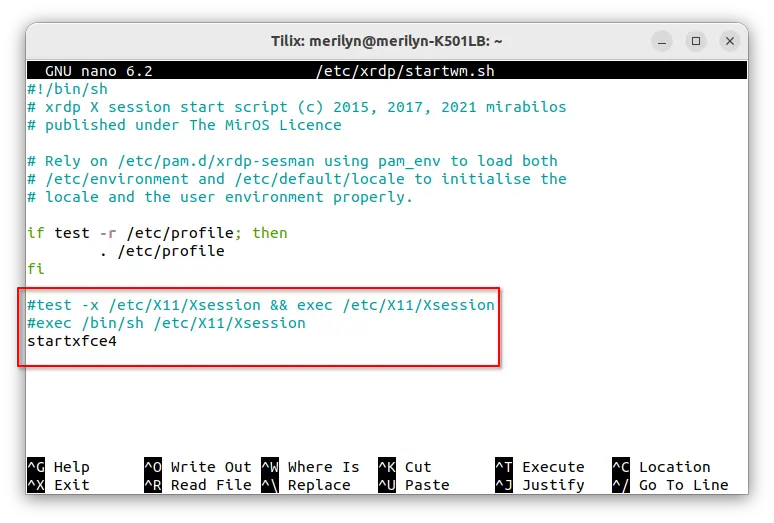
(For XFCE4 only) Secondly, edit the configuration file “/etc/xrdp/startwm.sh” via command:
sudo nano /etc/xrdp/startwm.sh
You may replace nano with your favorite text editor, e.g., gedit for GNOME desktop.
When file opens, comment out the following lines by adding ‘#’ in the beginning:
#test -x /etc/X11/Xsession && exec /etc/X11/Xsession
#exec /bin/sh /etc/X11/Xsession
And add new line startxfce4 in the end to start XFCE4 desktop when connecting. And, save file by pressing “Ctrl+X”, type “y” and finally hit Enter. (Skip this step if you decided to use GNOME)
4. Configure Firewall:
Ubuntu desktop does not enable the firewall by default, but the server edition does. So you may run command to allow port 3389:
sudo ufw allow 3389 && sudo ufw reload
RDP listens to port 3389 by default. You may change it in "/etc/xrdp/xrdp.ini" config file.
5. start or re-start xrdp service:
After configuration, you need to start or restart (if already started) the service to reload the changes.
- Enable the service, usually required in Debian:
sudo systemctl enable xrdp
- Start the service:
sudo systemctl start xrdp
- And restart the service to reload changes, in case it’s already running when editing config file:
sudo systemctl restart xrdp
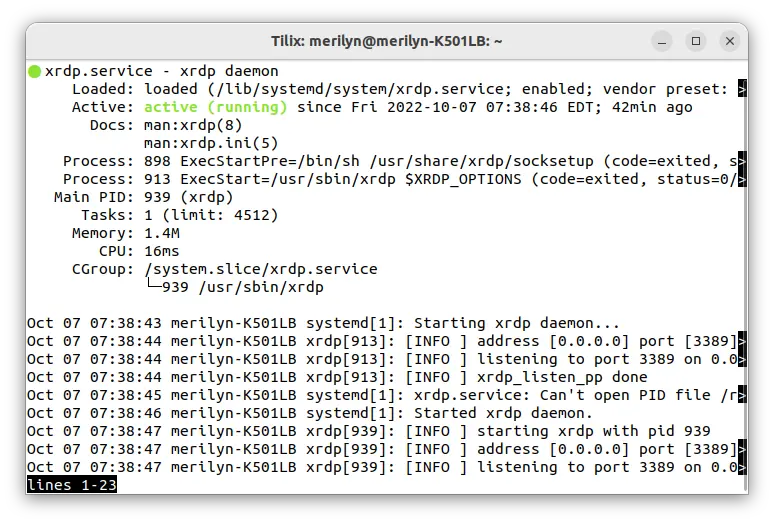
- Check the service status via command:
systemctl status xrdp
The xrdp service should be in ‘Active(running)‘ status before being able to connect remotely.
6. Port Forwarding:
If the Ubuntu Server or Desktop is running in home network behind a router, you need to enable port forwarding on the router unless the computer has a public IP address.
The steps vary on different routers, though they are generally:
- Go to Port Forwarding settings in router settings page (e.g., 192.168.0.1)
- Create a new rule named ‘remote desktop’
- Set both internal and external IP to 3389.
- Input the IP address of your Ubuntu/Debian PC.
- And finally save it.
Connect from Windows, macOS Client PC:
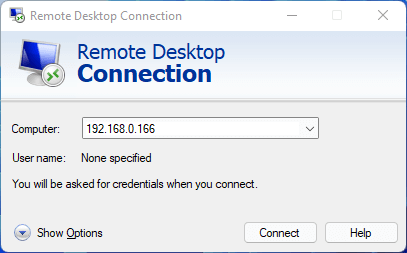
For Microsoft Windows, just search for and open ‘Remote Desktop Connection‘ from Windows start menu (macOS can install it from app store).
Then type the Ubuntu server’s IP address, and click “Show Options” for more settings, such as screen resolution under ‘Display’ page.
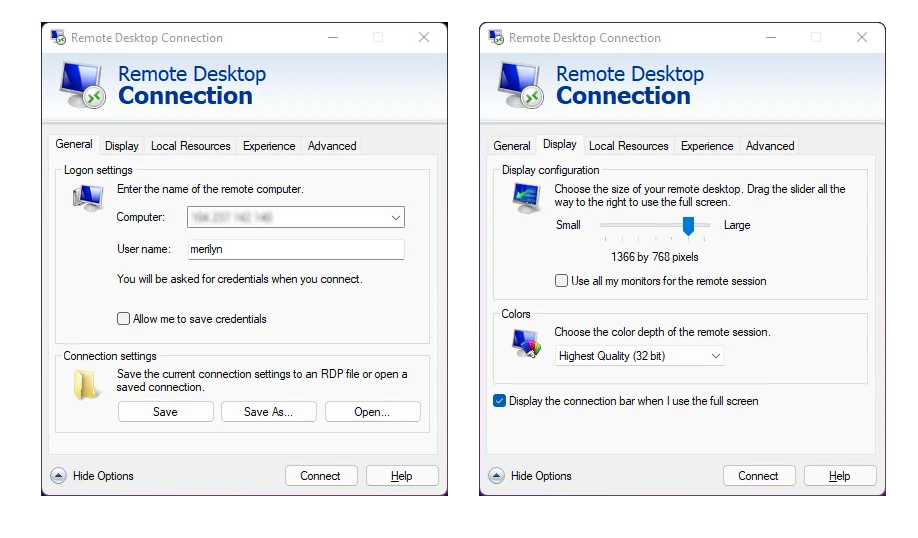
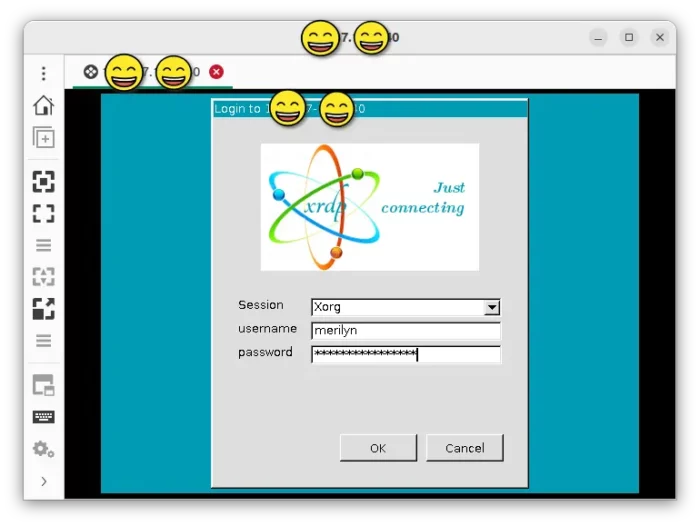
It will open a window asks to type user and password to login. Just use the username and password in Ubuntu system that you use to login locally.
Connect from Linux client:
For Ubuntu & most other Linux, there’s ‘Remmina‘ available either out-of-the-box or in system repositories as client for RDP/VNC. And Fedora with GNOME 41+ now uses “Gnome Connections” as the default remote client.
Just start the app, select RDP and type server’s IP address to connect. If the default screen resolution is too low, create a profile, and specify resolution in the pop-up dialog.
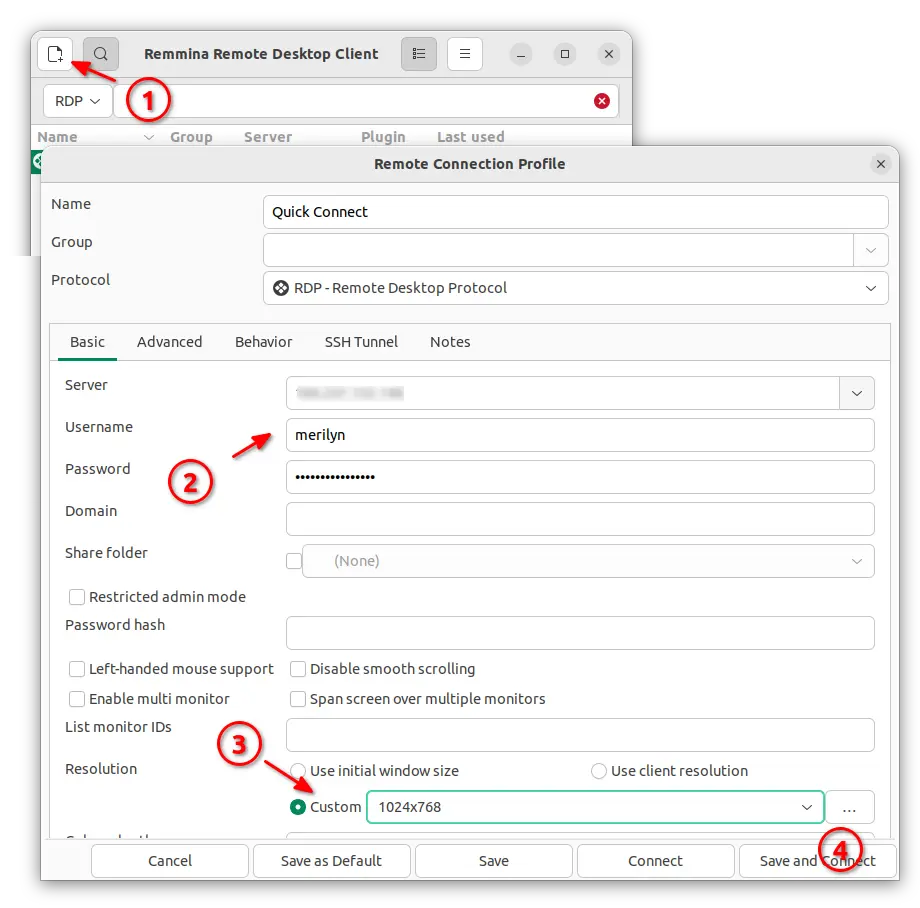
Finally, type username and password in next screen to login the remote server and enjoy!