Has a Windows 11 PC and want to connect remotely from an Ubuntu or Debian Linux? Here’s the step by step beginner’s guide shows how to do the setup in both local and remote machines.
Step 1: Enable Remote Desktop in Windows 11
Windows has built-in remote desktop protocol (aka, RDP) that provides a graphical interface for user to login remotely. It transfers data with encryption. And, the feature is available in Windows Pro & Enterprise. Though, Home edition may also enable it via an open-source wrapper library.
Enable Remote Desktop in Windows 11 Pro:
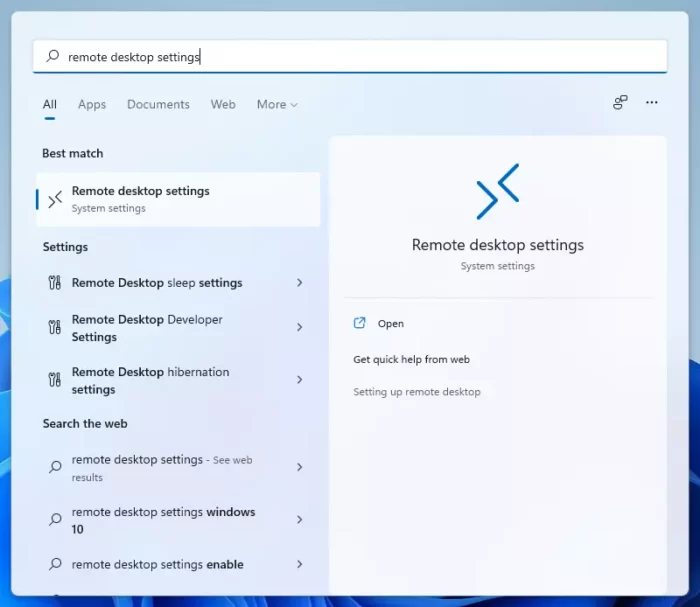
Simply search for and open ‘Remote Desktop Settings‘ from system start menu. Then, you may enable this feature by turning on the toggle icon.
Or, go to ‘Settings -> System -> Remote Desktop‘ to enable this feature. And click the down arrow icon to expand and see more settings about the feature.
Enable Remote Desktop in Windows 11 Home:
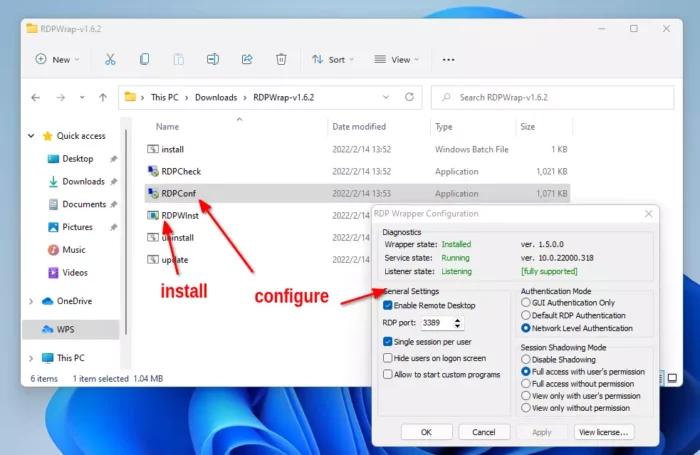
The Home edition does not has the feature out-of-the-box, but an open-source project ‘RDPWrap’ can enable this feature with concurrent RDP sessions support. It does NOT add toggle option in System Settings, but enable the RDP host service automatically on start up! Though, a separate configuration dialog is available.
So far, (Feb, 2022) Windows 11 is supported via a custom configuration file.
- 1. Download & install ‘RDPWrap’ from the github page:
- 2. Grab and extract the .zip archive if .msi does not work. And, double click run ‘RDPWins‘ (or ‘install’ file) to install the library.
- 3. Download the custom ‘rdpwrap.ini’ config file via the link below (use right-click save as option):
https://raw.githubusercontent.com/sebaxakerhtc/rdpwrap.ini/master/rdpwrap.ini
- 4. Finally, search for and open cmd command console as administrator. And do the steps below one by one (via this thread):
- Run net stop termservice to stop the service.
- Replace old rdpwrap.ini file in C:\Program Files\RDP Wrapper with the new file you just downloaded.
- Again start the service via net start termservice command in CMD.
- Finally restart Windows PC.
The previous steps enabled the Remote Desktop feature in my Windows 11 Home edition after reboot.
Step 2: Remote Control Windows 11 from Ubuntu/Debian:
After properly setup the remote desktop host, user may now login remotely by system default RDP client in Linux.
1. Firstly, search for ‘Remote Desktop’ in the Activities overview screen. Then, click open the client app:
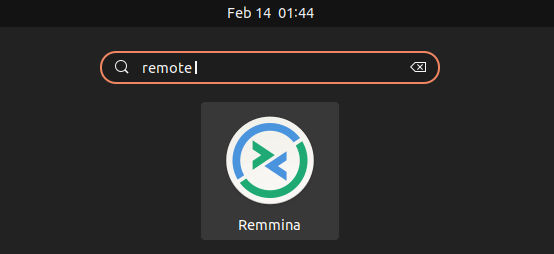
Debian 11 does not has the client app out-of-the-box. Install it by running command in ‘terminal’:
sudo apt install remmina
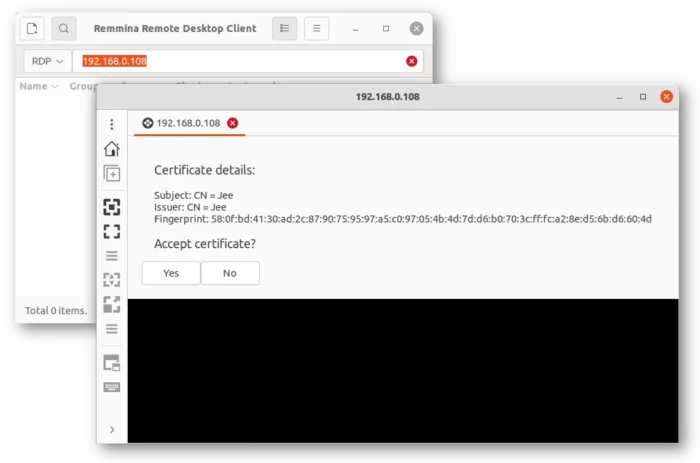
2. Next, choose ‘RDP‘ protocol and type the IP address of Windows 11 host to connect. Accept the certificate, and finally type username & password to login.
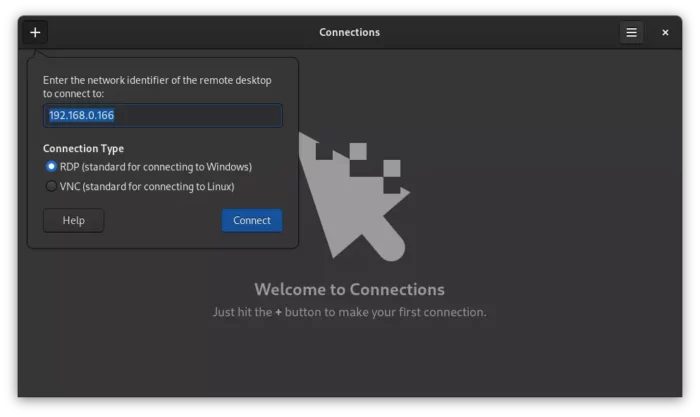
Ubuntu 22.04 proposed to use ‘Gnome Connections’ as default remote desktop client. For this app, start connecting via top left corner ‘+‘ button.
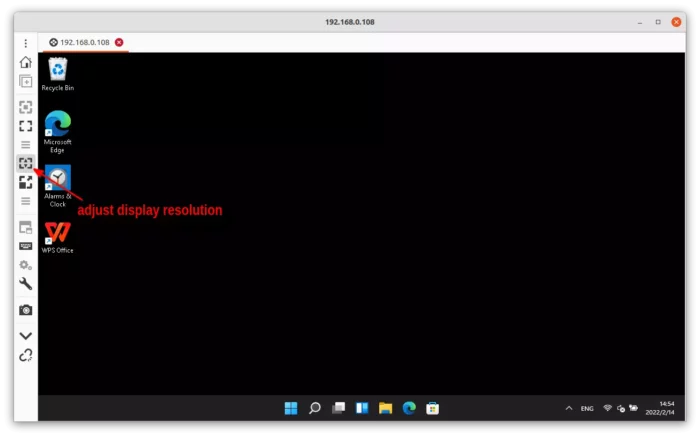
3. After typing the username and password for your Windows 11 PC, as well as Domain (leave it blank if NOT exist, or find it in Computer Properties dialog), you should now be able to control the Windows PC remotely.
For low screen resolution issue, there’s an option in left panel ‘Toggle dynamic resolution updates‘ to make it fit your display.
That’s all. Enjoy!










Recent Comments