

This is a step by step beginner’s guide shows how to install Zorin OS (17 updated) using an USB Stick.
Zorin OS is a beginner friendly Linux Distro with Windows look like desktop appearance. It’s stable and reliable for general purpose use in home PC or laptops.
The Linux system features 4 editions: the full Ultimate edition pay for downloading, core edition with modern Gnome Desktop, lite edition for old machines, and education for school use.
Preparation
Firstly, you need to download the ISO image from its website:
Secondly, burn it into USB stick so you can boot the USB and start installing the system on your PC or laptop. To do so, either follow this tutorial, or see a list of USB creator apps.
Boot USB driver & Start the installer.
After created the boot-able USB installer, plug it into your machine and boot. You may first go to BIOS settings page and enable / set USB as boot option. The keyboard shortcut to get into BIOS vary according to your machine, it’s usually Esc, F2, Delete, etc.
Once the USB boots, you should see the menu look like:
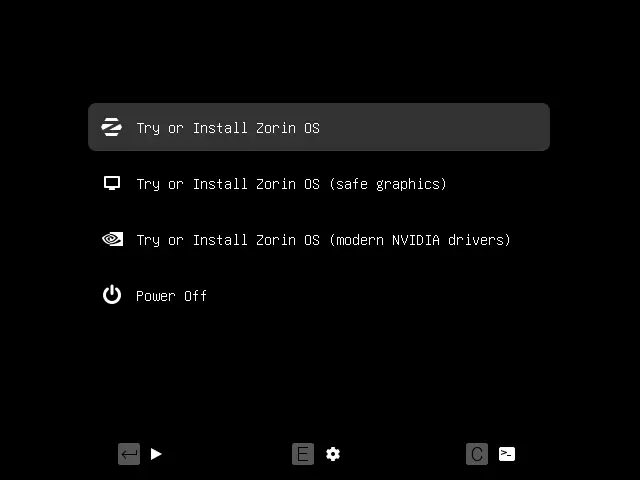
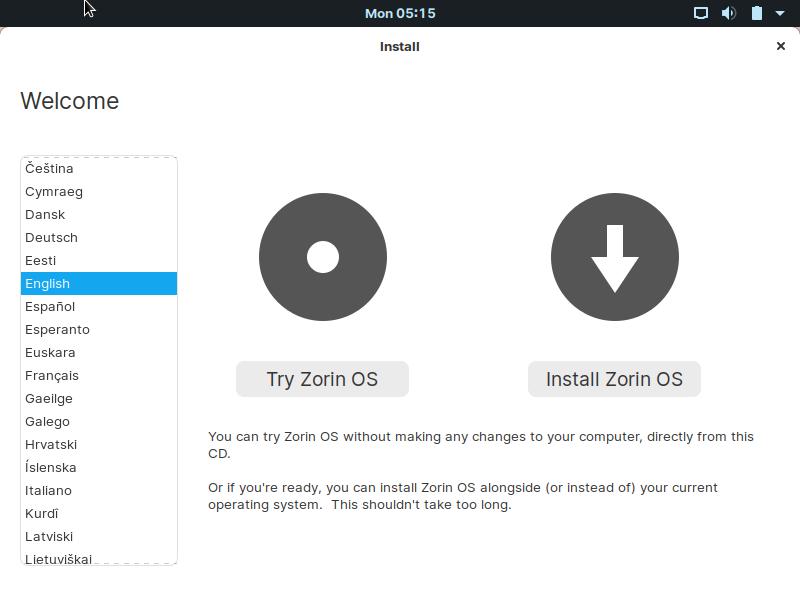
Choose the first or second and hit Enter to boot. And it will get into the ‘installer wizard‘ directly. There choose the language as you prefer, click either ‘Try Zorin OS’ or ‘Install Zorin OS’. and hit Continue.
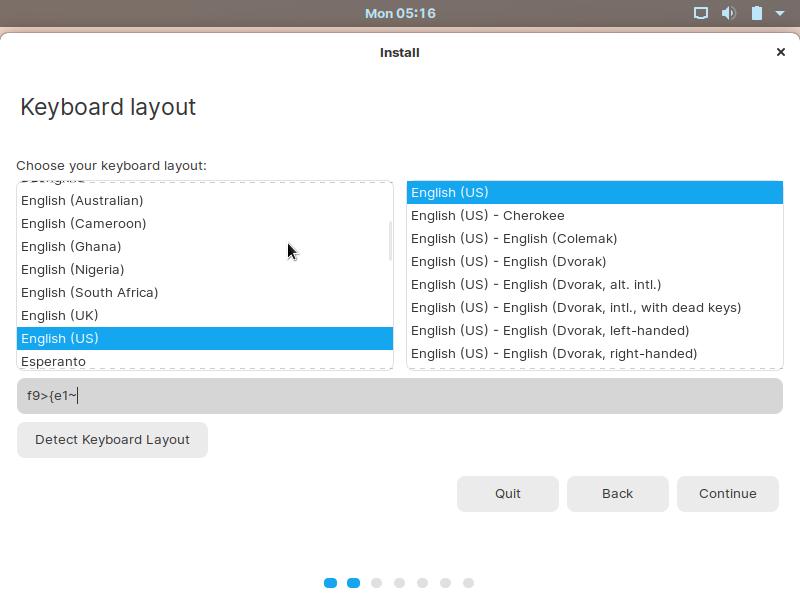
Next, choose the keyboard layout. The default one is good for normal devices, and you can type in the box to test it out. Or click ‘Detect Keyboard Layout’ and follow it.
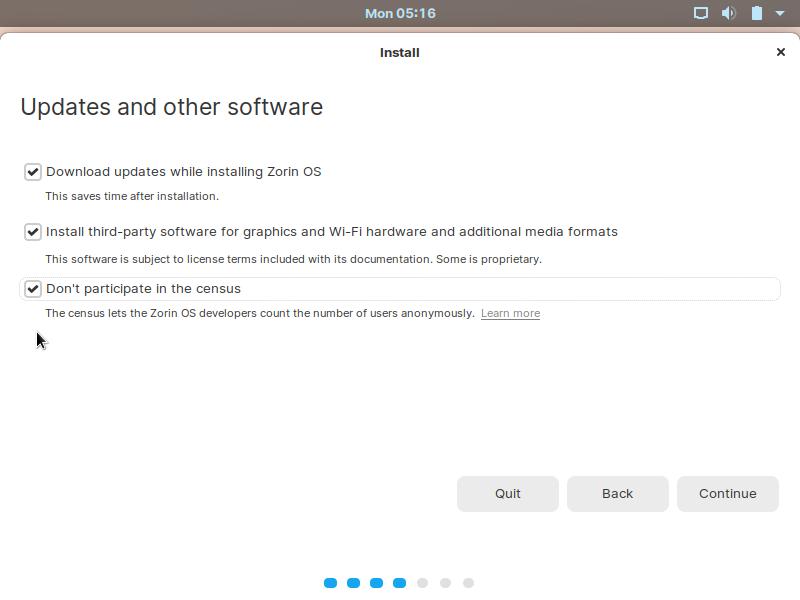
Next screen will prompt you either to install updates, third-party software during the installing process. Toggle the options as you prefer. It’s OK to disable them to speed up the process a little, since they are available in system repositories to install afterwards.
Create Partitions for Zorin OS file system:
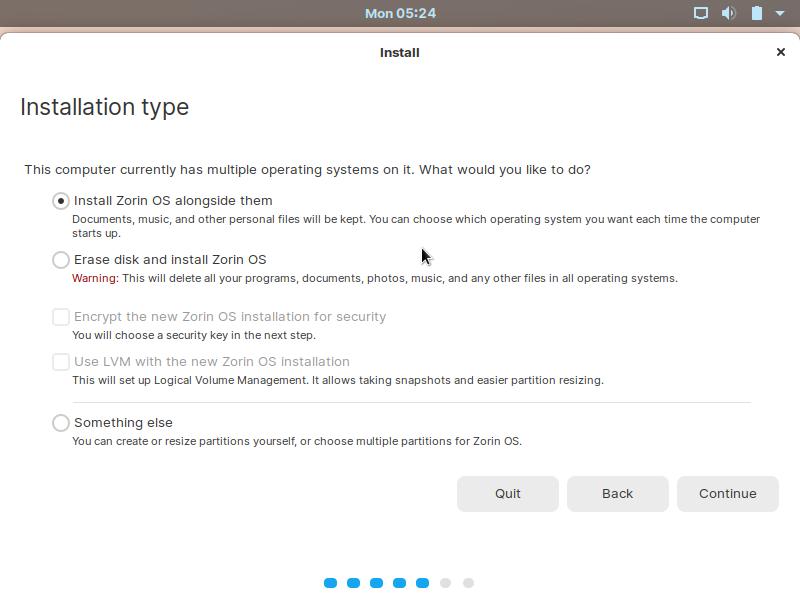
1.) Depends on your disk status, it will provide you following options for the “Installation type”:
- ‘Install Zorin OS alongside them’ – this option will use all un-allocated space (if any) for Zorin OS.
- ‘Erase disk and install Zorin OS’ will remove all data in the disk for Zorin OS
- As always, I’ll recommend ‘Something else’ to get into partition table and create system partition manually.
2.) If you chose to create file partitions manually, it should now bring you to the partition table. There you need to create following partitions:
- BIOS boot or EFI partition for GPT hard disk.
- EXT4 partition for file system.
- Swap area for small RAM or hibernation.
If you want to encrypt Zorin OS file system, go directly to the next step.
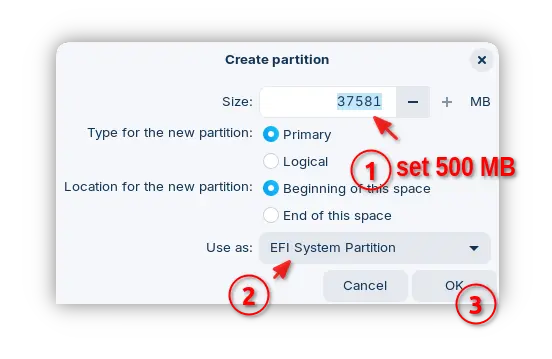
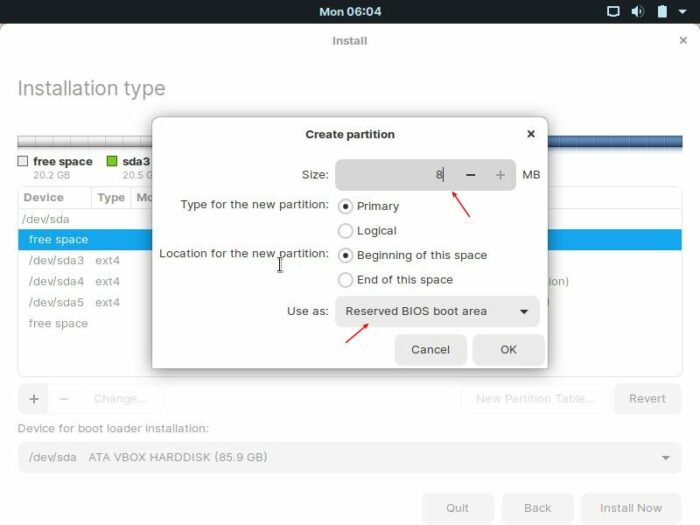
a.) Create BIOS boot or EFI partition.
For installing the system boot-loader, you need to create either EFI (for modern machines support UEFI) or reserved BIOS boot area for very old machines.
- To create EFI partition if you machine uses UEFI boot. Click on free space (at the beginning if possible) and create a 500 MB partition, use as ‘EFI System Partition‘.
- To create BIOS boot partition for legacy BIOS boot machine, simply click on free space (free space in the beginning is recommended if possible) and create a 2MB ~ 8MB partition, use as ‘Reserved BIOS boot area’.

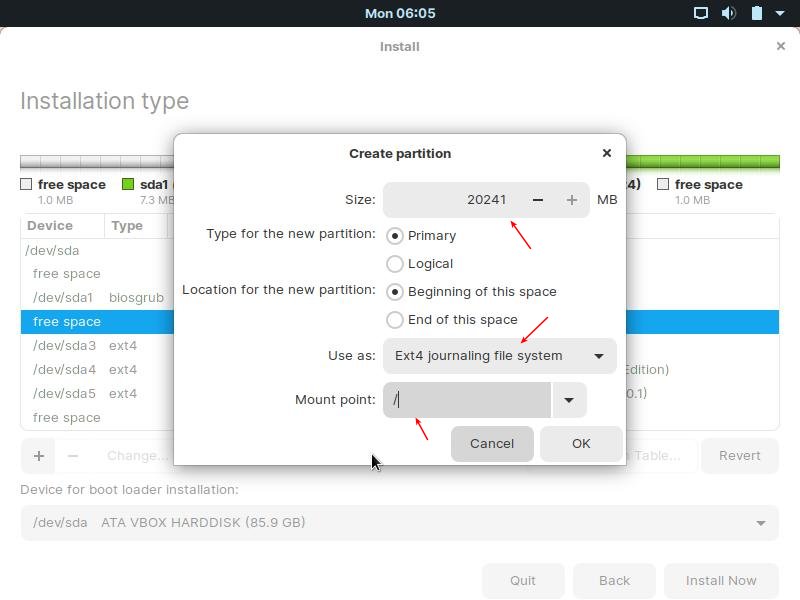
b.) Create Ext4 file system partition
Next create the partition to install the Zorin OS file system. Use EXT4 file system with 20 GB+ disk space, though 50 GB+ will be good for long time use. And select or type / as mount point.
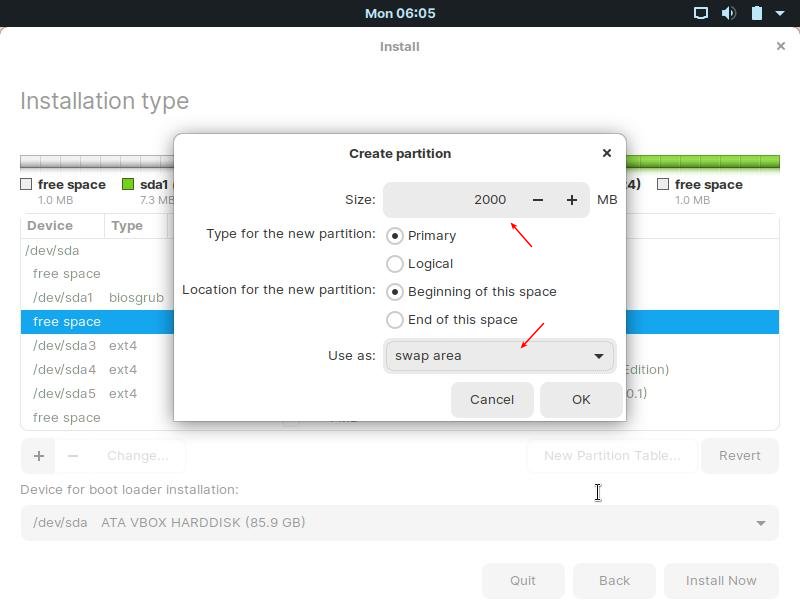
c.) Create swap area:
If you have a small RAM, e.g., 4GB or less, or you need the function to hibernate to disk, also create the Swap area.
Set the size to as large as of RAM, and use as ‘Swap area’.
(Optional) Encrypt the Zorin OS File System:
You can encrypt the file system so that users need to type password before accessing it. No one can access you files without the password you set.
If you lost this password, you lose all the data. No way to recover in theory!
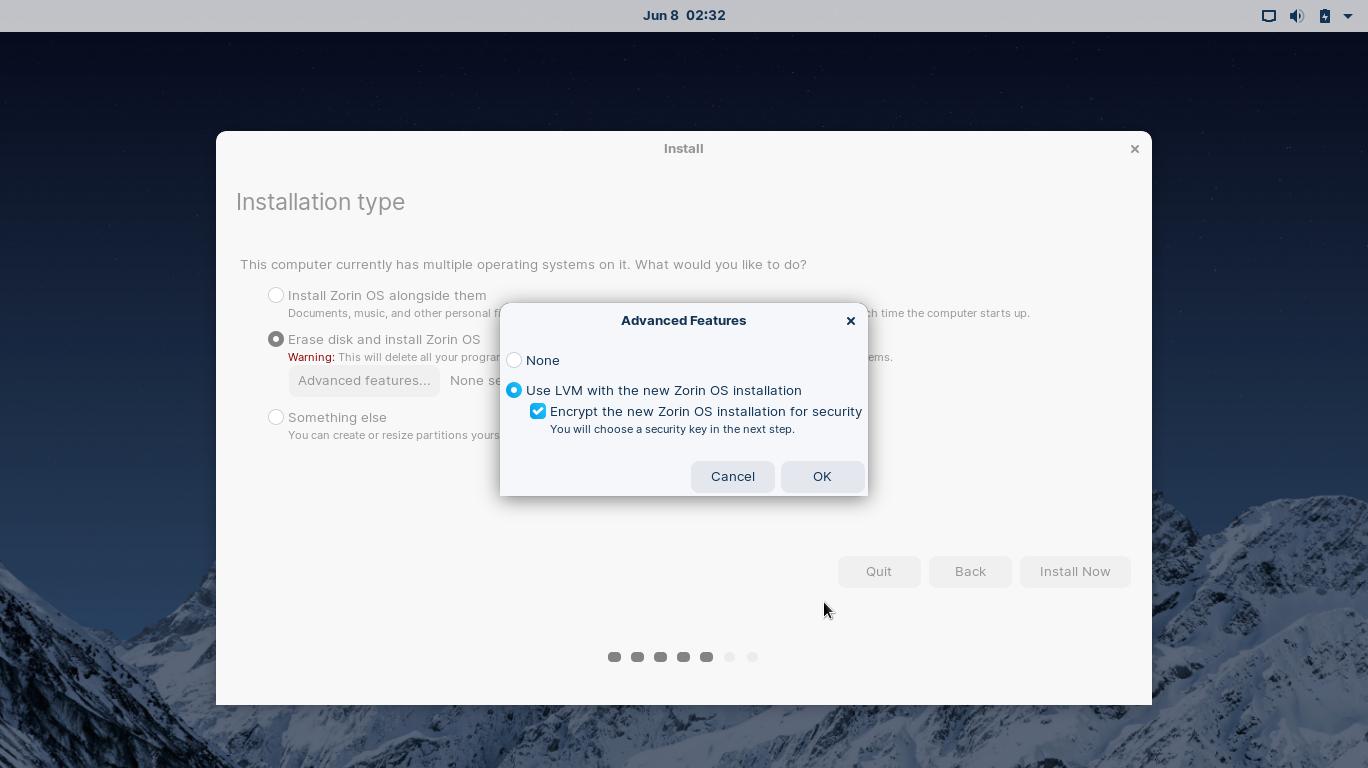
Firstly, if you’re going to install the whole hard disk for Zorin OS only. Select ‘Erase disk and install Zorin OS’ and there’s an option to encrypt the file system.
Alternatively, if you’re now at the partition table, select the free space and click on ‘+‘ icon to create a partition:
- Set size to 20 GB+ (recommend 50 GB and higher). Do leave 500MB free space for /boot partition (see next step).
- Choose use as ‘Physical volume for encryption’
- Set your password twice and hit OK.

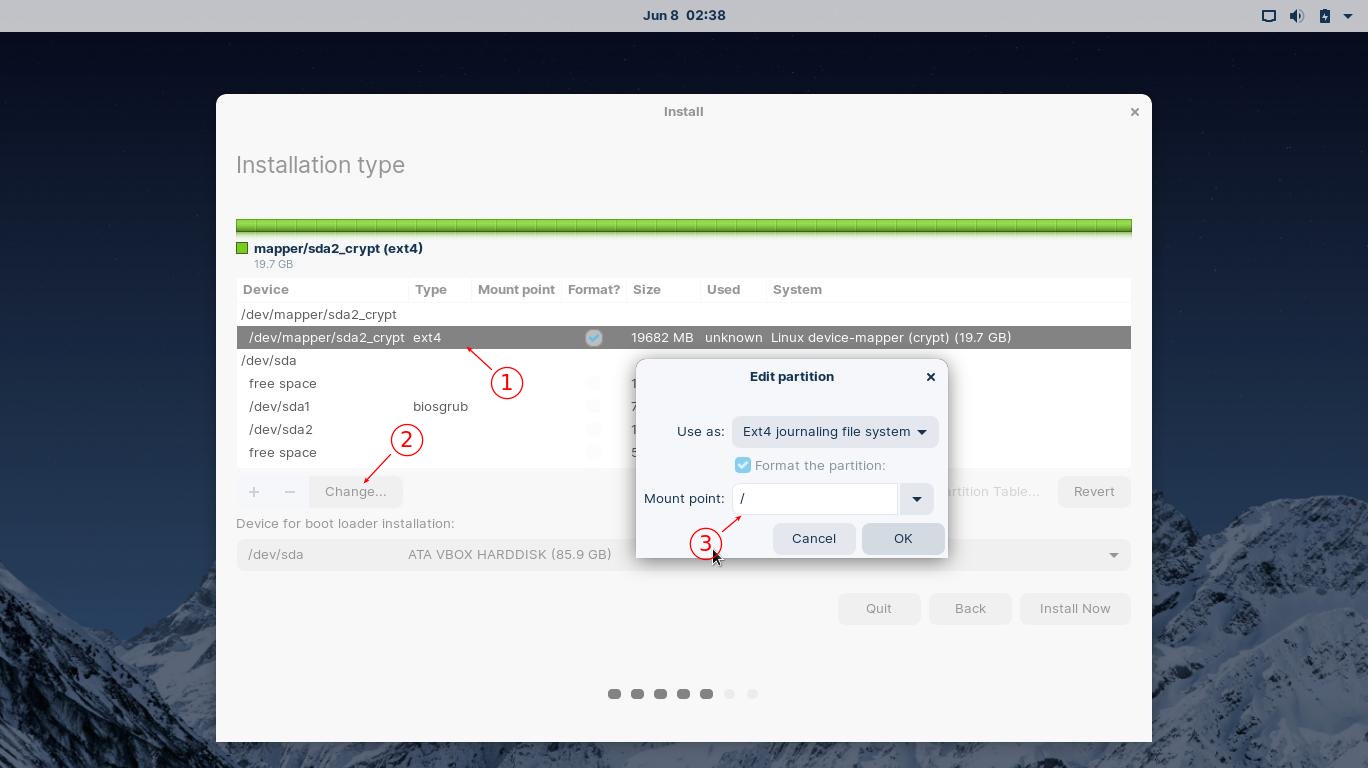
Next, wait a few seconds. It will create an encrypted partition shown at top.
Choose the partition, and click on ‘Change‘ button. Then use the partition by typing or selecting / as mount point.
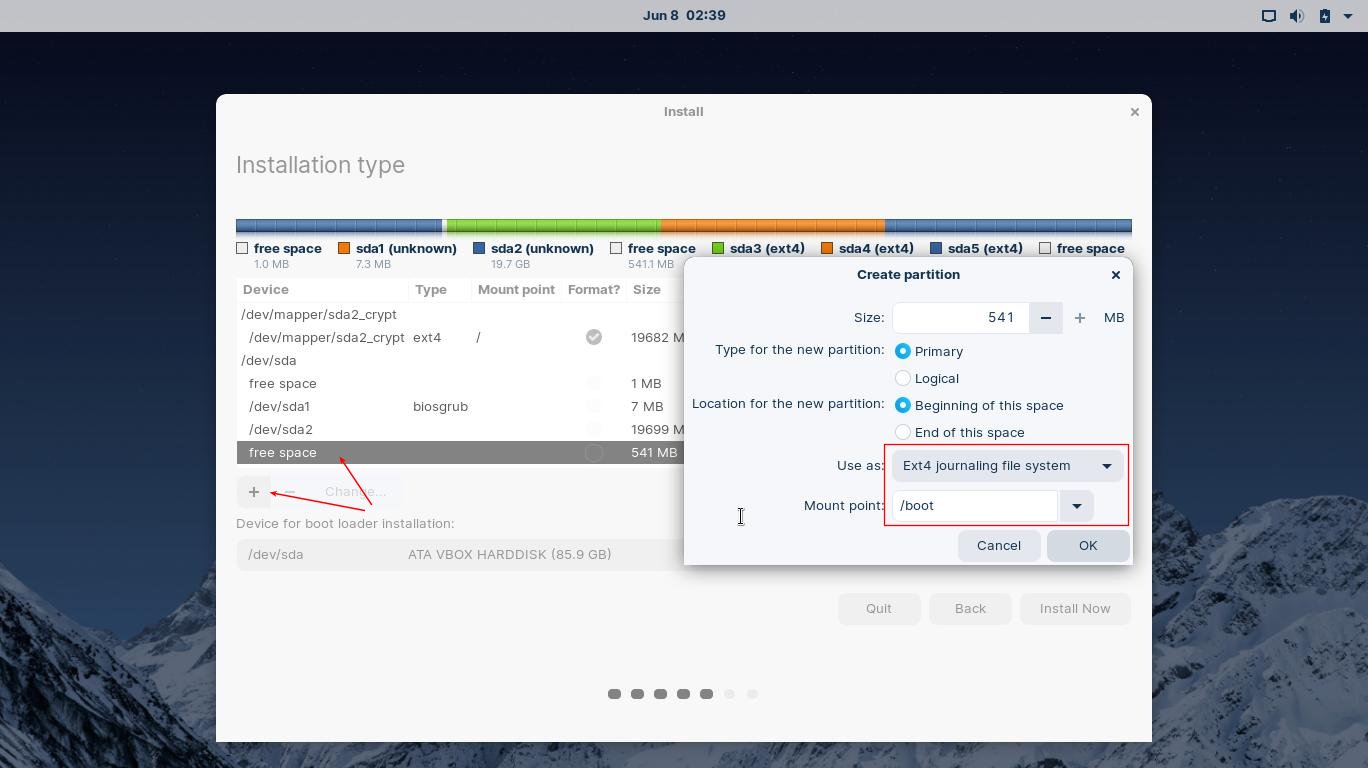
You also need to create a separate /boot partition. Highlight the free space and click ‘+‘. Then create a partition with:
- 500 MB size
- EXT4 file system.
- Mount point /boot
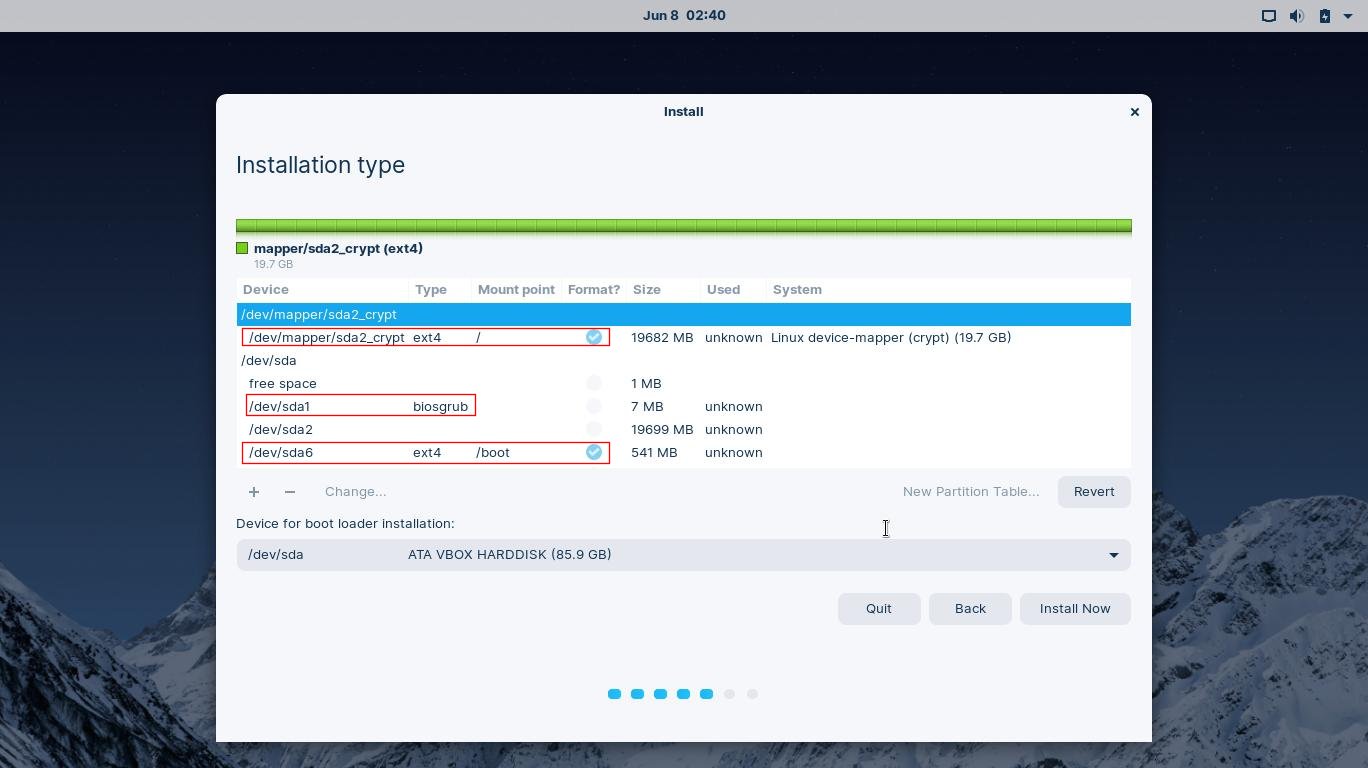
Finally, the partition table will look like:
Finally, choose locale, set account and start installing Zorin OS
After creating disk partitions, click on ‘Install Now’ button. And confirm in pop-up dialog.
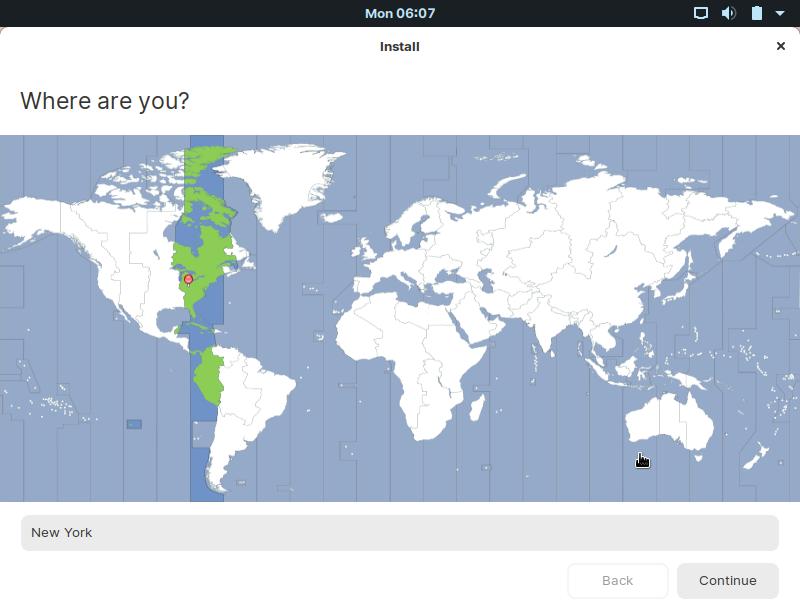
Next choose your location in the world map.
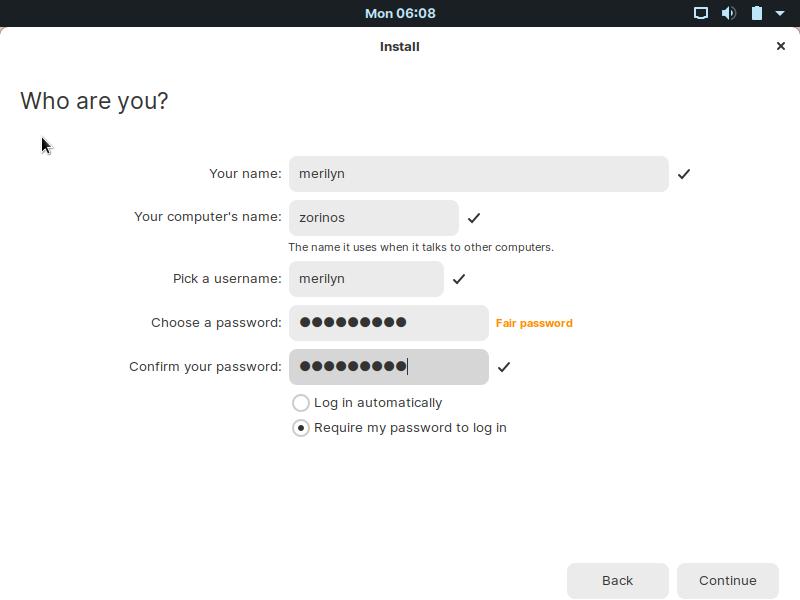
Create user account, setup computer name, etc.
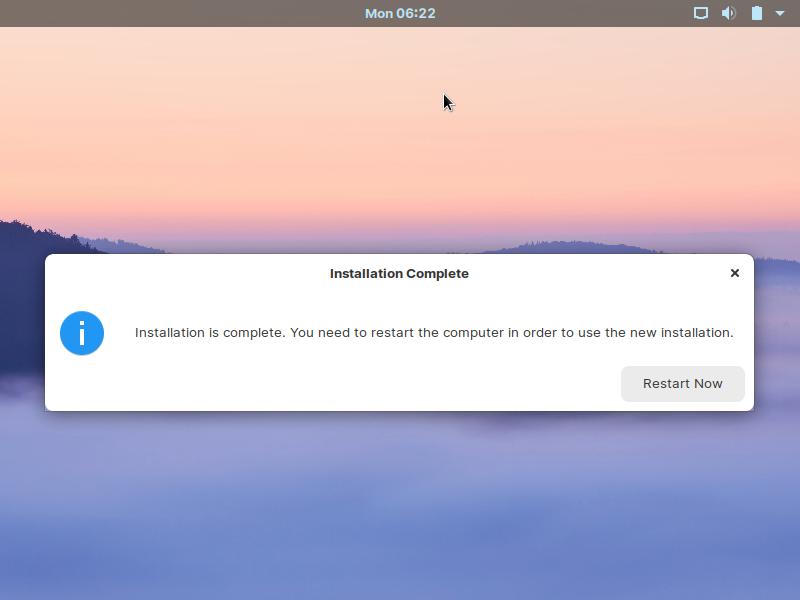
And wait for copying file system and installing process. When done, either click ‘Restart Now’ or just close the dialog to continue testing the live system.
Conclusion.
The installation process of Zorin OS is mostly same to Ubuntu, though there are few differences. For those using the system in public places, it’s recommended to encrypt the file system. And no one will be able to access your data.