This is a step by step screenshot guide shows how to install openSUSE Leap 15.5 using an USB stick.
openSUSE 15.5 was released a few days ago. It’s a non-feature release based on SUSE Linux Enterprise 15 Service Pack 5, with support until the end of 2024. It features Kernel 5.14.21, KDE Plasma 5.27, Python 3.11, and more. See the release note for details.
Step 1: Download openSUSE 15.5
Firstly, download the .iso image from its website via the link below.
Depends on the destination machine, select ‘x86_64‘ for modern PC and laptops, ‘aarch64‘ for Apple M1/M2, Raspberry Pi, etc, or other images accordingly.
And, this tutorial uses the x86_64 offline image for the guide.
Step 2: Verify ISO file integrity
After downloading the .iso file, also download the ‘Checksum’ file, which is available by clicking the down arrow icon ‘▾’ after Download button.
Then, you can run one of commands below to check the hash code of the file that you just downloaded:
- If you downloaded the file in a Linux system, run command:
sha256sum ~/Downloads/openSUSE-Leap-15.5-*.iso
- If you got it in a Windows PC, open ‘cmd’ and run command:
cd Downloads && certutil -hashfile openSUSE-Leap-15.5-DVD-x86_64-Build491.1-Media.iso SHA256
- For MacOS, check the hash code of downloaded file by running command:
shasum -a 256 ~/Downloads/openSUSE-Leap-15.5-*.iso
NOTE: In the commands above, replace file-name to yours! And replace ‘Downloads’ if you saved it in another location.
Once you got the hash code for local .iso file, open the ‘Checksum’ file and compare them. They must be same before continuing the following steps!
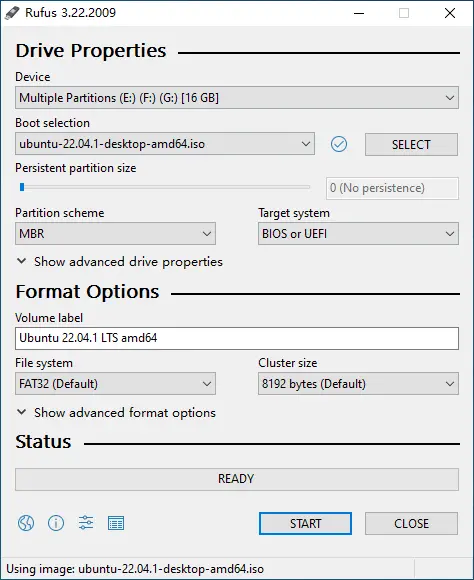
Step 3: Burn .iso file into USB as boot-able installer
There are quite a few tools for burning .iso file into USB, and I’ve written a tutorial about it. For USB stick with large storage, I’d recommend to use Ventoy.
For Windows, just download and use Rufus:
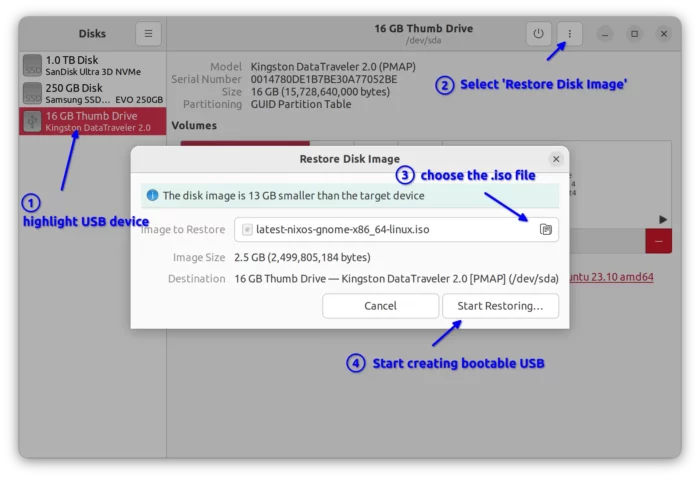
For Ubuntu, Fedora, and other Linux with GNOME, search for and open “GNOME Disks”. When it opens, highlight the USB device, and go to “⋮ -> Restore Disk Image”. Finally, choose the .iso file in pop-up dialog and click “Start Restoring”.
The screenshot was taken for NixOS, though it works for openSUSE too!
Step 4: Boot from the USB stick
Once you created the boot-able USB installer for openSUSE, plug it into the destination computer/laptop. And boot it!
Depends on your machine, you have to press ‘Esc’, ‘Del’, etc shortcut key while booting. So to get into UEFI menu or BIOS to choose which device to boot!
Once you successfully boot the USB, you’ll get into the menu looks like below:
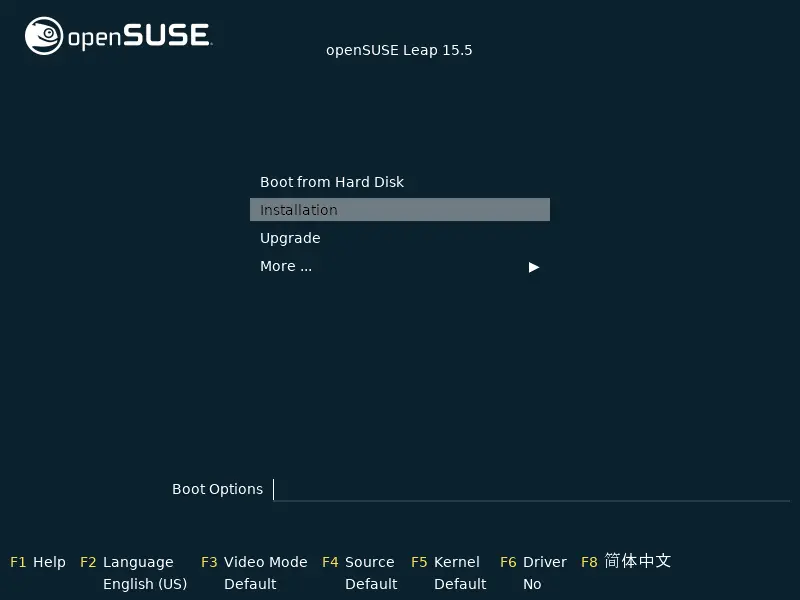
Just choose ‘Installation‘ hit Enter to boot into the installer wizard.
Step 5: Start installing openSUSE
Unlike Ubuntu, Fedora, etc, the installer does not support for trying out live system without installation.
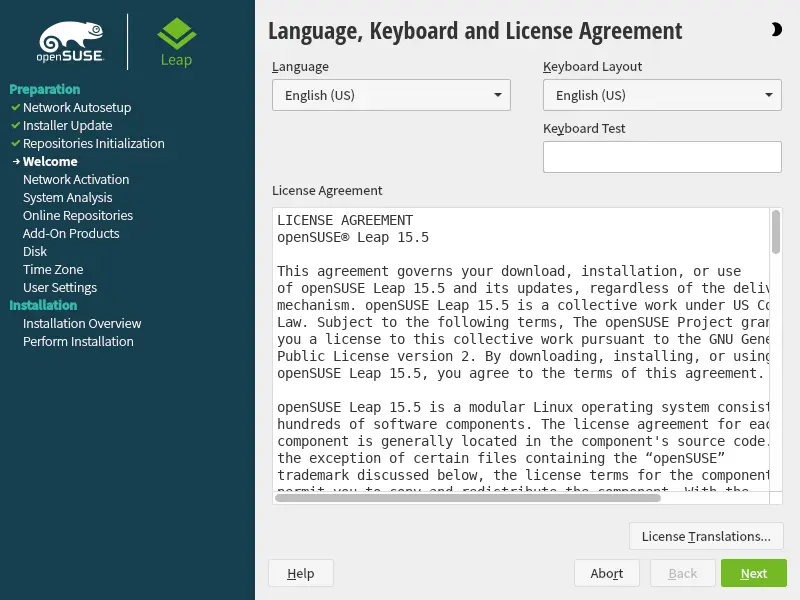
It boots directly into full-screen wizard, and automatically load drivers, detects your hardware, and setup first few things. This can take quite a few seconds depends on your hardware. Then, it goes into next screen, asking to choose language, keyboard layout, and accept license (automatically on clicking ‘Next’ button).
Setup network
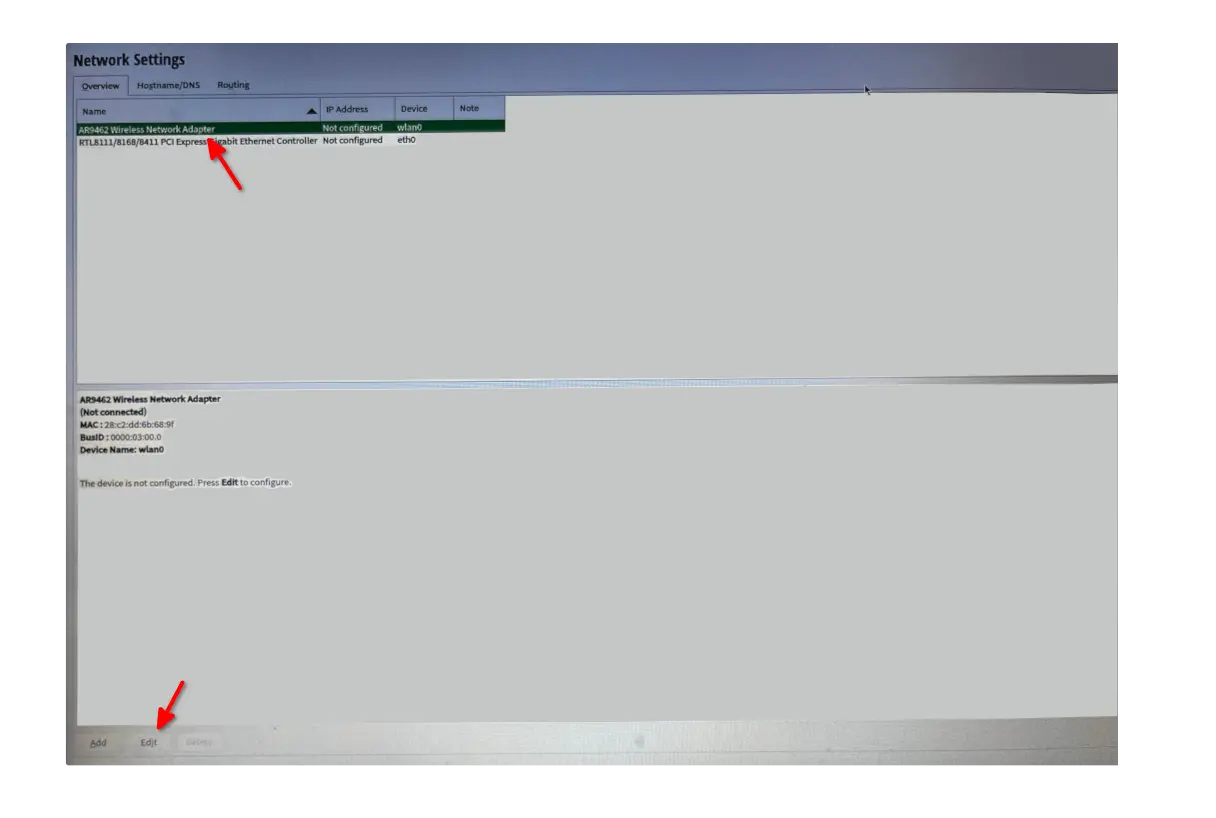
It automatically tries to connect to the network. If failed, then it will go into the next screen asks to configure network settings. Either, plug-in a network cable and click ‘Next’.
Or, just click “Next” to continue the wizard without internet connection. For laptop, who want to enable wireless connection, choose the wireless adapter from the list, and click ‘Edit’ button.
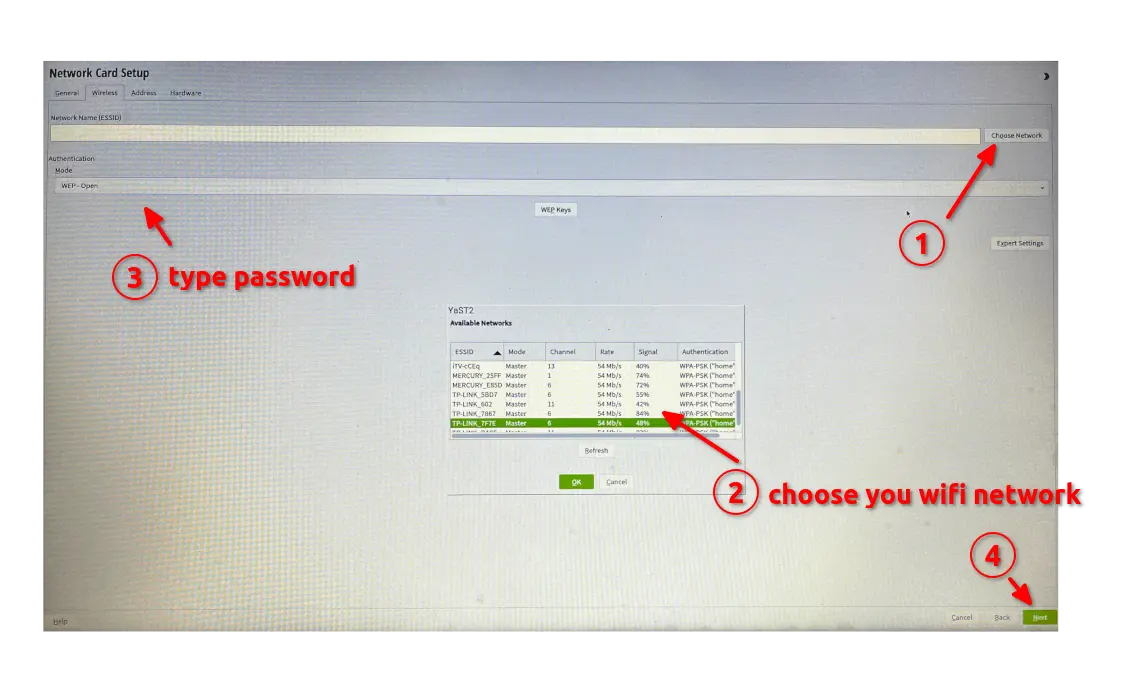
In next screen, go to ‘Wireless‘ tab. Click “Choose Network” button, and then choose to connect your Wi-Fi network. Type the password and finally click “Next”. Also, click “Next” again when go back the previous screen (see last screenshot).
Choose server, or which Desktop Environment to install
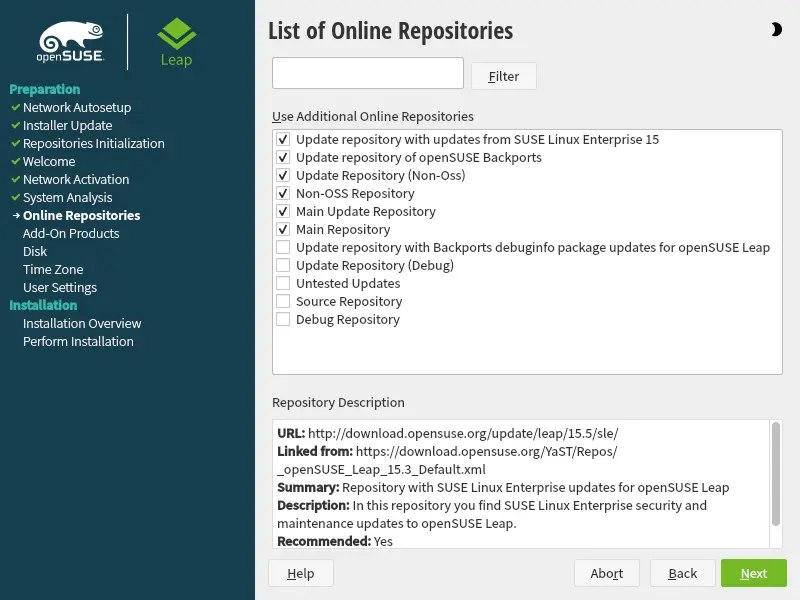
Next, the wizard will asks to either enable online repositories. Choose “Yes” or “No”, depends if you want to install updates, patches during the installation process.
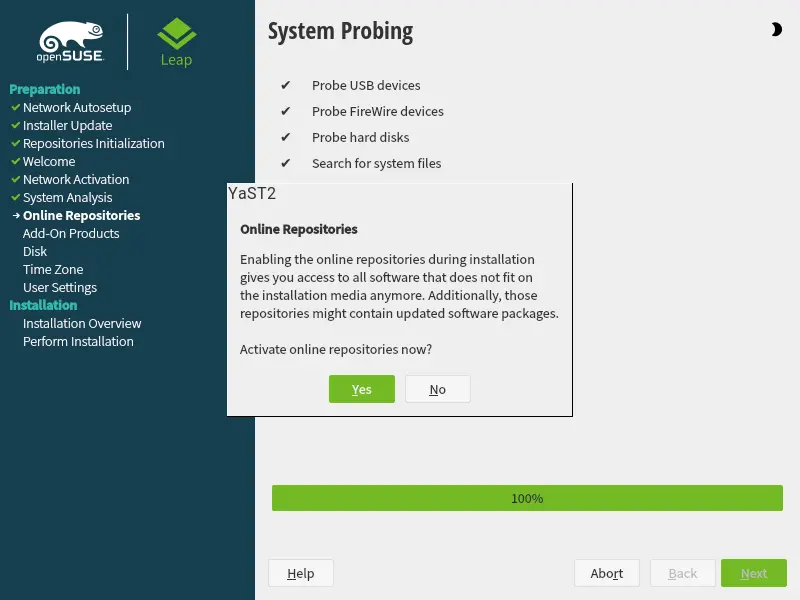
If you selected “Yes”, it then goes into next screen, asking to choose which repositories to enable. Default ones are usually OK. But if you want, enable more or disable anyone as you want.
Next, it will asks which desktop environment to install. There you can choose one of below DEs/Servers:
- KDE Plamsa
- GNOME
- XFCE
- Generic Desktop (IceWM)
- Server
- Transactional Server.

Create file-system partitions
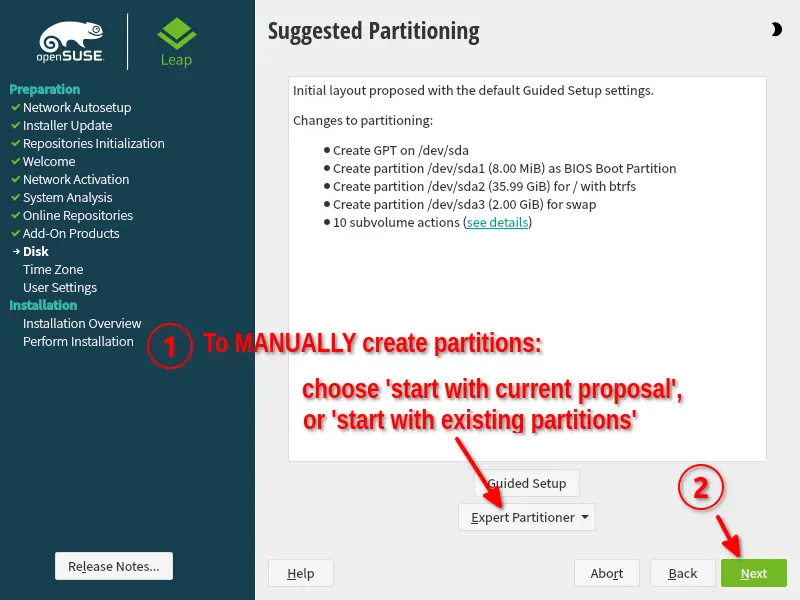
The installer wizard provides “Suggested Partitioning“, for where to install the boot-loader, file-system, and swap.
- For brand new HDD/SSD, or empty disk, it will take use the WHOLE disk space.
- Or, it takes all the free space, if available.
- IMPORTANT: Delete an existing partition, and re-create for openSUSE, when there’s no enough free space. You data will be lost!!!
If you’re OK with “Suggested Partitioning”, just click “Next” button to continue.
If you want to modify the “Suggested Partitioning”, select “Start with Current Proposal” from the Expert Partitioner drop-down and finally click “Next”.
Or, to MANUALLY create partitions, choose ‘Start with Existing Partitions’ from the Expert Partitioner drop-down.
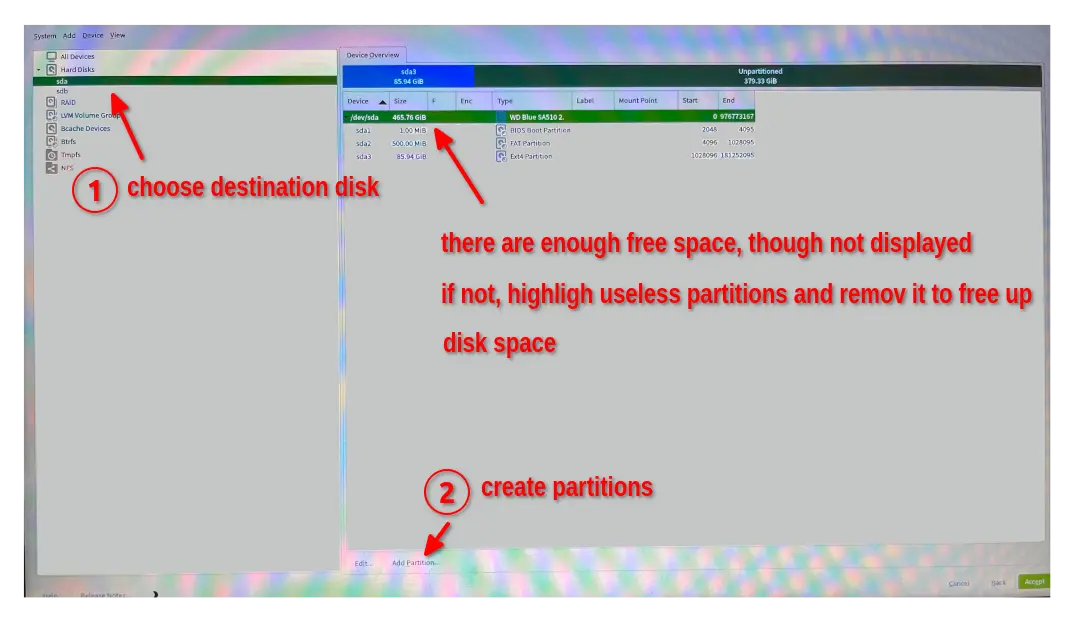
If you selected to modify or manually create partitions, then it will go to the partition table once you click “Next”. In the screen below:
- Choose the destination disk from left pane.
- Try click “Add Partition” button to create a partition.
- If no enough free space, choose an existing partition and click “Delete“.
BE CAREFUL when deleting partitions! Don’t touch those that you don’t know what they are. And, back up things first!!!
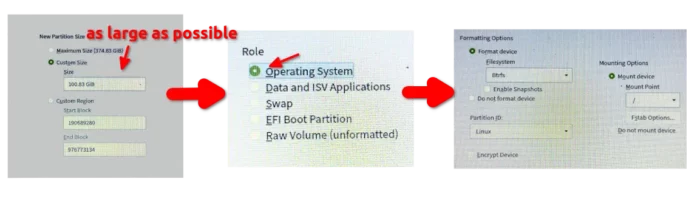
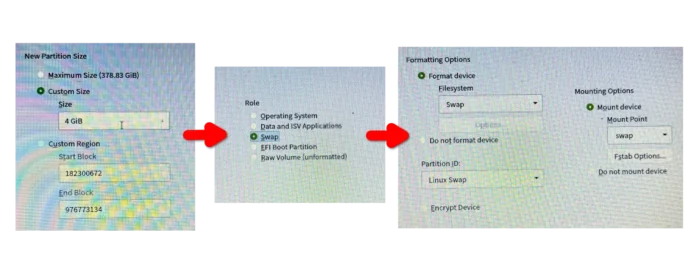
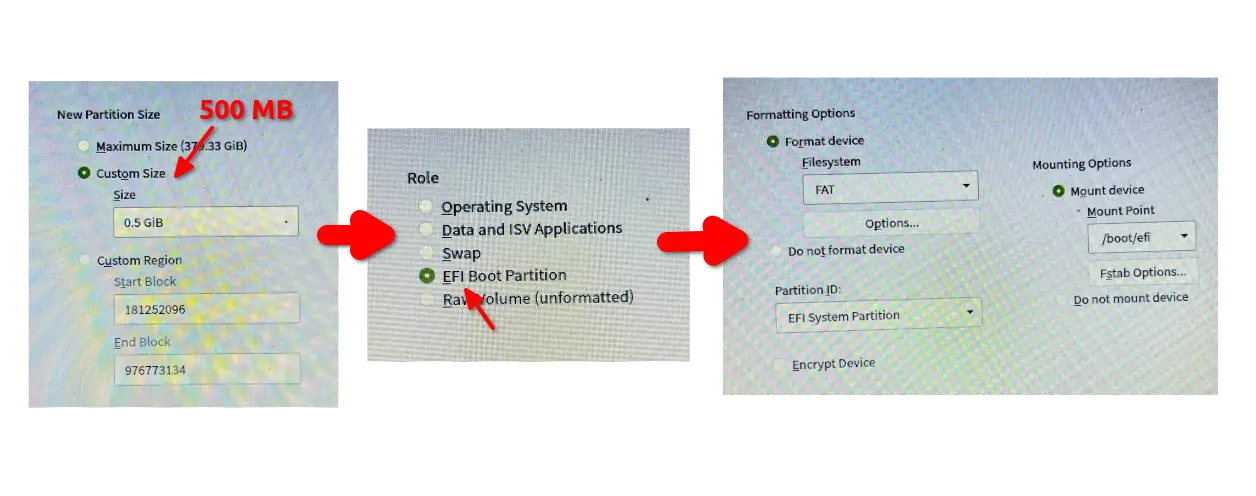
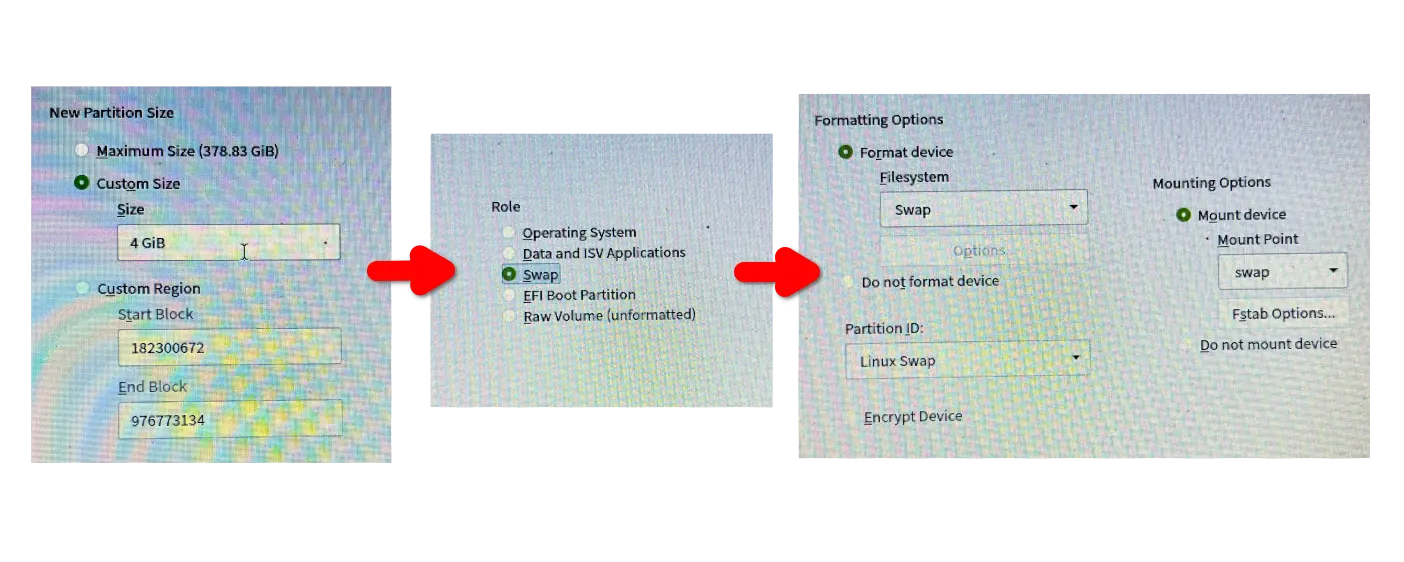
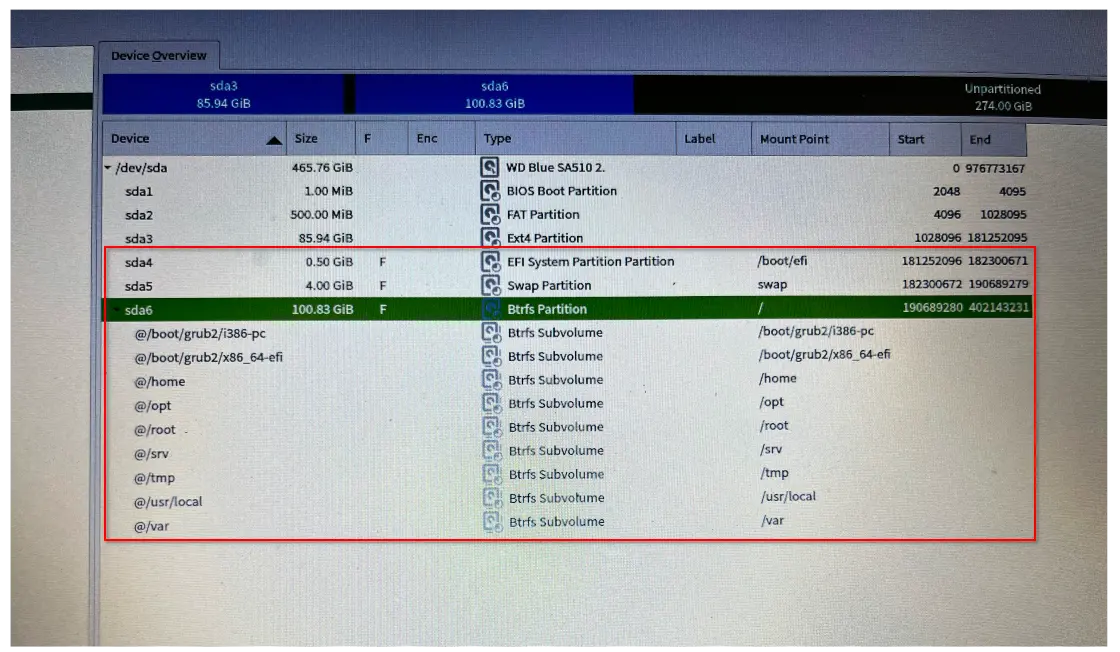
And, to MANUALLY create partitions for openSUSE, you need to create 3 partitions:
- EFI boot partition (or 8 MB ‘BIOS Boot’ for old PC without UEFI), 500 MB, FAT file-system, mount at /boot/efi.
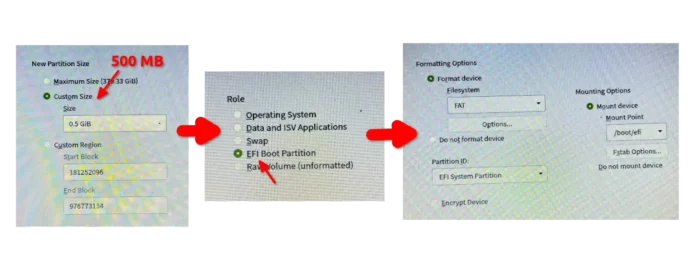
- Root (Operating System), as large as possible for long time use, Btrfs or Ext4, mount at ‘/’.
- Swap area (Optional). As large as RAM for hibernation, or half large as RAM for normal use.

After creating the 3 (or 2) partitions, your disk partition table will look like below. In my case, the ‘sda4’, ‘sda5’, ‘sda6’ are for openSUSE, and ‘sda2’, ‘sda3’ are for another dual-boot system (Ubuntu).
After creating/modifying partitions, click “Accept” and confirm.
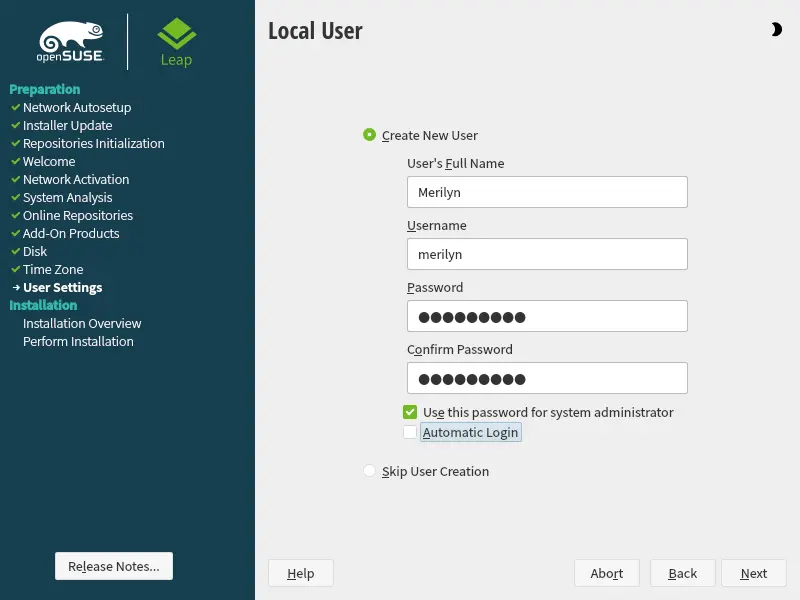
Select Time Zone, and create user account
Next, select your time zone from world map. And, type a user-name and password to create user account.
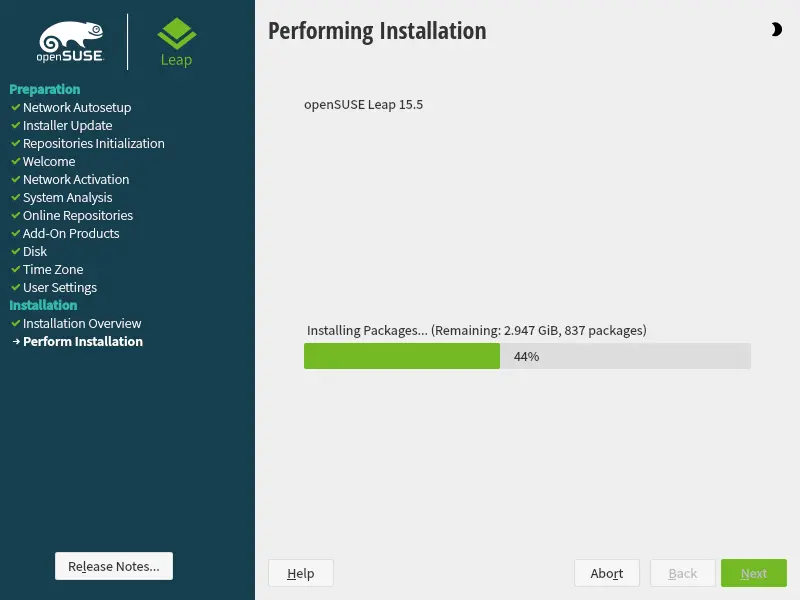
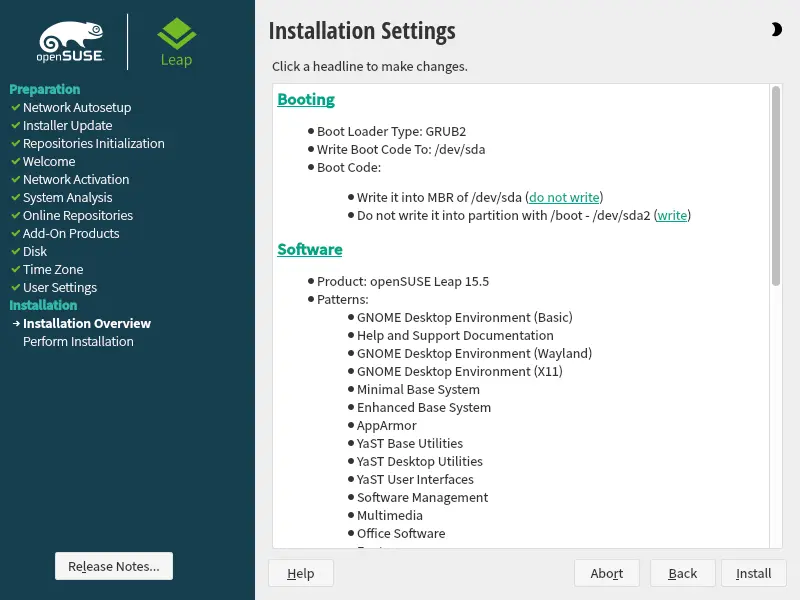
When done, it shows a summary overview for the things you just did. If OK, click “Install” button to start installing the system!
The process can take quite a few minutes depends on your machine. And, if everything’s done successfully, it automatically reboot into the new openSUSE system.