

For personal computers and public access terminals, you can set Linux to login automatically since typing user password may be meaningless. Here’s how to enable this function in GNOME desktop based Linux, such as Ubuntu, Fedora workstation, Debian and Arch Linux, etc.
NOTE: this tutorial only works for GNOME's default 'GDM' display manger. And, here are two methods:
- using Gnome control center.
- or edit the configuration file via command line.
Method 1: Enable Automatic Login via Gnome Settings:
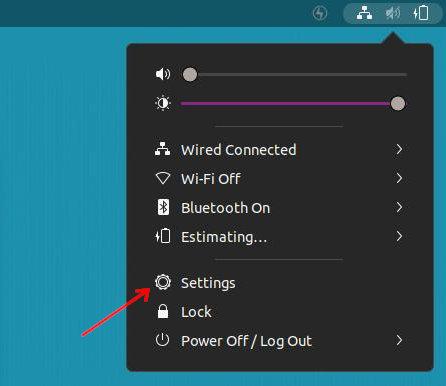
Firstly, you need to open the System Settings by clicking on top-right corner system tray menu and choose “Settings”. You may alternatively press Windows key on keyboard, search for and open ‘Settings’ in overview.
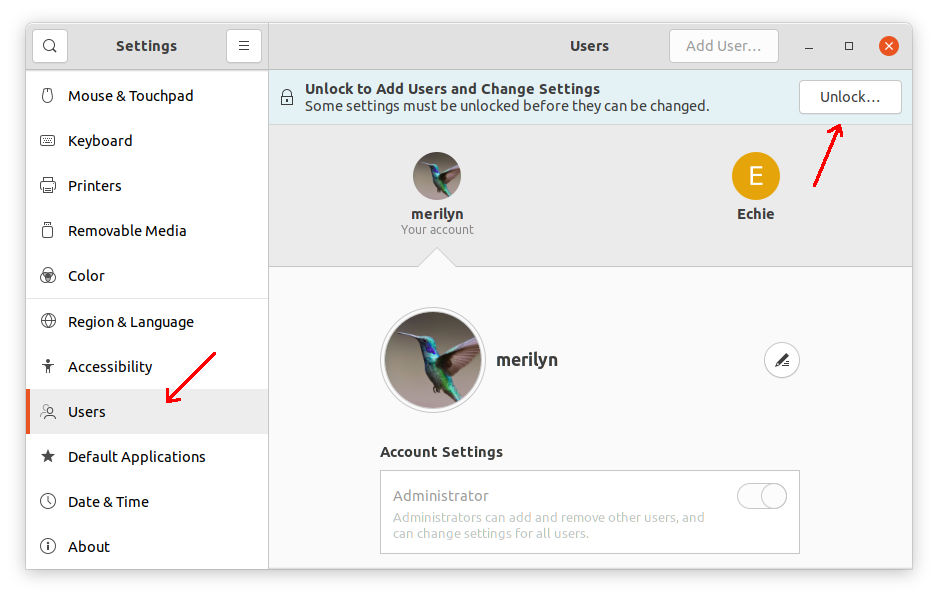
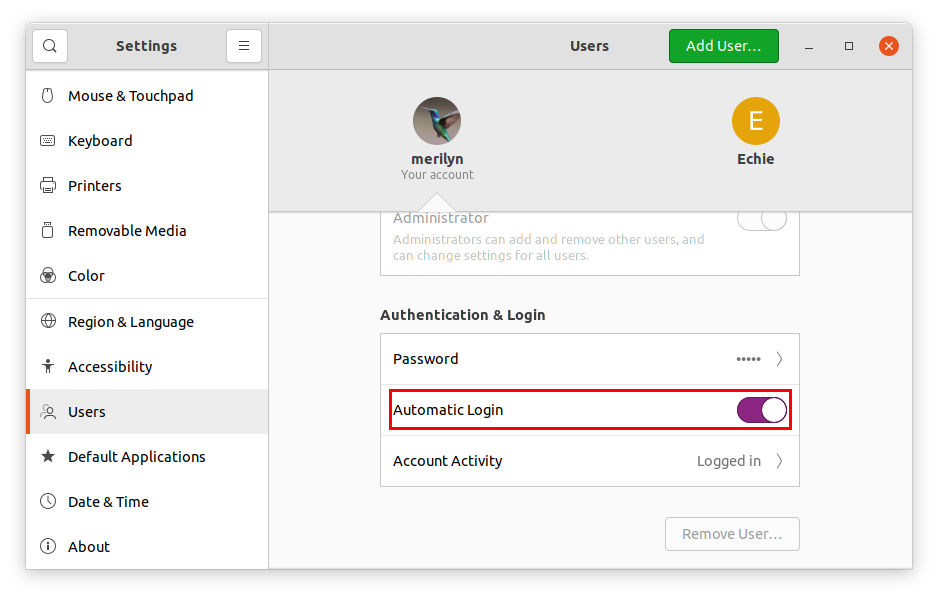
When it opens, navigate to Users from the left pane. Then you need to click the “Unlock…” button in the top-right to authenticate before you’re able to do any change.
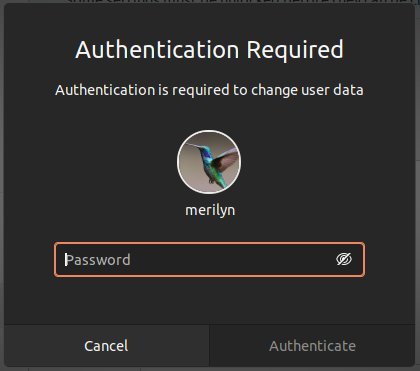
Next, it will pop up an authentication window prompts you to type user password to get pass. If you’re doing this in a Standard user session (non-administrator), it will ask for an Administrator account password instead.
Finally, choose any account by clicking on its icon from the list. Scroll down and turn on the “Automatic Login” slider icon. After that, Ubuntu will log into that account automatically in next boot.
For computer with multiple user accounts, without disable automatic login, you can switch accounts temporarily either using the “Switch User” option in Power Off menu or just log out and choose log in with another account.
Method 2: Enable Automatic Login by Editing Configuration File:
If you have no access to the GNOME desktop, such as remote SSH with command line. Or, you want to set time delay before login automatically. This method may help by changing the configuration file.
1.) Firstly, open “terminal” by searching it from Activities overview or connect to the system from command console.

2.) Next, run command to edit the “/etc/gdm3/custom.conf” file:
sudo nano /etc/gdm3/custom.conf
NOTE: The configuration file varies on different Linux distributions. For Fedora 35, it's "/etc/gdm/custom.conf". And Debian 11 has the file at "/etc/gdm3/daemon.conf"
When the file opens in text editor (you may replace nano with your favorite editor), do below steps for your choice.
Option a.) Enable Automatic Login with no delay:
Under “[daemon]” section, add (or un-comment by removing # at the beginning) following lines:
AutomaticLoginEnable = true
AutomaticLogin = USER_NAME
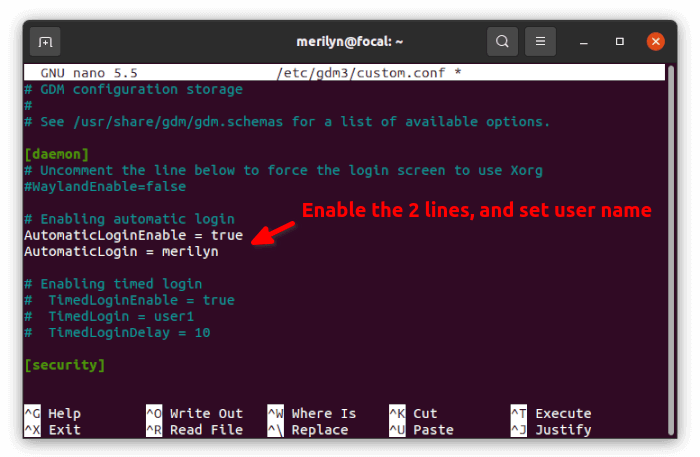
Don’t even know usernames? Run ls /home in terminal to get them. Finally, press Ctrl+X, type y and hit Enter to save change.
Option b.) Automatic Login with a few seconds delay:
In case you want to select another user from the login screen, you may enable timed login. So GNOME will start login automatically when inactivity after a specified time.
To do so, first disable (adding # at the beginning) the 2 lines in “Option a.” if enabled. Then add (or un-comment) the lines below, set username and time delay in seconds.
TimedLoginEnable = true
TimedLogin = USER_NAME
TimedLoginDelay = 10
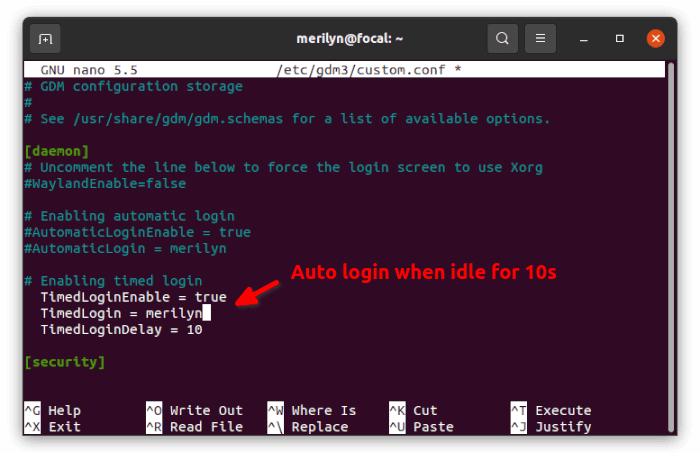
Press Ctrl+X, type y and hit Enter to save change. And, it will function in the next time you boot the Linux system.
Fix “Unlock Login Keyring” issue:
After enabled automatic login, Ubuntu may popup a dialog to ask for “Unlock Login Keyring” at login. You need to type user password until being able to use the system.
Authentication required
The login keyring did not get unlocked when you logged into your computer
This happened in my Ubuntu 20.04 machine but not in Ubuntu 21.10 somehow. To workaround the issue, do the steps below one by one.
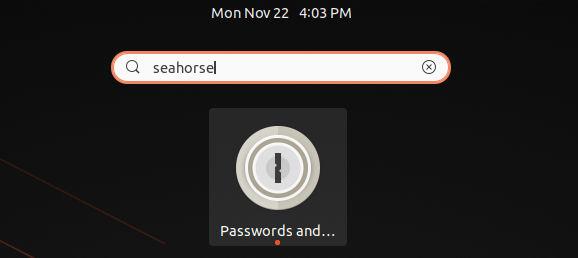
1.) Firstly, press Ctrl+Alt+T on keyboard to open terminal. When it opens, run command to install ‘seahorse’, GNOME front end for GnuPG.
sudo apt install seahorse
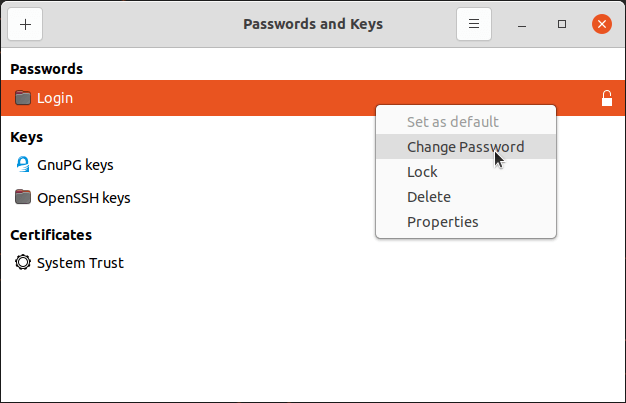
2.) Next, search for and open ‘seahorse’ from Activities overview screen. It will display as ‘Passwords and Keys’ in search result.
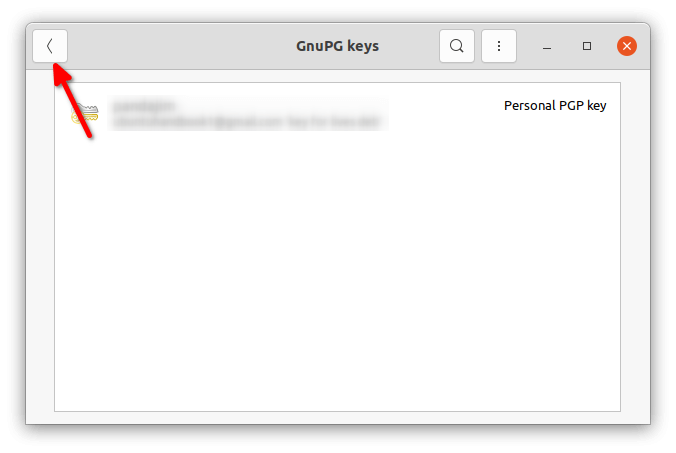
3.) When the app opens, it starts to the GPG key management page if nay. Navigate back to the main page via top-bar arrow button.
4.) Then, right-click on “Login” and select ‘Change Password’ option.
Type your user password for authentication, and finally set EMPTY (leave blank) when it prompts to set new password. That’s all.
NOTE: this will ONLY change the password for GnuPG Login keyring. Your user password will leave unchanged.