

For those who find clicking the mouse difficult, the default GNOME desktop in Ubuntu, Fedora, Debian and other Linux has the ability to simulate automatic mouse clicking. Here’s how to enable it in 3 different ways.
NOTE: this tutorial is tested and works in Ubuntu 20.04, 22.04, Fedora 38 and Debian 11. It should also works on all other Linux with Gnome Desktop.
Method 1: Enable Hover Click via Gnome Settings.
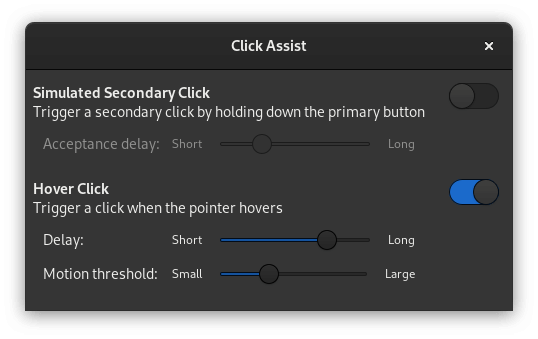
Gnome Settings (aka, Gnome Control Center) has a click assist option “Hover Click” (aka, Dwell click). With it, your system will do mouse click automatically when the cursor stop moving after a certain short time period.
Firstly, open ‘Settings’ from top-right corner system tray menu.
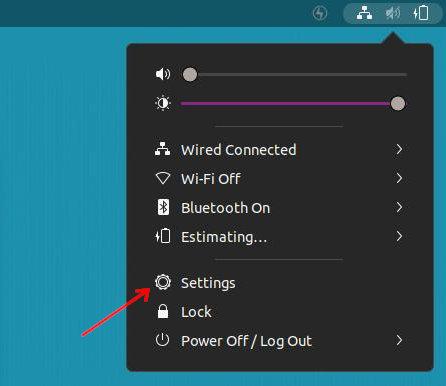
When it opens, go to “Accessibility” (Universal Access for Ubuntu 20.04) from left pane. Then click on ‘Click Assist’ option in the right.
NOTE: For Ubuntu 23.04/Fedora 38, the option become ‘Hover Click’ under ‘Pointing & Clicking’.

In next dialog, turn on “Hover Click” and configure the delay and motion threshold.
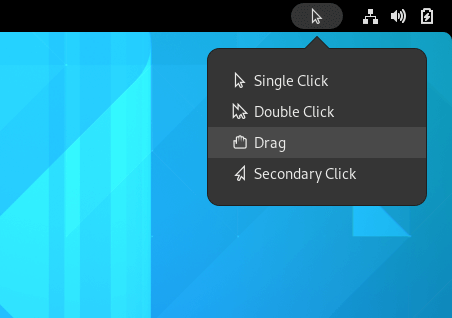
By default, it will do single left click when stop moving cursor after the delay. An indicator applet in system tray provides menu options to do double-click, drag, and right-click (secondary click). However, it automatically go back to single click after doing double-click, right-click or drag for one time.
As you see in picture, there’s another option “Simulated Secondary Click” in Click Assist dialog. With it enabled, it will do a second click automatically after first click done with certain delay.
After all, move your mouse. An orange circle will appear around the cursor when it stops, indicates that a click is about to be performed.
Sadly, the orange circle only apply in my Ubuntu 20.04, but not in Linux running as VirtualBox VM.

Method 2: Make mouse click automatically via gestures (Dconf Editor)
The previous method is well enough! Though, a ‘gesture‘ mode is available to do different mouse click actions via gestures.
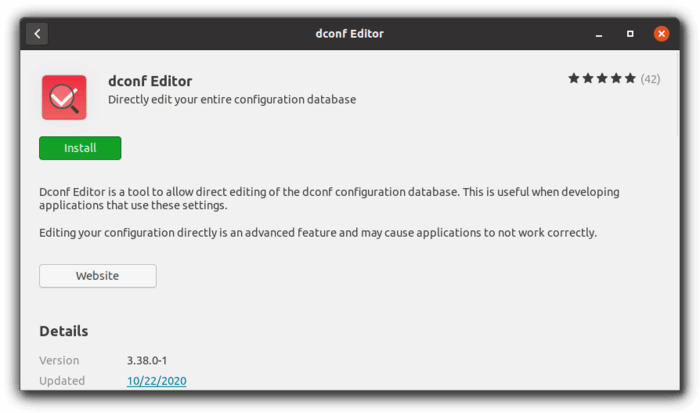
Firstly, search for and install ‘Dconf Editor‘ in Ubuntu Software (or Gnome Software):
Secondly, search for and open the tool from ‘Activities’ overview screen. When it opens, navigate to ‘org/gnome/desktop/a11y/mouse‘.
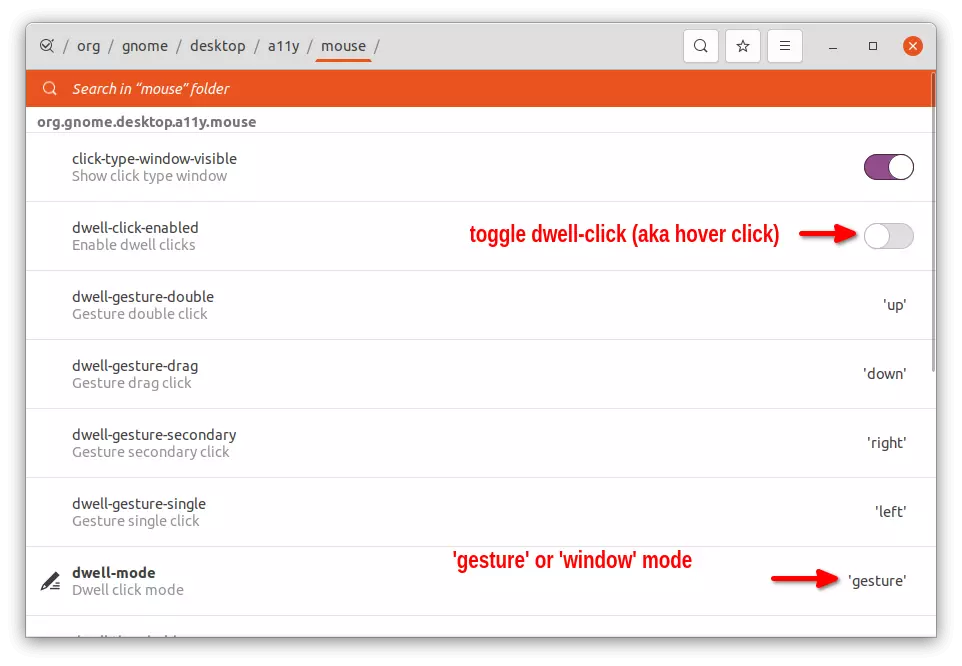
There are some key values to control the ‘Hover click‘ (aka, Dwell Click) feature:
- Toggle ‘dwell-click-enabled’ to enable or disable the feature.
- The default ‘window‘ mode for ‘dwell-mode’ do the same thing as GNOME control center do (see method 1).
- When set ‘dwell-mode’ to ‘gesture‘. The orange circle count down appears twice! When the mouse stop moving, the cursor turns into a plus icon (“➕“) after first delay time. Before it goes back normal pointer icon, move the cursor up, down, right, or left will do different click actions in the previous pointer location. By default, the gesture directions will do:
- move left to right-click.
- right to left-click.
- down to double-click.
- up to drag.
There are also options to re-assign actions to the mouse move gestures, configure click time and toggle secondary click.

Method 3: Use gsettings to do previous tasks in command line:
For those familiar with Linux commands, all the previous tasks can be done via gsettings command. And, this step is useful for those want to enable ‘Hover Click’ in login screen.
NOTE: add ‘xhost SI:localuser:gdm && sudo -u gdm‘ in the beginning of the following commands will do the job for GDM login screen. For example, enable ‘Hover Click’ for GDM via command:
xhost SI:localuser:gdm && sudo -u gdm gsettings set org.gnome.desktop.a11y.mouse dwell-click-enabled true
1. To enable ‘Hover Click’ (aka Dwell Click) feature, run command in terminal:
gsettings set org.gnome.desktop.a11y.mouse dwell-click-enabled true
2. Set the Dwell mode via command (‘window’ or ‘gesture’, here set to ‘gesture’):
gsettings set org.gnome.desktop.a11y.mouse dwell-mode 'gesture'
3. Change dwell threshold via command (default 10):
gsettings set org.gnome.desktop.a11y.mouse dwell-threshold 12
4. Set the default time delay before triggering automatic click (in seconds):
gsettings set org.gnome.desktop.a11y.mouse dwell-time 0.8
5. Enable secondary click via command:
gsettings set org.gnome.desktop.a11y.mouse secondary-click-enabled true
To undo the previous commands, simply remove the key values in the end and replace ‘set‘ with ‘reset‘. For example, reset ‘dwell-click-enabled’ to disable the feature via command:
gsettings reset org.gnome.desktop.a11y.mouse dwell-click-enabled
That’s all. Enjoy!
Summary:
This tutorial shows how to enable ‘Hover Click’ (Dwell click) to make mouse click automatically for those who find moving and clicking the mouse difficult at the same time.
Options in Gnome Settings is well enough, though ‘dconf editor’ provides more settings such as ‘gesture‘ mode. And the gsettings command is useful for enabling automatic mouse clicking in login screen.