Want to login your user account automatically in your Linux PC / laptop? Here’s how to do the trick in the most popular Linux Distributions.
This tutorial is tested and works in Ubuntu, KUbuntu, LUbuntu, XUbuntu, Ubuntu MATE, Ubuntu Studio, Linux Lite, Linux Mint, Manjaro KDE, Rocky Linux, Fedora Workstation, Debian, Kali Linux, Pop! OS, and Zorin OS.
Tell which display manager your Linux is using
The automatic login function is handled by the display manager service in Linux. They include GDM, LightDM, SDDM, and more.
Each Linux distro has a certain default display manager. In case you have tried out different desktop environments, it can be replaced by another one.
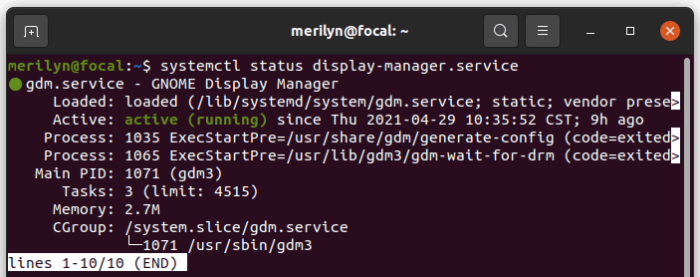
To verify current display manager in use, open “terminal” and run command:
systemctl status display-manager.service
Enable Automatic Login for GDM (Ubuntu, Fedora & other Linux with GNOME)
This step is for the Gnome Display Manager (GDM), that is default in Ubuntu, Fedora Workstation, and other Linux with GNOME, such as Debian, Arch, Manjaro, Rocky Linux, as well as Zorin OS, Pop! OS.
Option 1: Use Gnome Control Center
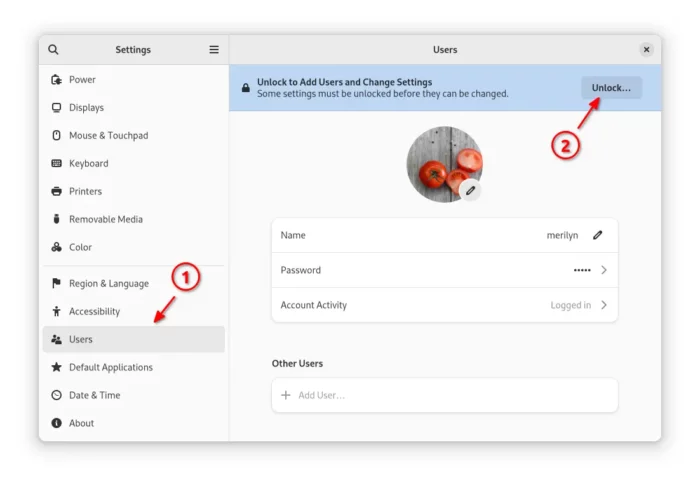
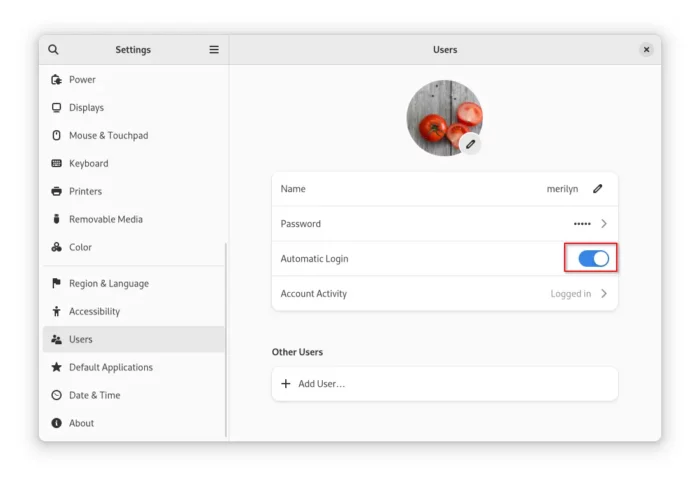
The “Settings” (aka Gnome Control Center) has an option to do the job. Firstly, open it from the top-left system tray menu.
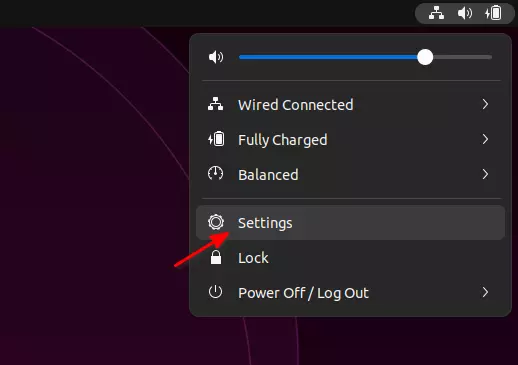
Then, navigate to “Users” in the left, and click “Unlock” button to unlock the settings. It will asks you to type user password for authentication.
After that, select a user (if you have more than one accounts) and use the ON/OFF switch to enable automatic login.
Option 2: Edit the config file
In case something is broken or you just want to do the trick from command line, this can be done by editing the config file.
1. First, search for and open terminal either from start menu or ‘Activities’ overview.
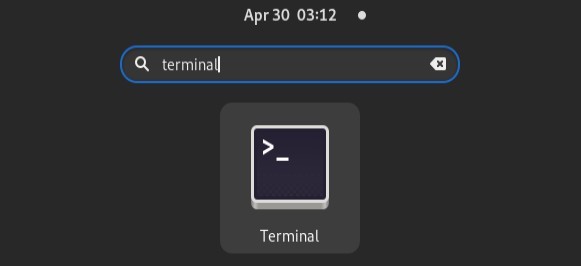
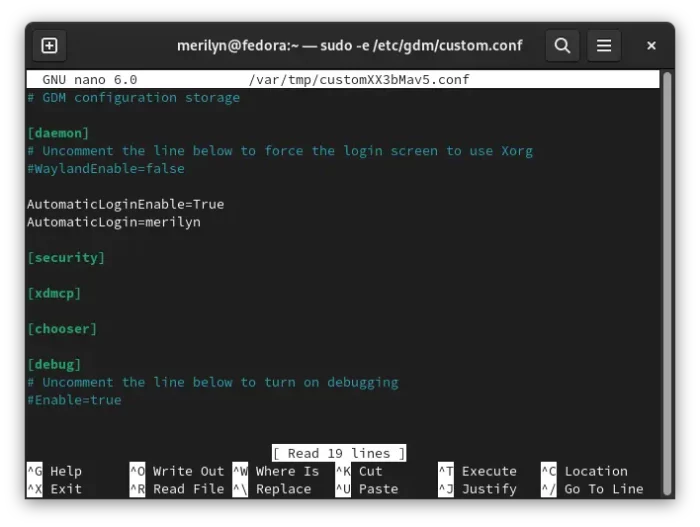
2. When terminal opens, run command to edit the config file:
sudo -e /etc/gdm/custom.conf
The file is /etc/gdm3/custom.conf in some Linux, such as Ubuntu. Replace it accordingly.
Replace-ewith your favorite editor, e.g.,geditorgnome-text-editor
3. Once the file opens, either add or un-comment (remove # at beginning) the lines below under “[daemon]”
AutomaticLoginEnable=True
AutomaticLogin=USER_NAME_HERE
After that, save changes by hitting Ctrl+X on keyboard, then type y and hit Enter.
If you want to auto login with a certain time delay, use following lines instead (10 seconds in the case):
TimedLoginEnable=True
TimedLogin=USER_NAME_HERE
TimedLoginDelay=10
Enable Automatic Login for SDDM (LUbuntu, KUbuntu, Ubuntu Studio & other Linux with KDE)
This step works for Simple Desktop Display Manager (SDDM), that is commonly used in LXQt, KDE Plasma 5. Meaning, you can try this step in KUbuntu, Ubuntu Studio, LUbuntu, and KDE version of Manjaro, Debian, Fedora, Rocky Linux.
Option 1: Use KDE Plasma Settings
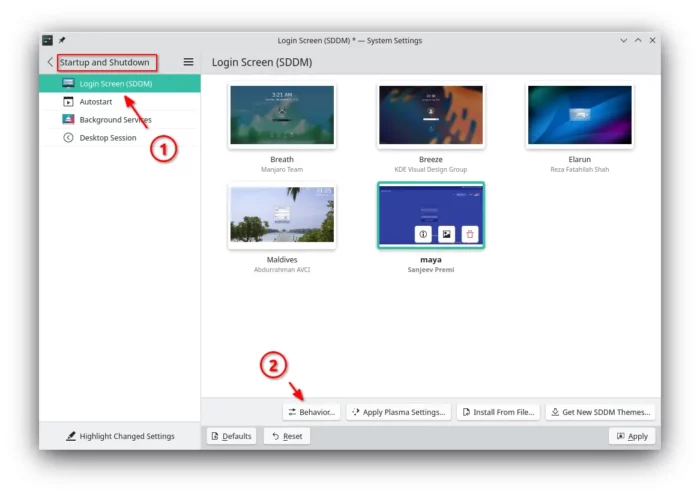
For KDE Plasma desktop users, simply search for and open “System Settings” from start menu. Then navigate to Startup and Shutdown -> Login Screen (SDDM). Finally, click on the bottom “Behavior” button to open the configure dialog.
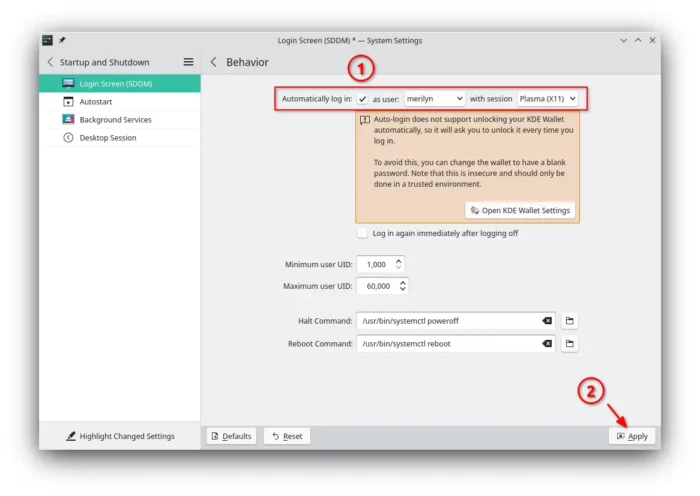
In next screen, tick on “Automatically log in”, choose a username and session. And, finally click on bottom right “Apply” button.
Option 2: Edit the config file
I didn’t find the graphical configure option in LXQt desktop. However, editing the configuration file works in all Linux using SDDM display manager.
1. First, search for and open terminal from system start menu. When it opens, run command to edit the config file:
- In case the config folder does not exist, create via:
sudo mkdir -p /etc/sddm.conf.d/
- Then run command to edit the file:
sudo -e /etc/sddm.conf.d/kde_settings.conf
The name "kde_settings" does not matter, you can however change it to whatever you want
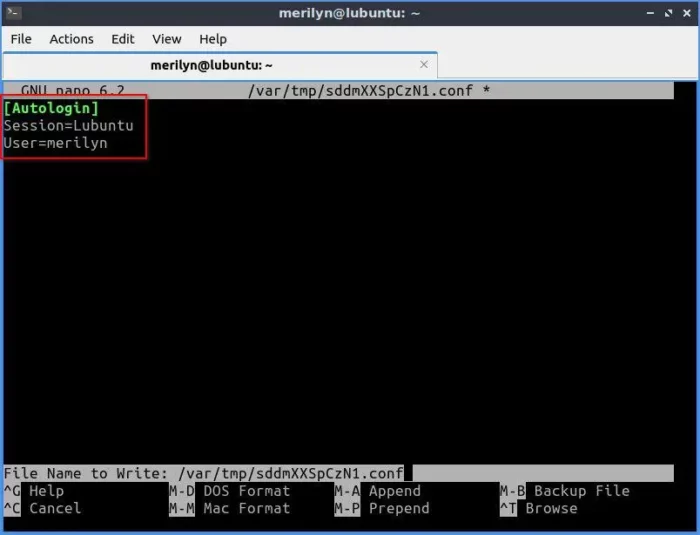
2. The file could be empty if you never configured SDDM, so either edit or add following lines:
[Autologin]
Session=SESSION_NAME
User=USER_NAME
The SESSION_NAME can be plasma for KDE Plasma, or Lubuntu for LUbuntu. For other Linux, run command echo $DESKTOP_SESSION to get it (case sensitive).
Also, save changes by hitting Ctrl +X, then type y and hit Enter.
Enable Automatic Login for LightDM (Linux Mint, XUbuntu, Kali Linux, Linux Lite, etc.)
Light Display Manager (LightDM) is mostly default in XFCE, Cinnamon, MATE desktops. Meaning, you can do this step in Ubuntu MATE, Linux Mint, Kali Linux, and XFCE edition of Fedora, Debian, Rocky Linux.
Option 1: for Linux Mint
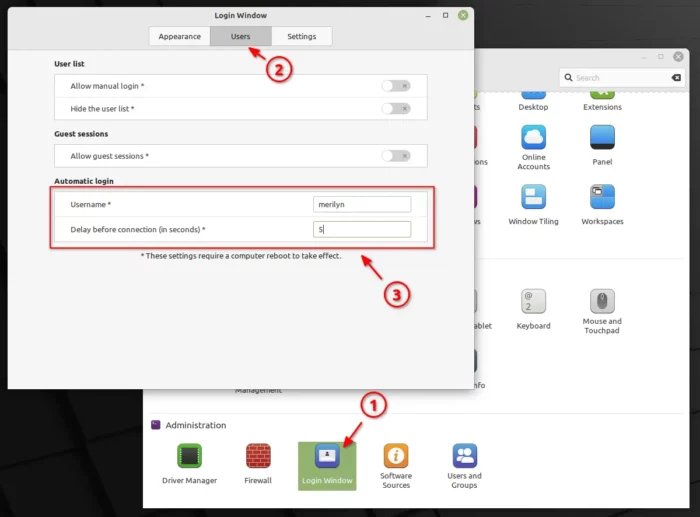
Linux Mint users can first open “System Settings” from start menu, then open the “Login Window” settings dialog under Administration. Type user password when it asks and hit Enter.
Finally, navigate to ‘Users‘ tab in the pop-up dialog and type username and set a delay if you want to enable automatic login.
Option 2: for Linux Lite
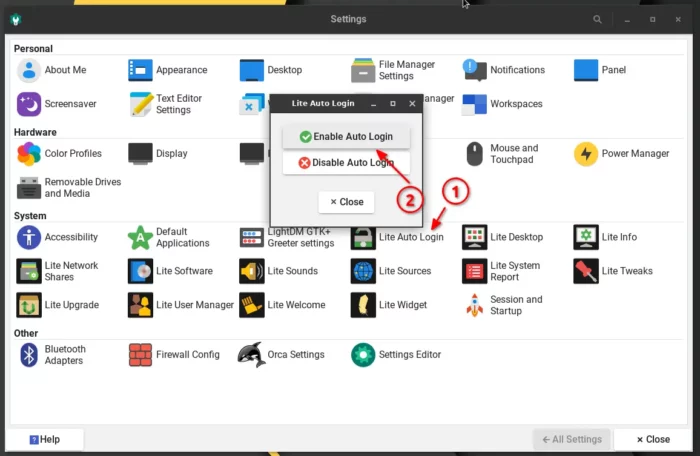
Linux Lite users can first search for and open “Settings” from start menu. When it opens, click “Lite Auto Login“, then enable the feature in next dialog. Also, you need to type password for authentication.
Option 3: Edit lightdm config file
I can’t find the graphical options for other Linux that uses LightDM display manager. User can edit the config file to do the trick.
1. First, open terminal and run command to edit the file:
sudo -e /etc/lightdm/lightdm.conf
2. The file can be either empty or full of lines. So, either add following lines or edit accordingly:
[SeatDefaults]
autologin-user=USER_NAME_HERE
autologin-user-timeout=0
Some Linux has the rules under [Seat*] session, such as Kali Linux. And, you may specify session by adding autologin-session=, and get current session name via echo $DESKTOP_SESSION.
Finally, press Ctrl+X, then type y and hit Enter to save change.
Final words
Most Linux Distros that I’ve tried use one of the 3 display managers: GDM, SDDM and LightDM. And, all of them has config file options to enable automatic login.
If your system is not included in this tutorial, feel free to leave a comment here.










Recent Comments