

This is a step by step guide shows how to install the next Python 3.14 (so far in Beta3 development stage) in Debian 12 stable, and create virtual environment with it for your project.
Python 3.14 is the next major release of the popular programming language that’s scheduled to be released on October 07, 2025. If you want to try out the new features or test your app compatibility, then here’s how to install it in Debian.
NOTE: This tutorial is tested on works in Debian 12 Bookworm! Not only for Python 3.14, you may follow this tutorial to install Python 3.13, 3.12 or other versions!
Step 1: Download Python 3.14
The official source tarball is available to download at Python website via the link below:
At the moment of writing, the latest is “Python-3.14.0rc1.tar.xz“. As time goes on, there’ll be rc2, rc3, and even newer versions (e.g., 3.14.1, 3.14.2). In the case go to this page for the tarball.
After downloaded the tarball, decompress it, then right-click on source folder and select “Open in Terminal” (or “Open Terminal Here” depends on DE) to open a terminal window with the source folder as working directory.

If you’re on Debian Server or you want to download the source from command line, then use command:
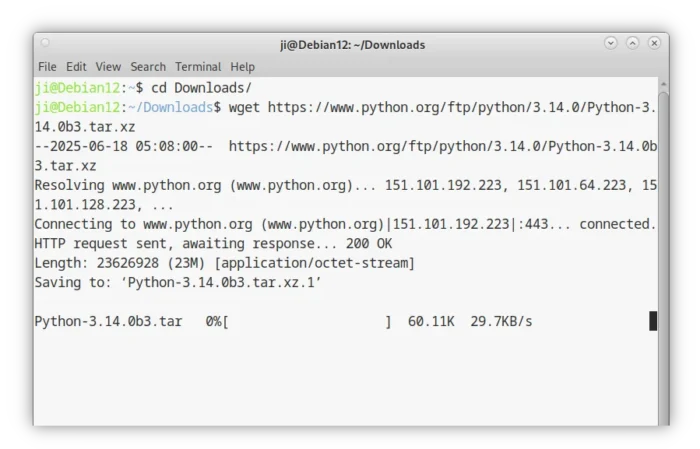
- First, navigate to Downloads folder (optional):
cd ~/Downloads
- Then, use
wgettool (install viasudo apt install wget) to download the source tarball:wget https://www.python.org/ftp/python/3.14.0/Python-3.14.0rc1.tar.xz
This command will download the 3.14.0 rc1, you may replace the link for other versions.
Download Python 3.14 b3 from CLI - Once downloaded the tarball, run command to decompress, then navigate to source folder (also replace version number accordingly).
tar -Jxf Python-3.14.0rc1.tar.xz && cd Python-3.14.0rc1
Step 2: Build & Install Python 3.14
After downloaded the source and open source folder in terminal window, you may then run the commands below one by one to compile and install Python in your system.
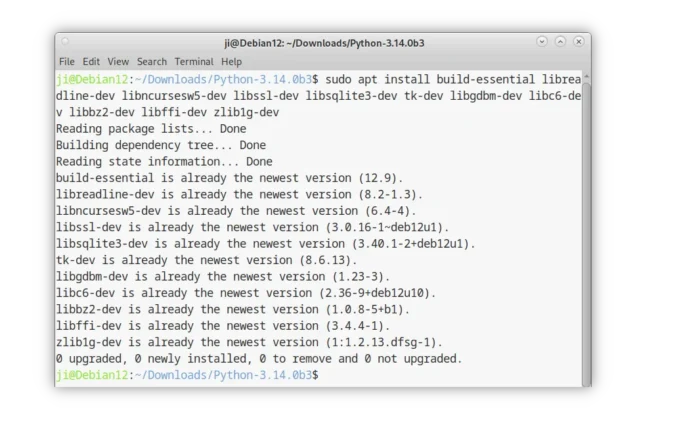
First, install build dependencies by running command:
sudo apt install build-essential libreadline-dev libncursesw5-dev libssl-dev libsqlite3-dev tk-dev libgdbm-dev libc6-dev libbz2-dev libffi-dev zlib1g-dev
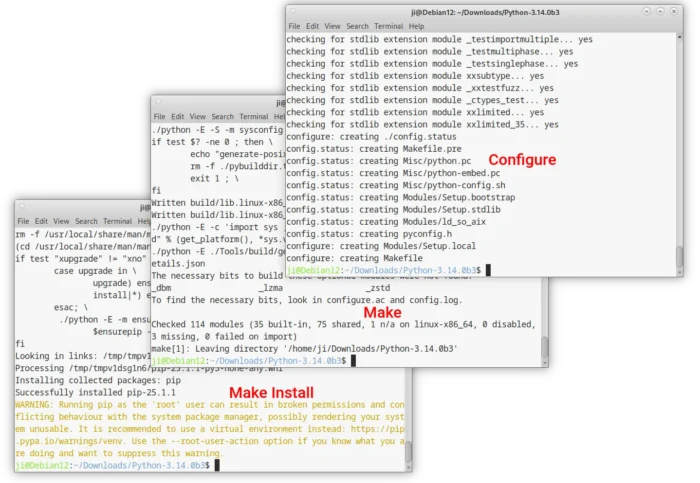
Next, configure the source:
./configure --enable-optimizations
Usually, I use --enable-optimizations option for expensive stable optimizations. You may run ./configure --help to see all available configure options, then configure with your custom choices.
Then, build if configure is done without error:
make -j4
Here -j4 means to start 4 threads in parallel. Depends on how many CPU cores you have, you may replace it with -j8 or -j16 to start more threads in parallel to speed up the process.
Finally, install Python by running command:
sudo make install
If you configure the source with default options, then it will install Python executable and libraries into /usr/local directory.
Unset Python 3.14 as Default (optional)
As mentioned, compile Python with default configure options will install it into /usr/local directory with higher priority than system default Python.
Run python3 --version in terminal will tell that default Python3 point to Python 3.14 rather than the preinstalled python.
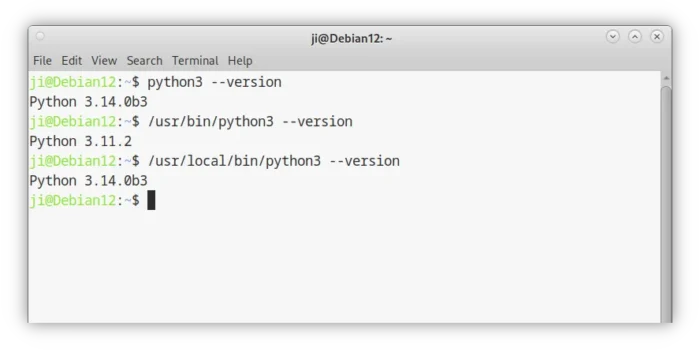
This MAY cause issues as many tools/applications rely on system default Python.
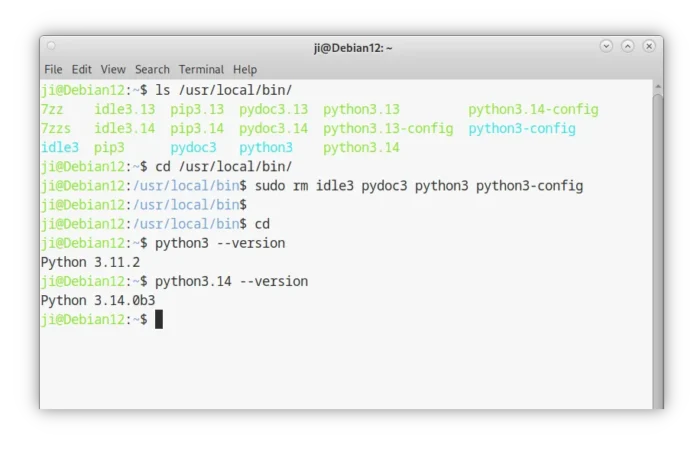
To unset Python 3.14 as default, just remove the syslinks under /usr/local/bin by running command:
cd /usr/local/bin && sudo rm idle3 pydoc3 python3 python3-config
Step 3: Setup Virtual Environment and Install Packages
After installed Python 3.14, you may run your python apps or scripts via python3.14 /path/to/file, run python3.14 in terminal to get into CLI IDE, or idle3.14 to start the graphical editor and shell.
Due to PEP 668, Python now recommends to create virtual environments for installing packages.
- To manually create virtual environment, use command:
python3.14 -m venv ~/.venv/myapps
It will create a copy of Python 3.14 into
.venv/myappsdirectory as virtual environment. - Next, run command to get into the environment:
source ~/.venv/myapps/bin/activate
- Finally, install a package, e.g., 123, via command:
pip3 install 123
For choice, you may use pipenv to manage your Python projects and dependencies, which will automatically create virtual environments for you.
- First, run command to install pipenv:
python3.14 -m pip install --user pipenv
- The executable file will be installed in
.local/bin. If it’s NOT in your PATH, run command below to make it work for current terminal window:export PATH="$HOME/.local/bin:$PATH"
- Next, navigate to your app folder (
myappfor example) and install dependencies (e.g., requests):cd myapp && pipenv --python 3.14 install requests

For more about Python 3.14, see the official documentation.