This simple tutorial shows how to install the most recent Linux Kernel 6.10.x in Linux Mint 22.
Linux Mint 22 is based on Ubuntu 24.04, and so far is powered by Kernel 6.8. While, the upstream Kernel has reached version 6.10.x with new and updated hardware support, and various fixes.
Ubuntu keeps building the new Kernel releases as .deb packages. They are available as Mainline Builds for testing purpose, which are NOT officially supported and are not appropriate for production use!
If the new kernel includes specific bug-fixes or hardware compatibility for your computer or laptop, then you can follow the steps below to install it in Linux Mint 22.
Step 1: Install Mainline
Advanced users can directly download the Kernel packages from Mainline PPA page, then install via apt command from a terminal window.
For beginners and those who want a graphical tool, then Mainline is a good choice for all current Ubuntu and their based systems.
1. First, search for and launch “Software Sources” from start menu. When it opens, navigate to PPAs tab in left, and click on “Add” in bottom to add the ppa:cappelikan/ppa PPA.
The PPA contains the most recent software package for Ubuntu 16.04, Ubuntu 18.04, Ubuntu 20.04, Ubuntu 22.04, and Ubuntu 24.04.
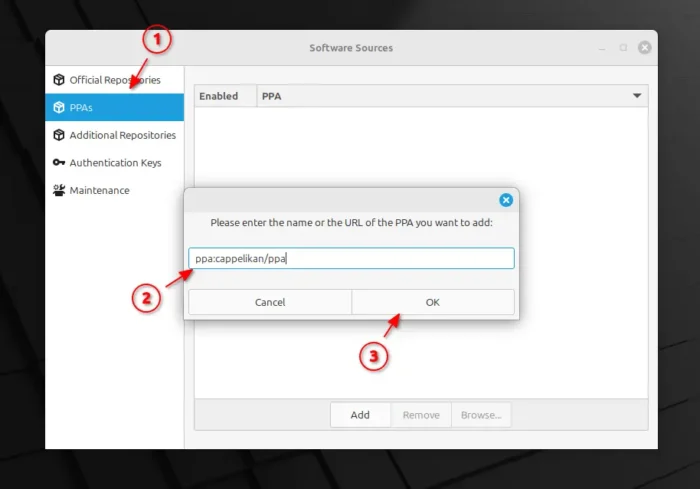
After adding the PPA, click on bottom right green button “Click here to update the APT cache” to refresh.
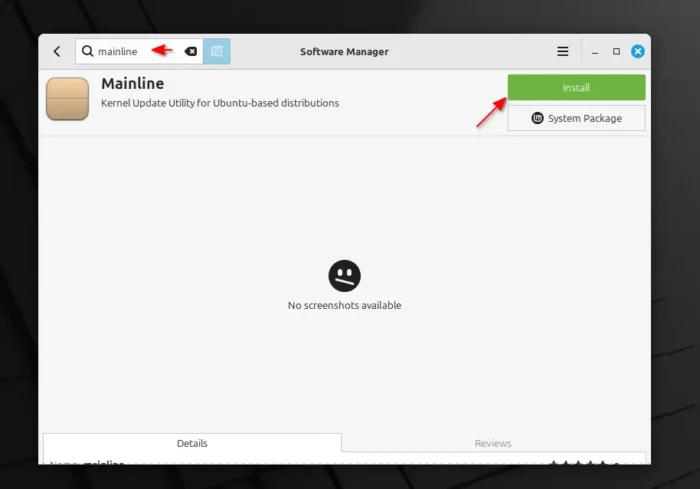
2. Next, search for and launch “Software Manager“. When it opens, search for and install the Mainline package. Just in case, you may first click refresh the package list option from hamburger menu.
Step 2: Install New Kernel using Mainline
Now search for and launch the new “Mainline” app from start menu. When it opens, wait a few moment for fetching data. Then, it will show you all available Kernel releases in the app window.
To install a new Kernel release, simply highlight it in the list, and click “Install” to start the process. As you can see, there are as well options to uninstall, and open the PPA web page.
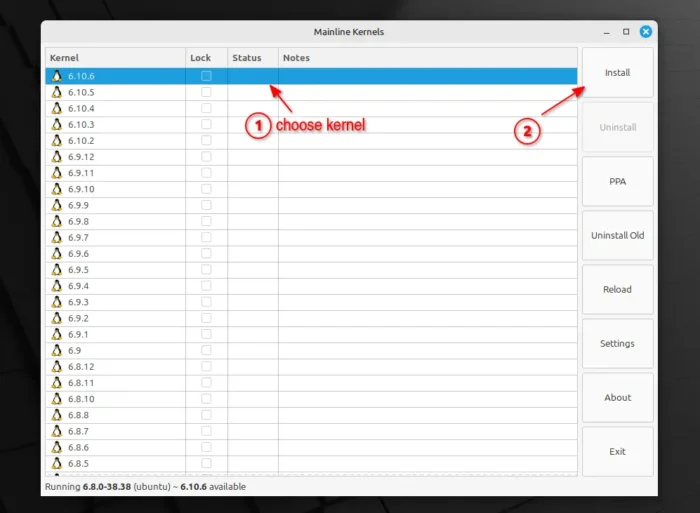
Since the installing process needs root user permission, it will ask you to input user password to authenticate during the process.
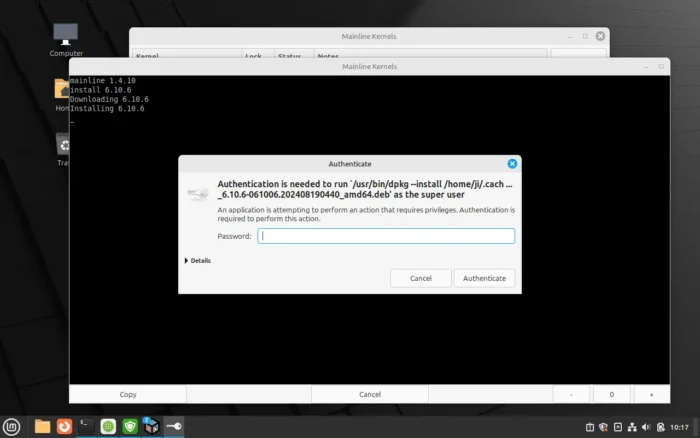
When the installation process done, simply close the dialog. And, restart your computer to apply.
Step 3: Verify
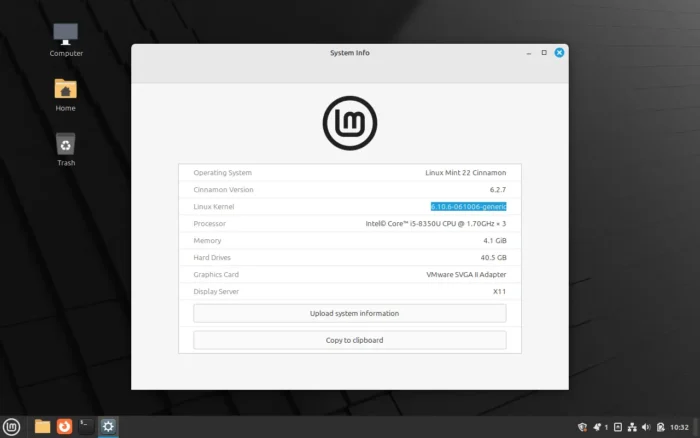
Finally, search for and launch “System Info” dialog. It will show you which Kernel version is in active running!
Uninstall (Optional)
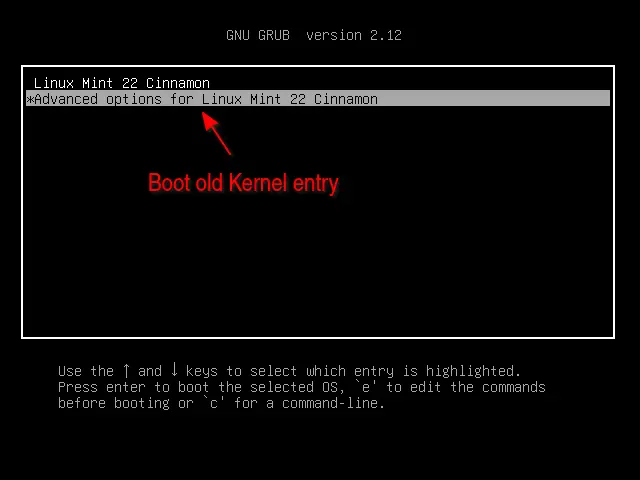
To uninstall and revert back the original Kernel, you have to first restart your computer.
During the boot process, press Esc to show Grub boot-loader and choose to boot old Kernel from “Advanced options…” sub-menu.
Then, re-launch the “Mainline” PPA after login, and select uninstall the Kernel release you want to remove.