This is a beginners guide shows how to install the latest NVIDIA proprietary driver in Ubuntu based systems.
Ubuntu started providing the latest NVIDIA drivers 2 years ago. Without needing PPAs or crazy scripts, all the supported Ubuntu releases, including Ubuntu 22.04, can get the latest drivers via restricted repository.
And it benefits to all Ubuntu flavors and based systems, e.g, KUbuntu, XUbuntu, Linux Mint, and more.
Install NVIDIA Proprietary Driver in Ubuntu:
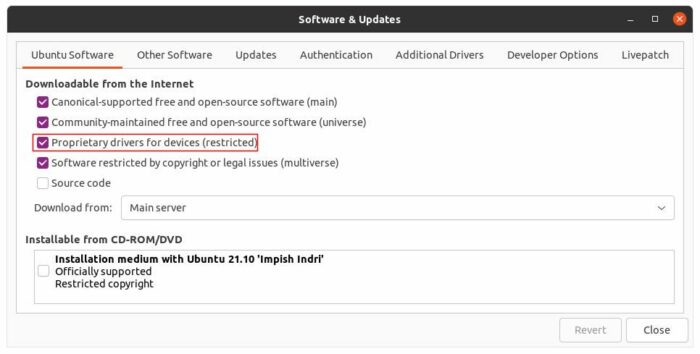
For the default Ubuntu Desktop users, firstly enable the restricted repository in “Software & Updates” utility.
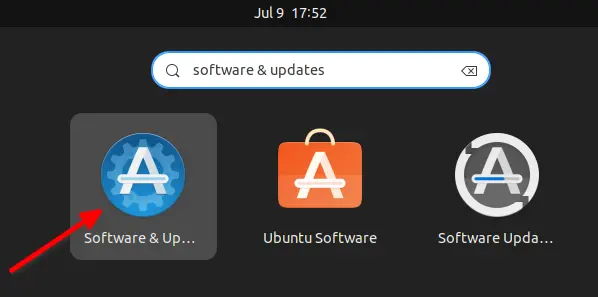
It is enabled in most cases. If not, tick the box for “Proprietary drivers for devices (restricted)”. When you close the window, click ‘Reload‘ button to update package cache in pop-up dialog.
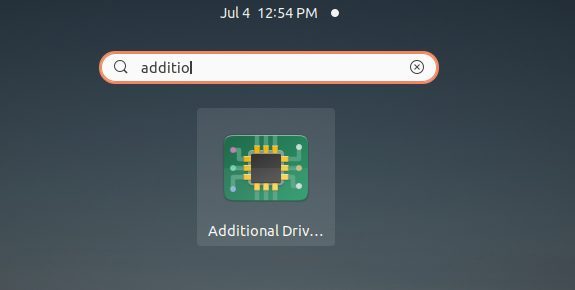
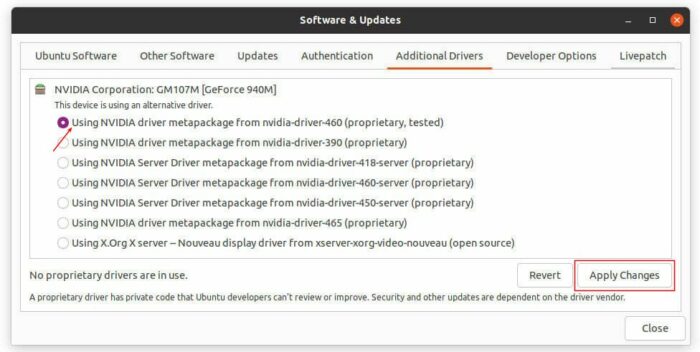
Next, either open ‘Additional Drivers‘ or go to “Software & Updates -> Additional Drivers” tab.
When it opens, you’ll see the available drivers. Usually, the first one in the list is the latest driver properly tested.
Just choose it or any other driver as you prefer, and click on ‘Apply Changes’ button. It will then display a small bar in the bottom, indicates the downloading & installing process.
Wait until done, and finally restart your machine.
Install NVIDIA Driver in Ubuntu based systems:
For other Linux uses Ubuntu package base, but not have the ‘Additional Drivers’ utility, you can use either apt command or synaptic package manager.
Install NVIDIA Driver via apt command:
Since the proprietary driver updates regularly, the number in package name vary time by time. So you need to firstly check out available packages.
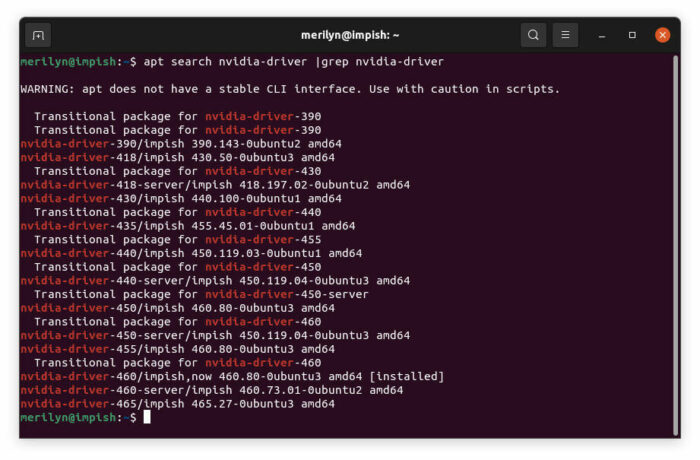
1. Open terminal from system app launcher. Then run command to search the package:
apt search nvidia-driver |grep nvidia-driver
2. Then install the one from terminal output, nvidia-driver-460 in the case:
sudo apt install nvidia-driver-460
Once installed, restart computer and that’s it.
Install NVIDIA package via synaptic:
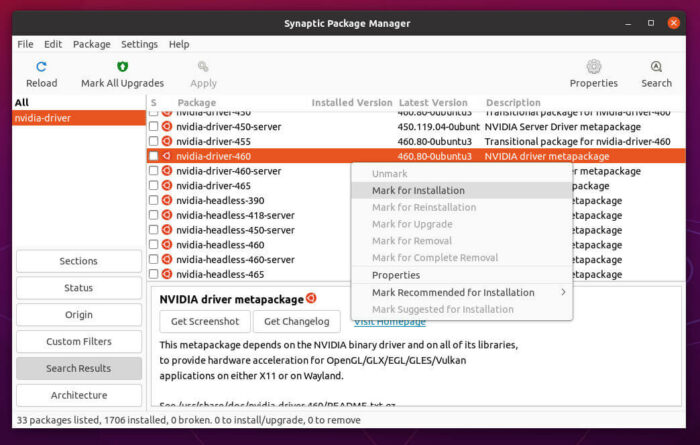
Some Linux Distros ships synaptic package manager out-of-the-box. If not, you can install it via your App Store.
With it, click Search button to search ‘Nvidia driver’, then browser and mark your desired driver package. Finally, click ‘Apply‘ button will install the driver.
As well, system start is required to apply the new driver.
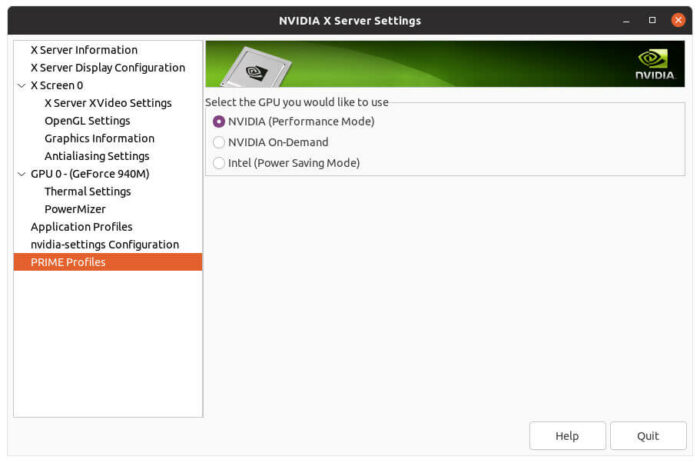
In addition, a “NVIDIA X Server Settings” utility will be available in system app menu. With it, you can switch between NVIDIA and Intel graphics as easy as a mouse click.











Recent Comments