

This tutorial shows how to install Shotcut video editor through Linux portable tar by creating app shortcut for it.
Shotcut, the free open-source non-linear video editor, provides Linux packages through AppImage, Flatpak, Snap, and portable tar.
The AppImage can be launch directly after adding executable permission, though it uses FUSE to mount as virtual file-system on every launch.
While the flatpak that’s available in this flathub page, and snap package in Ubuntu Software (for 22.04 and earlier) and App Center (for 24.04+) are both run in sandbox environment.
For those who don’t like or have issue running app in sandbox or virtual file-system, the Linux portable tar is available for choice.
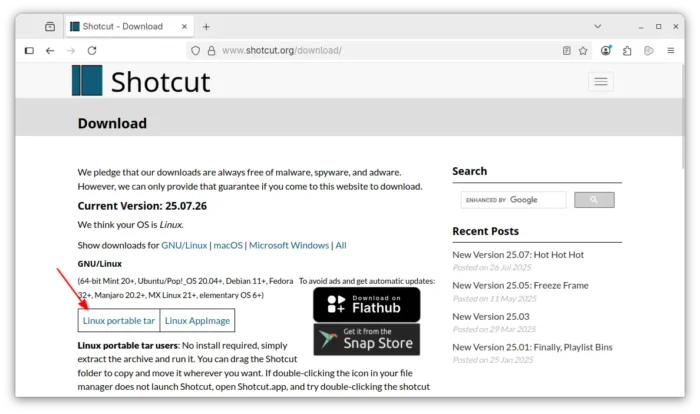
Step 1: Download Shotcut Linux portable tar
The Linux tar is available to download at the software website via the link below:
For choice, you may get the package directly from Github release page under “Assets” section, usually named “shotcut-linux-x86_64-xxx.txz” (for Intel/AMD only).
Step 2: Install the required libraries
Before being able to use the Linux portable tar, you need to install few run-time dependencies.
For Debian, Ubuntu, and their based systems, open terminal (Ctrl+Alt+T) and run command:
sudo apt install libjack-jackd2-0
And, for Fedora, install:
sudo dnf install libXScrnSaver jack-audio-connection-kit
For more, see the Linux dependencies page.
Step 3: Start Shotcut from the script file
As it mentions, no install required for the Linux tar! It contains the executable files and most run-time libraries in bundle. Just extract, then navigate to “Shotcut.app” sub-folder, finally run the shotcut script file under that directory to launch the video editor:
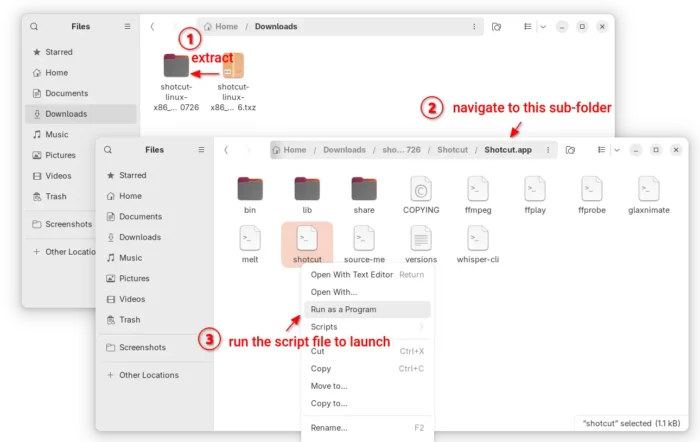
NOTE: don’t run the shotcut executable file under bin sub-folder as it doesn’t know where to find the run-time libraries. Instead, run the ‘shotcut’ script file you see in the screenshot above, which will set the environment variables automatically at launch.
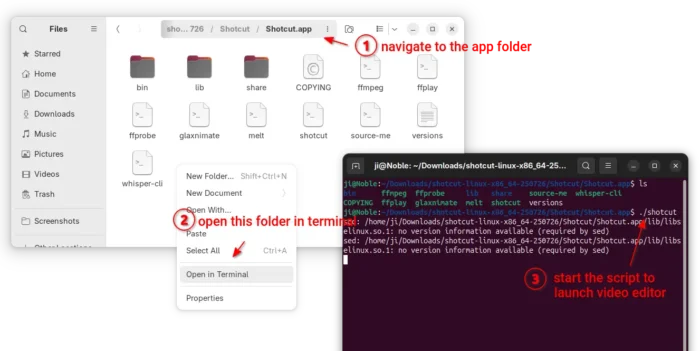
Or, open that folder (Shotcut.app) in terminal, and use the command below to run the script to start video editor from terminal:
./shotcut
Step 4: Add the App icon into Gnome App Grid, Overview, or Application Launcher
If everything works well, you may create a desktop entry for the app, so you can then search & launch it from Gnome Overview or Application launcher (start menu) like other apps.
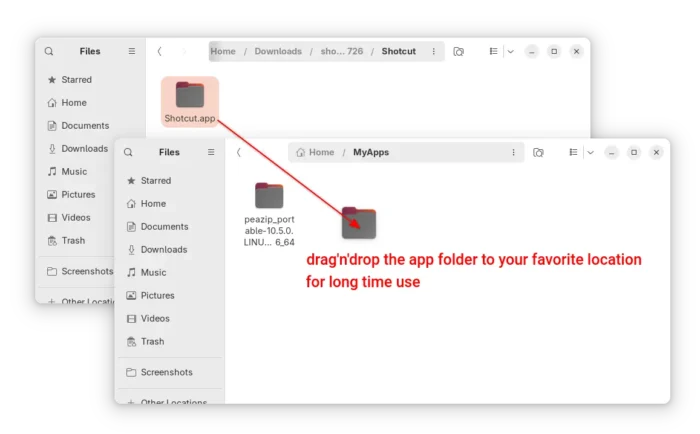
1. First of all, you need to move the “Shotcut.app” sub-folder to another location for long time use. In my case, I created a “MyApps” folder in user home and put all portable app folders there.
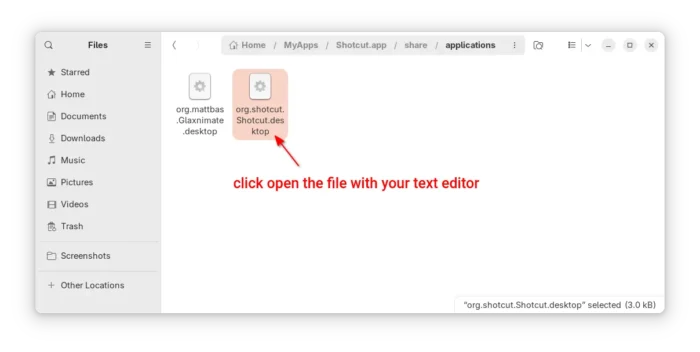
2. Next, navigate to the Shotcut.app -> share -> applications folder. It contains the “org.shotcut.Shotcut.desktop” file used for adding the app icon to your Linux application launcher.
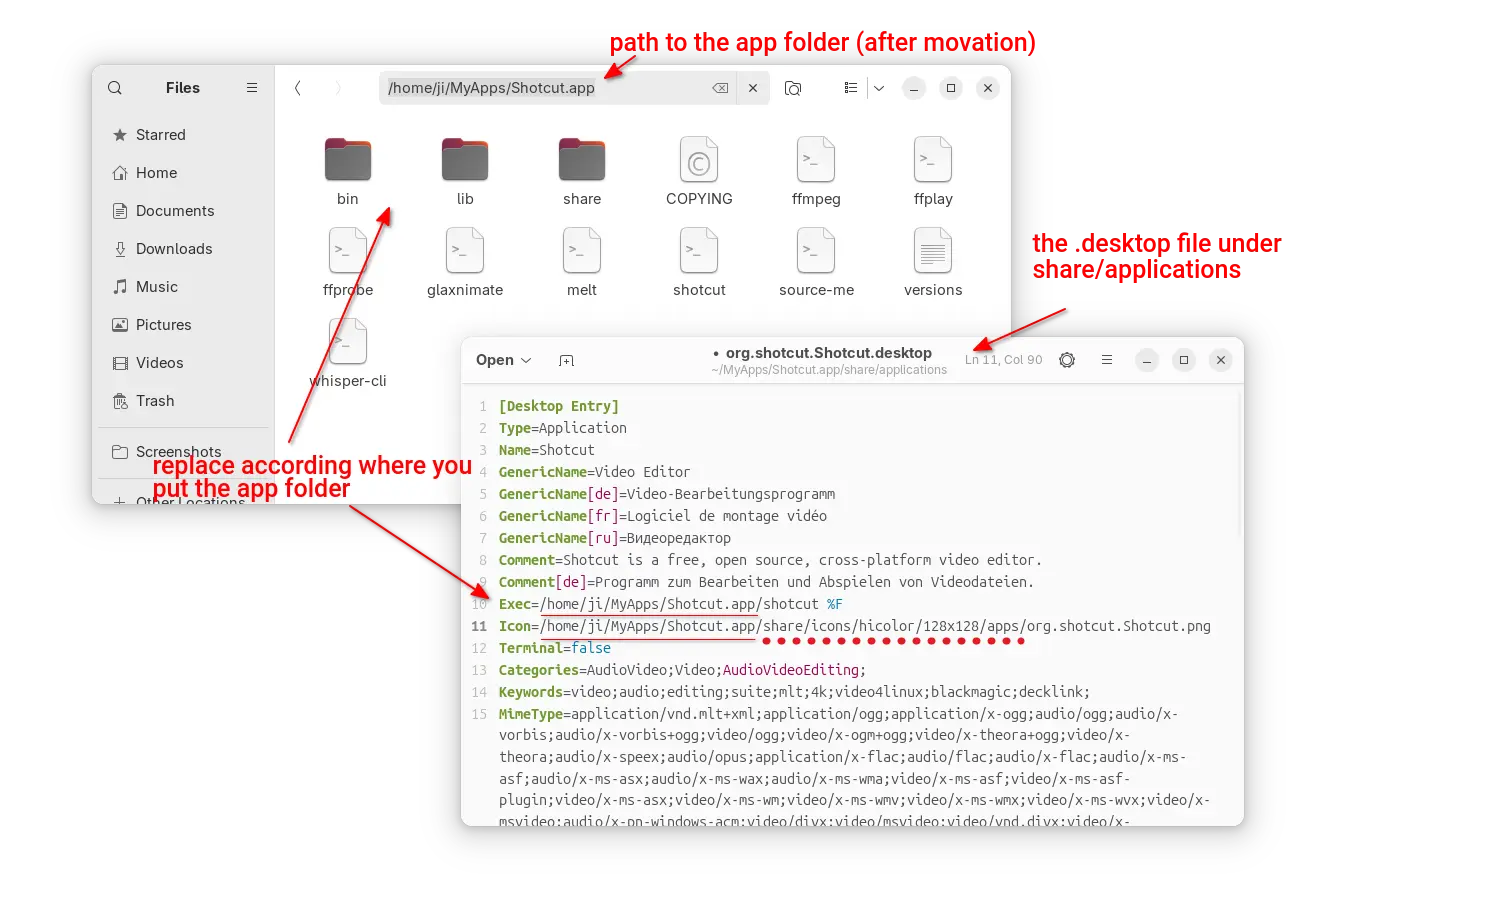
3. When the file opens, edit Exec= and Icon= lines telling where to find the executable and icon files.
In my case I moved the shotcut app folder into “MyApps” folder in user home. So, the folder path is /home/ji/MyApps/Shotcut.app, and:
- executable path (the script) is “/home/ji/MyApps/Shotcut.app/shotcut”.
- and icon is “/home/ji/MyApps/Shotcut.app/share/icons/hicolor/128×128/apps/org.shotcut.Shotcut.png”.
You need to replace according where you put the shotcut app folder! For GNOME, just navigate to that folder, and press Ctrl+L then copy the path.
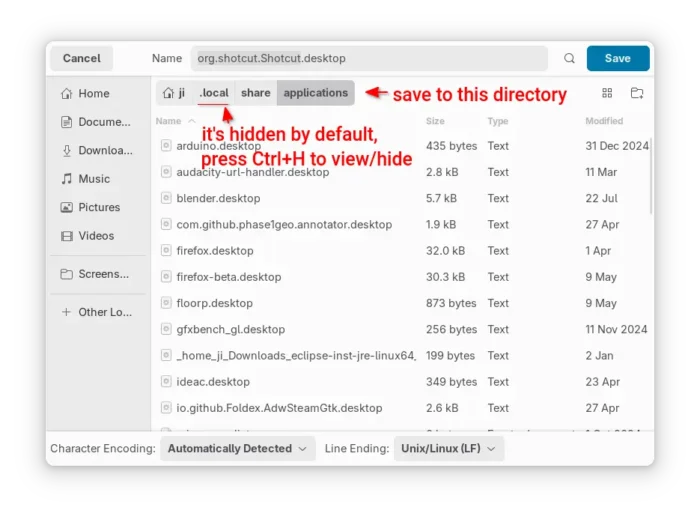
4. After edited the file, either save then move, or save the file to .local/share/applications directory.
Finally, run update-desktop-database ~/.local/share/applications/ to update database, though it’s usually not required.
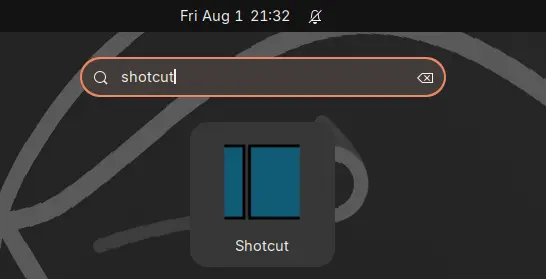
If everything goes well, you should be able to start the video editor from app launcher (e.g., GNOME Overview) few moments later.
Uninstall:
To uninstall the app icon from application launcher, simply remove that .desktop file form .local/share/applications directory, either by using your file manager or by running command below in terminal:
rm ~/.local/share/applications/org.shotcut.Shotcut.desktop
Optionally delete the app folder if you don’t need it anymore.