


When trying different operating systems via Virtualbox, we often need to transfer data between the host OS and virtual machines. So it introduced the shared folders feature. And here’s how to tutorial for beginners.
Note this tutorial is tested and works in VirtualBox virtual machines such as Ubuntu 20.04, Ubuntu 21.10, Elementary OS 6, Zorin OS 6, Debian 11, Linux Mint 20, and Fedora 34. Theoretically, it should work on all Linux guest OSes.
Install VirtualBox Guest Additions:
Before creating a shared folder, you need to first install the Guest Additions in the Virtual Machine to make the function work.
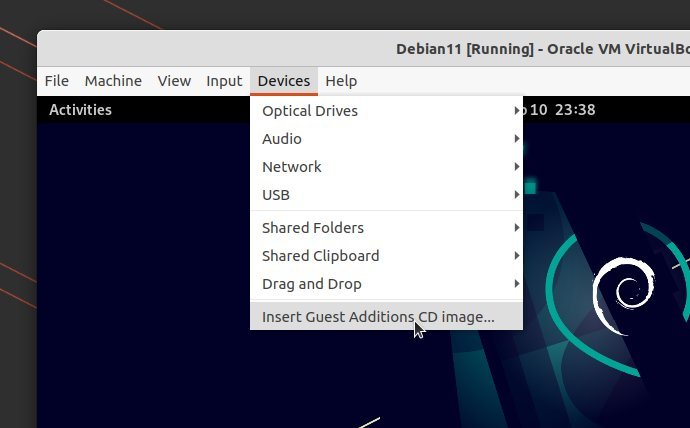
1.) Firstly, start the Guest OS. After login, go to VM menu “Devices -> Insert Guest Additions CD image…“.
2.) A dialog should pop-up asks whether to run the installer script or not. Click “Run” and then type user password in next authentication window. A terminal window will open and start installing the Guest Additions.
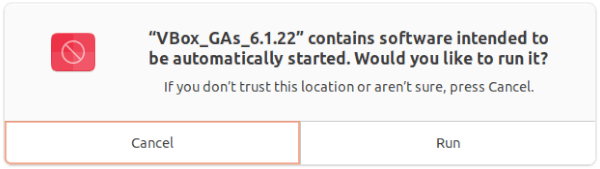
If you clicked “Cancel” by mistake or the dialog does not appear, go to “VBox_GAs_x.x.xx” in the left pane of file manager. Then right-click on blank area and select ‘Open in Terminal’. Finally run the command below to install the additions manually:
sudo ./VBoxLinuxAdditions.run
For installing issues, you may alternatively download the ISO image for your VBox edition from the link below. Then click to mount it, and run the installer script manually.
Add user permission:
Without this step, the shared folder will display with a lock and cross mark emblems. You need to sudo permission to be able to open it, or do copy and paste actions.
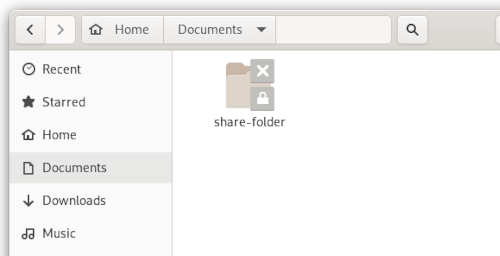
To fix issue, simply add your username to the “vboxsf” group which is created automatically after installing the Guest Additions.
Firstly, open terminal in Guest OS from the start menu, and run command to add current user to “vboxsf” group:
sudo usermod -a -G vboxsf $USER
On Debian and Ubuntu based systems, you can also use this command instead:
sudo adduser $USER vboxsf
After that, the command will should list your user as member of the vboxsf group:
cat /etc/group |grep vboxsf
Finally, restart the Virtual Machine to apply the change.
Create share folder in VirtualBox:
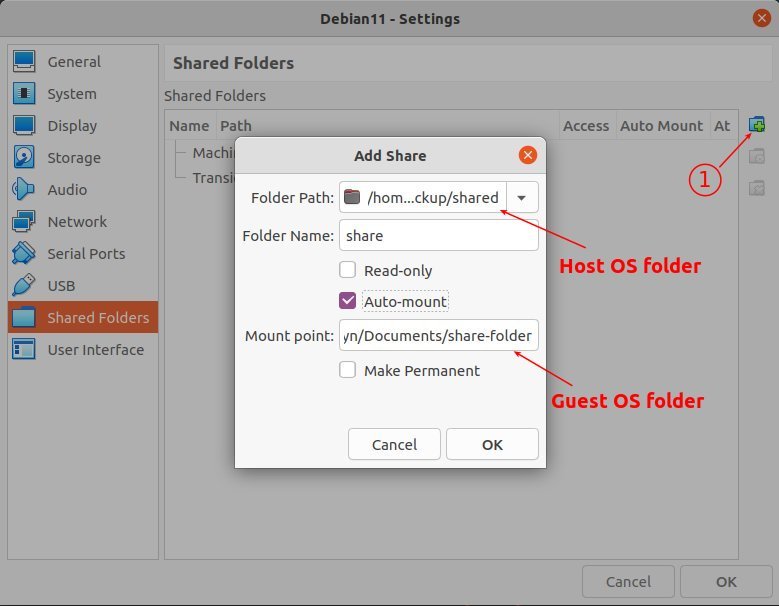
Now open Settings for the Virtual Machine, and navigate to “Shared Folders” from the left pane. There click the little folder icon in the right to start creating a new share.
- Folder Path: Choose “Other …” from the drop-down box and then select a folder on host machine you want to share with.
- Folder Name will generate automatically after selected folder path.
- Enable “Read-only” will NOT allow the Guest OS to change anything in this folder.
- “Auto-mount” is recommended for beginners.
- Mount point: folder path in Guest OS. You need to type it manually. And it’s usually “/home/USER_NAME/Documents/FOLDER_NAME”. Replace USER_NAME and FOLDER_NAME. VBox will generate the FOLDER_NAME automatically if not exist.
That’s all. Enjoy!