


Want to install Linux Mint in your machine? It’s easy. You just need an USB stick with 4 GB+ memory, and a running system on your machine.
Linux Mint is a popular Linux distribution based on Ubuntu. It features three desktop editions: Cinnamon, MATE, and XFCE. So far, the latest release is Linux Mint 20.x.
Preparation:
Before getting started, you need to do:
- Download Linux Mint ISO image.
- And follow this guide to create bootable Linux Mint USB installer.
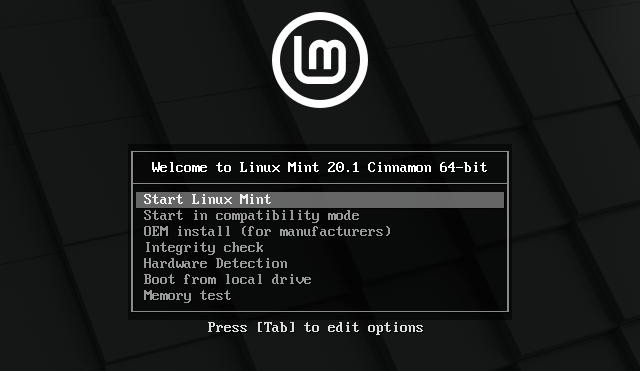
1. Boot the Linux Mint Live-USB:
Boot or re-boot your machine with the Live-USB. Different machines may have different keyboard key to select the boot device. It’s usually ESC, F2, F12, or even F8 / F9.
When it starts into the menu, hit Enter to boot with first menu entry:
2. Launch Linux Mint Installer Wizard:
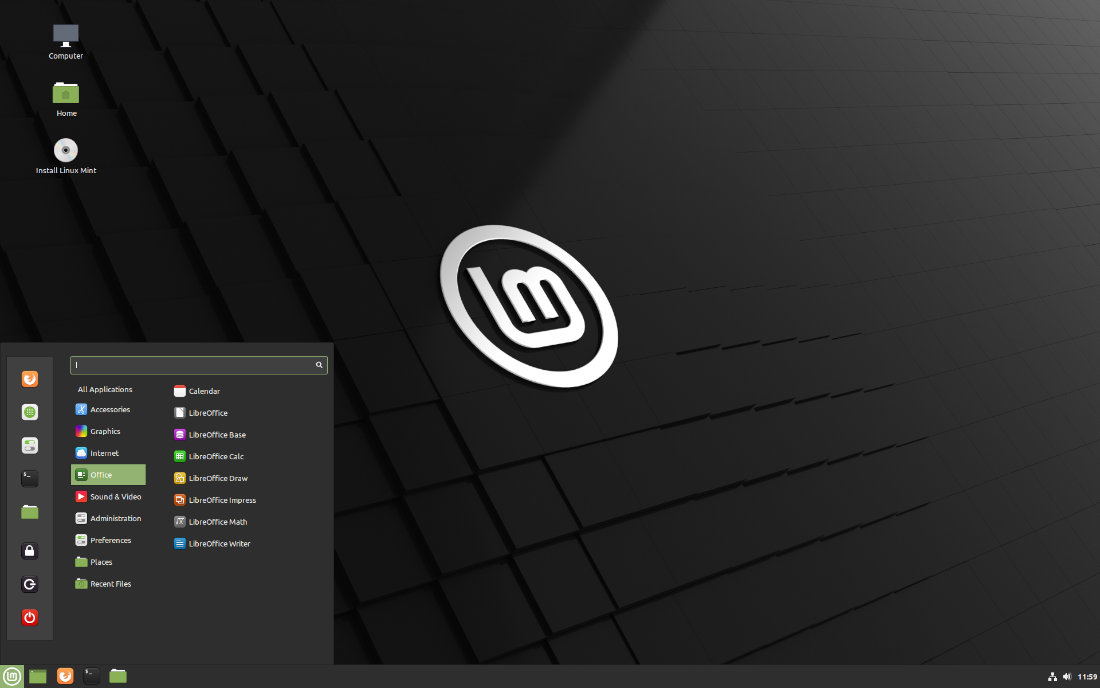
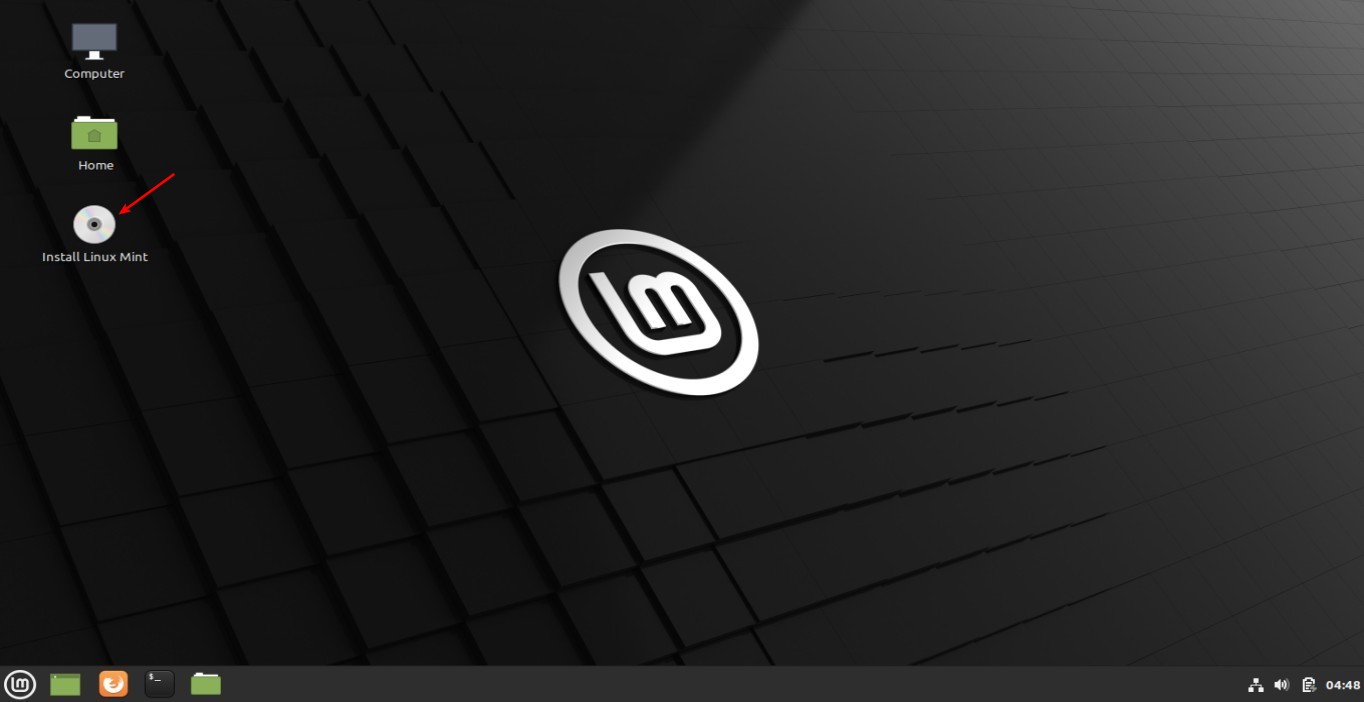
When it boots into the Live Linux Mint desktop, click on the desktop CD icon named “Install Linux Mint” to start the installer wizard.
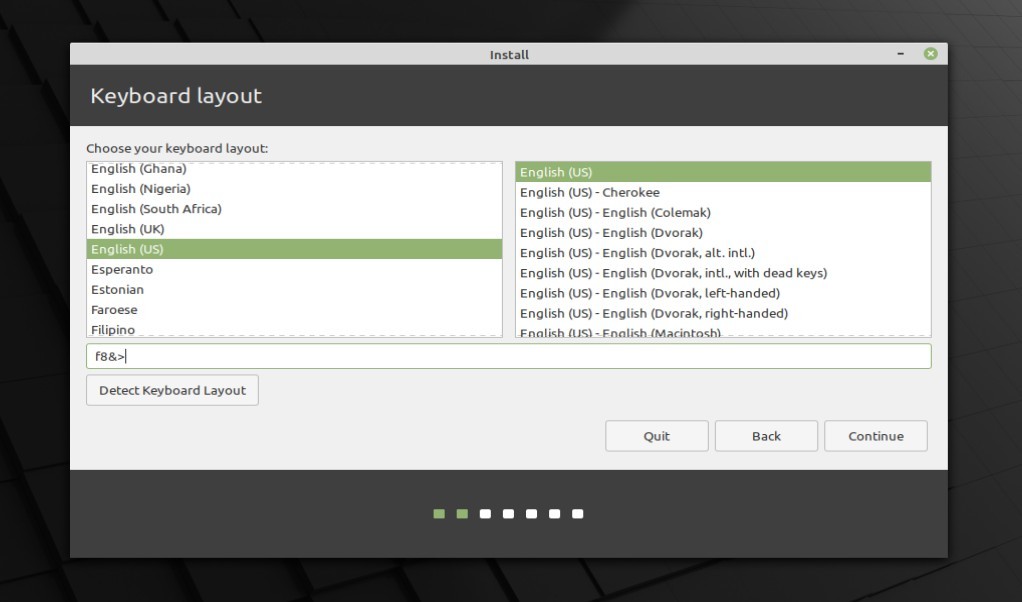
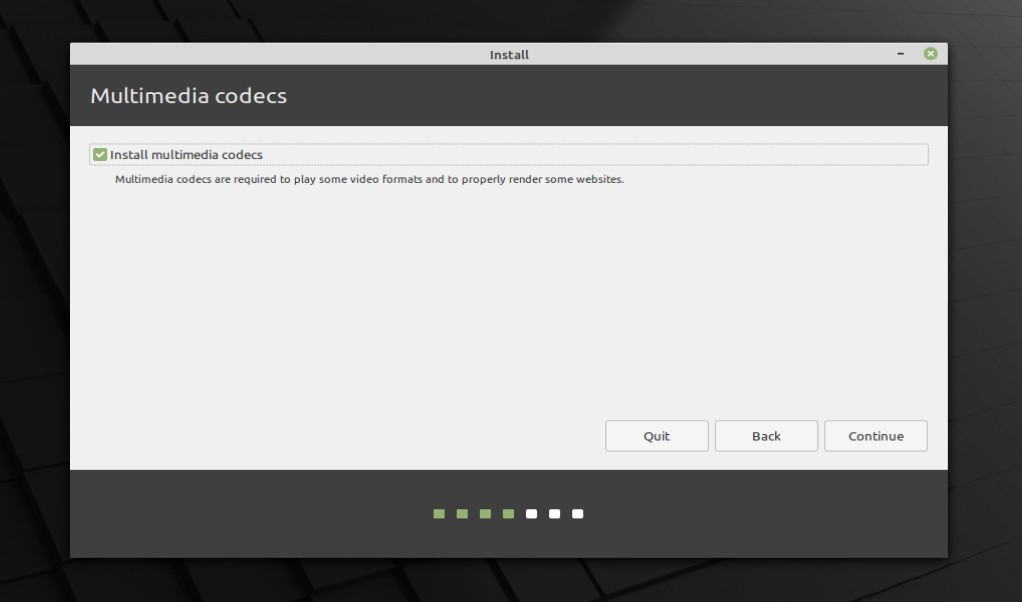
3. Choose language, keyboard layout, and install media codecs:
In the first screen, click the link to read the release note if you want. Select language and click continue.

Next configure the keyboard layout. You can hit “Detect Keyboard Layout” button, and then typing anything to test out.
Tick the check-box to “Install multimedia codecs” for audio / video playback. It’s OK to leave it un-checked. You can install them later after successfully installed Linux Mint.
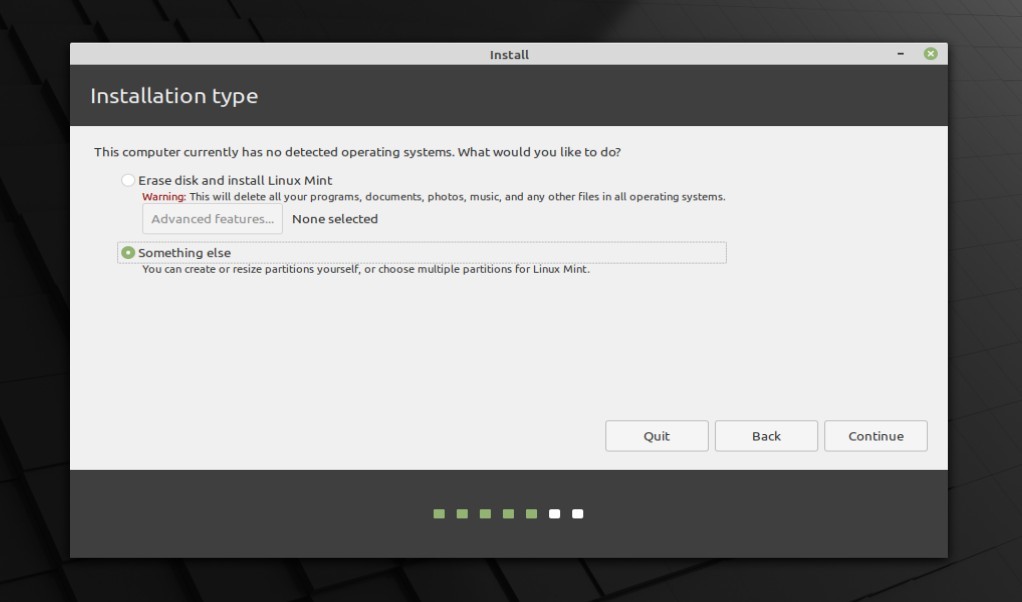
4. Choose install type:
In next screen you need to choose what to do with your hard disk:
- Choose “Install Linux Mint alongside them” if you have other operating systems in the disk.
- Select “Erase disk and install Linux Mint” so all the data in the hard disk will be lost! And install only Linux Mint on it.
- Something else (recommended) will bring your to partition table and allow to manually create partition.
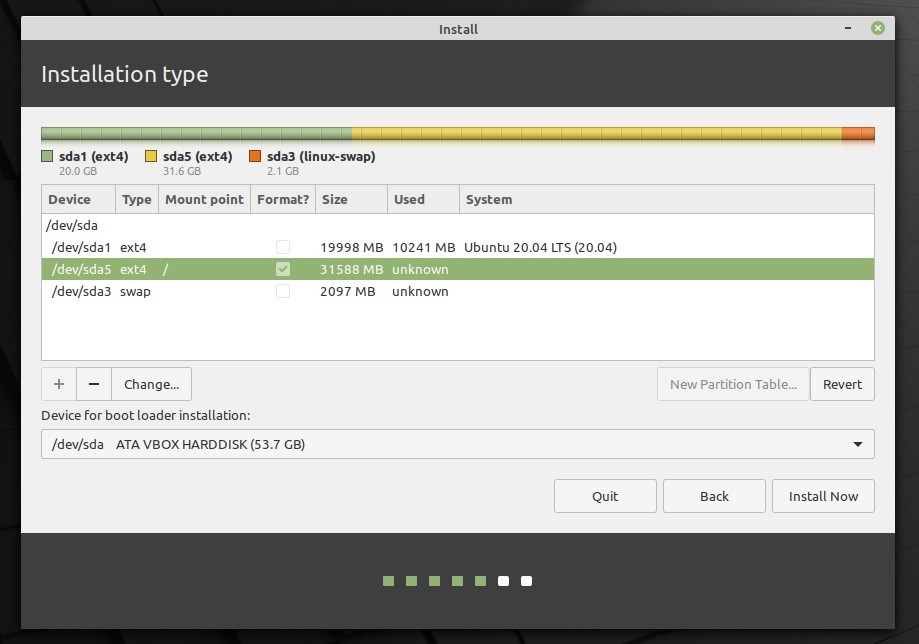
5. Manually create partition for Linux Mint:
If you selected “Something else” in the previous step, you’ll then see the partition table.
- No enough free space? Select a partition and click ‘–‘ to remove it to free up disk space. (DON’T worry, it won’t remove the data before clicking “Install Now” button.)
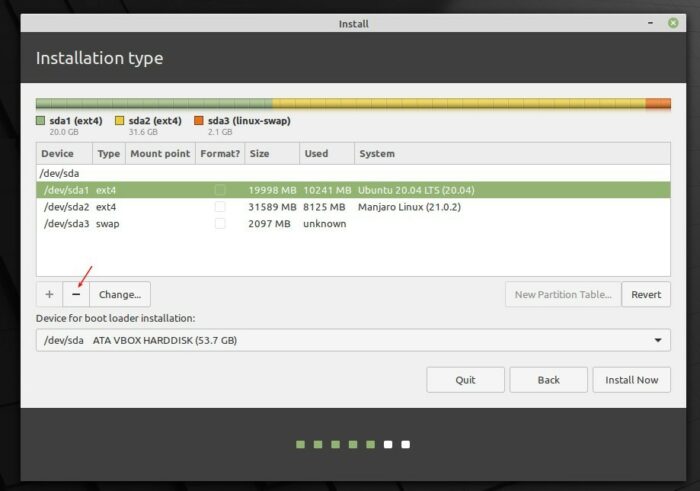
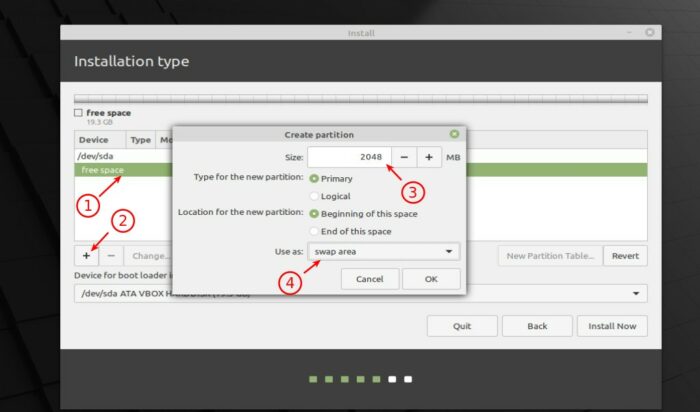
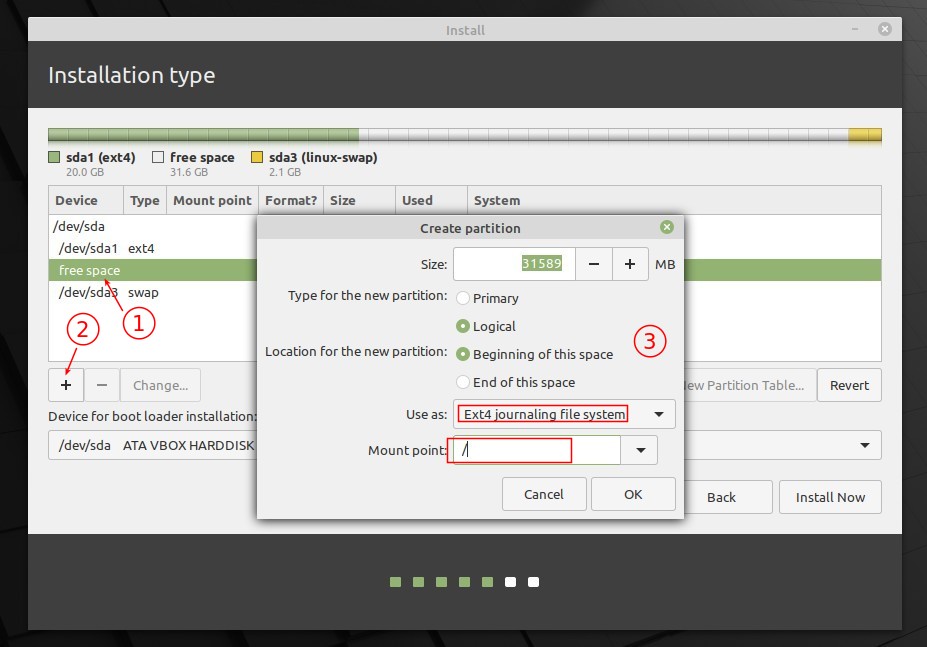
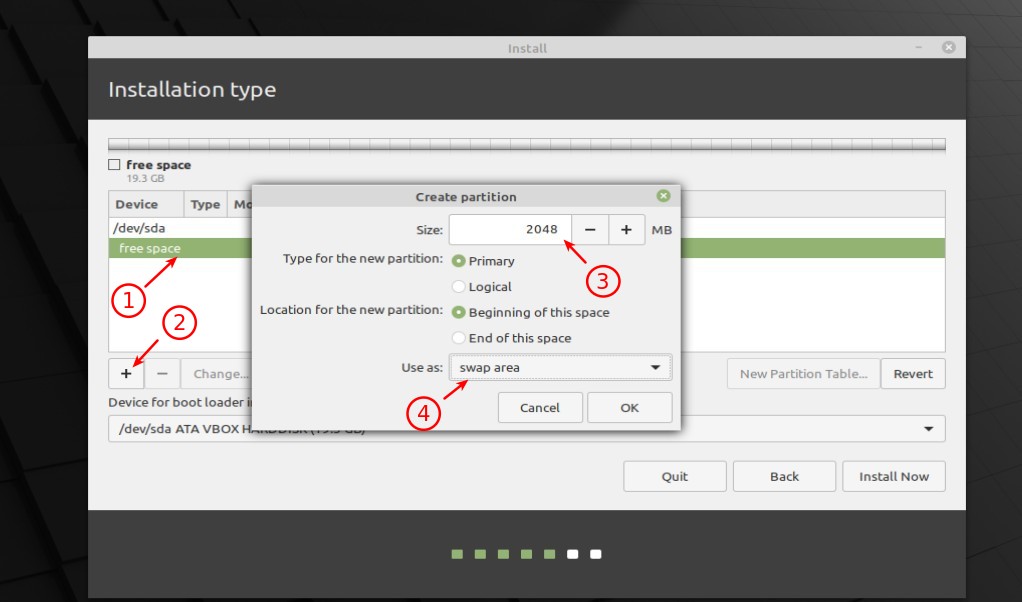
- Highlight the free space, and click “+” to create a partition for Linux Mint system:
- 20 GB+ size recommended.
- Ext4 file system.
- Mount point: /
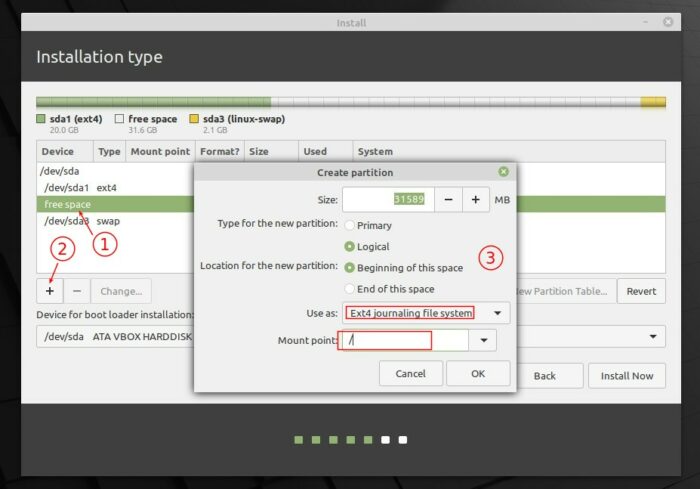
- (Optional) If you need system sleep (hibernate to disk) function, also create a Swap partition. And set the size to as much as RAM memory.
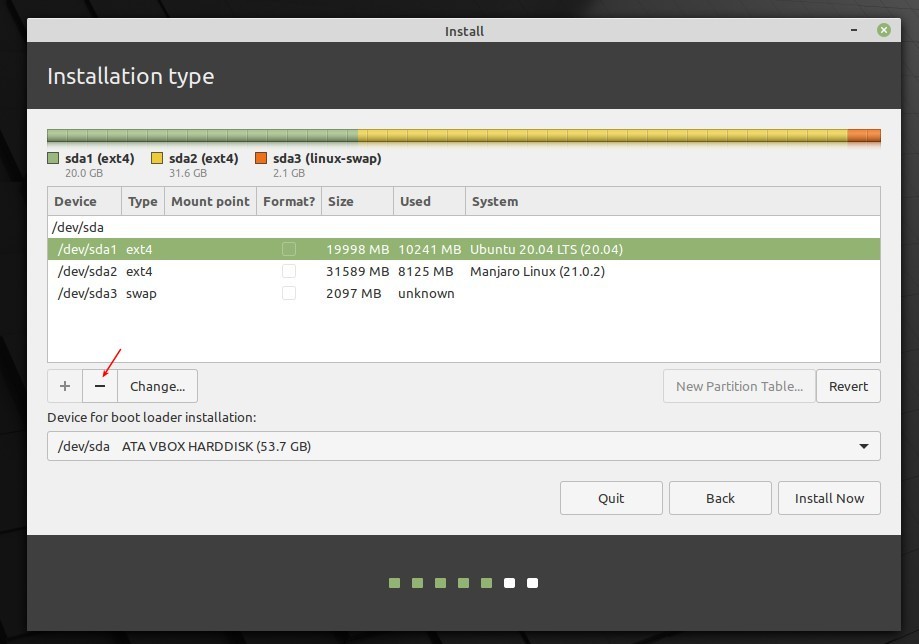
Finally you’ll get a Ext4 partition mounted on / with green checked icon to format.
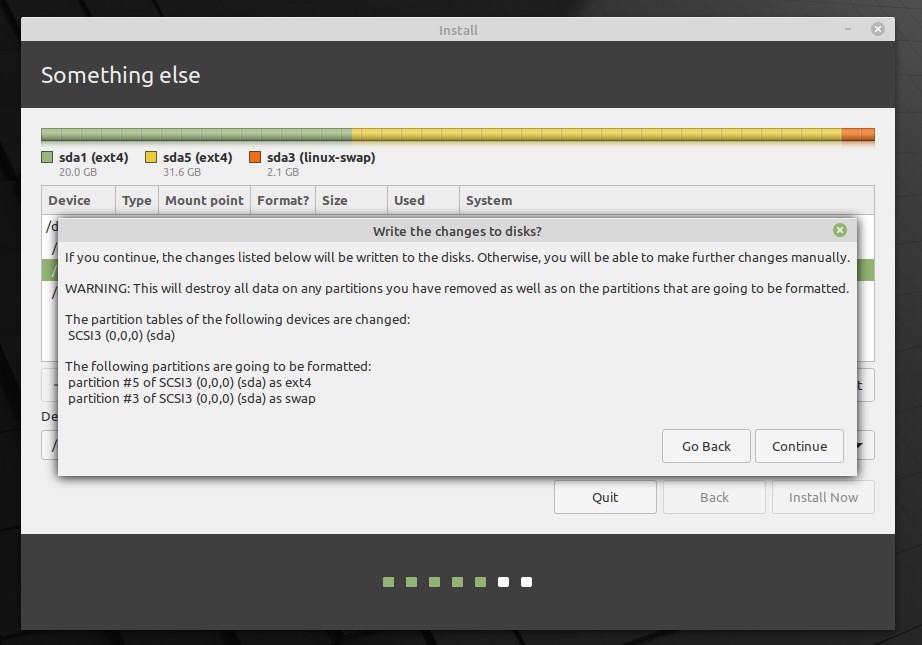
Click on the “Install Now” button and confirm in next pop-up.
NOTE: once you click on "Continue", it will apply changes on the hard disk! You can't go back anymore.
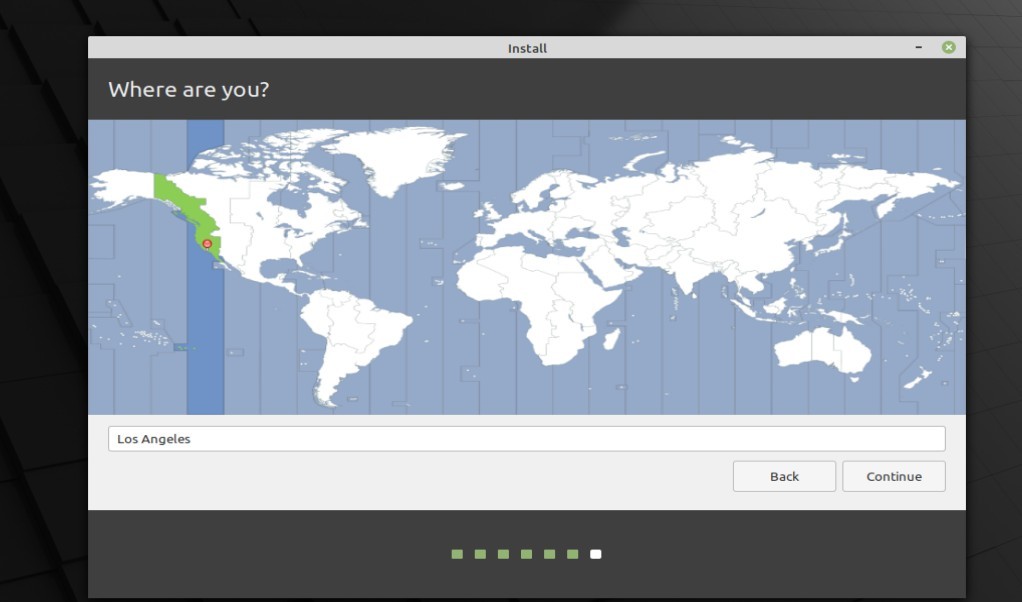
6. Select location, create account:
Next it will prompt to select your location. No need to type anything, just click on the map.
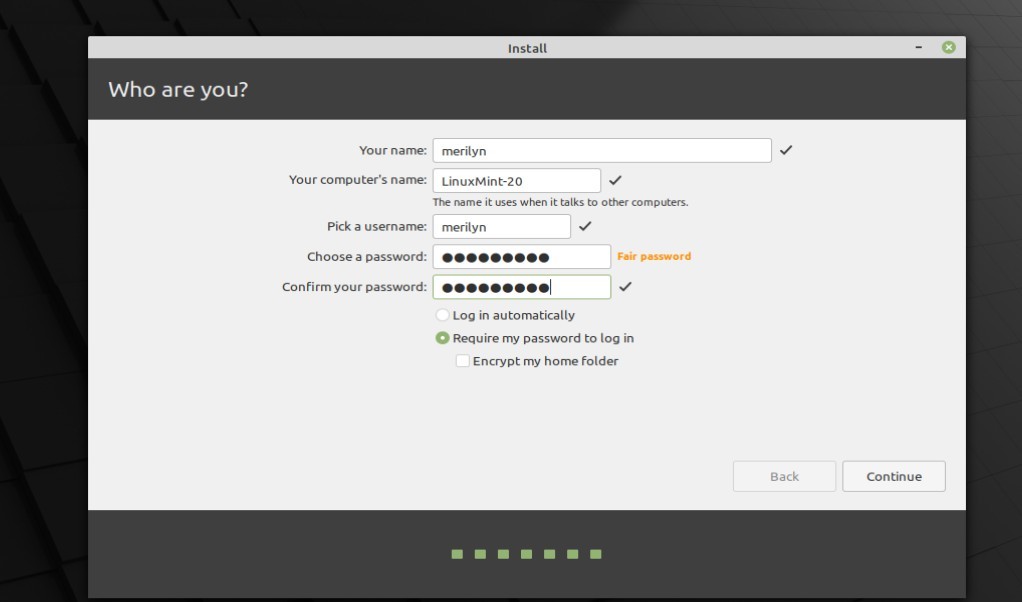
And create an user account, set computer name, login password, etc.
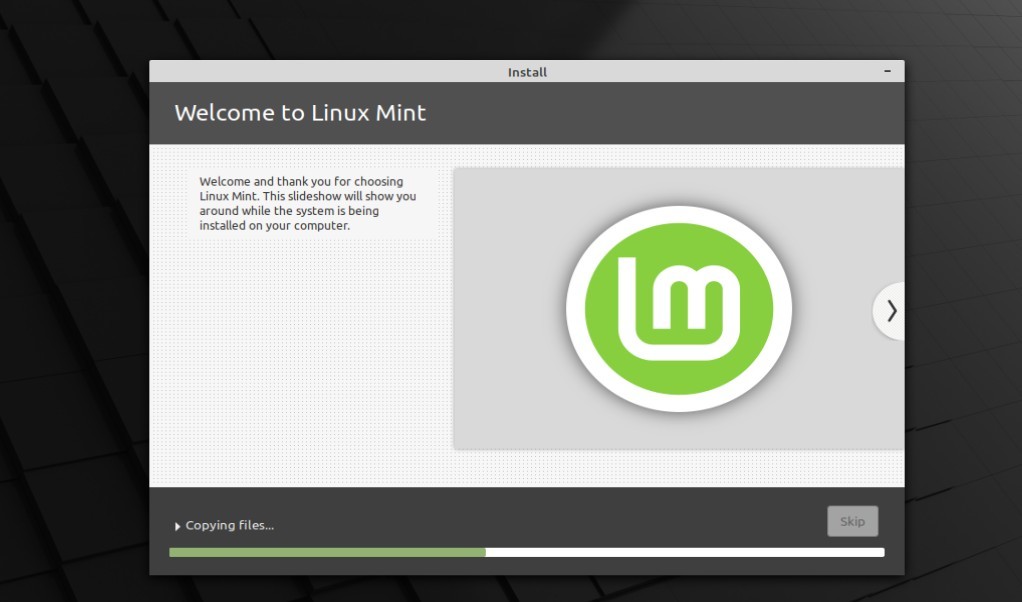
Then just wait. It starts to copy files, install system, configure the hardware device, and finally clean up.
When everything’s done successfully. A ‘Installation Complete’ dialog will pop up with options to either continue testing the Live system or restart.

Conclusion:
The whole installing process, include creating the bootable USB installer, is quite easy. While at install type window, I’d recommend to choose ‘Something else‘ unless you’re going to use the whole disk for Linux Mint system only.
The Swap is optional, if you need sleep to disk function create one with partition size as much as RAM memory. While creating account, you can also choose ‘encrypt my home folder’, just like Ubuntu 21.04 does by default, other users need password authentication to access it.