


This is a step by step beginner’s guide shows how to install Fedora Workstation using an USB stick.
Fedora is a Linux distribution developed by the community-supported Fedora Project which is sponsored primarily by Red Hat. It features Workstation, Server, and loT editions. And here’s I’m going to show how to install the Workstation (Desktop) edition.
Preparation:
Fedora Linux has an official USB writer called Fedora Media Writer. You can use it to create bootable installer from Windows or Mac OS.
As an alternative, download the ISO image and create live-USB via:
- Download Fedora Workstation ISO.
- Create bootable USB installer from Linux, Windows, or Mac OS. It does work for Fedora though written for Linux Mint.
1. Boot Fedora Workstation Live-USB:
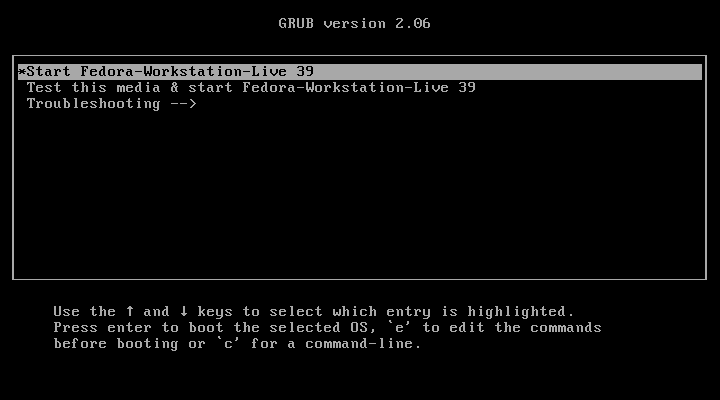
Once you created the USB installer, plug in and boot it in your machine. Depends on your device, you may press ESC, F2, Del, etc on startup to get into BIOS and set up boot order.
When it starts into menu, hit Enter to boot with first entry “Start Fedora-Workstation-Live 39”.
2. Launch the Installer Wizard:
Once you boots into the live system, click “Install Fedora …” in the welcome dialog.
You can of course click “Not Now” to close the dialog, then re-open it at any time from the bottom dock in ‘Activities’ overview screen.

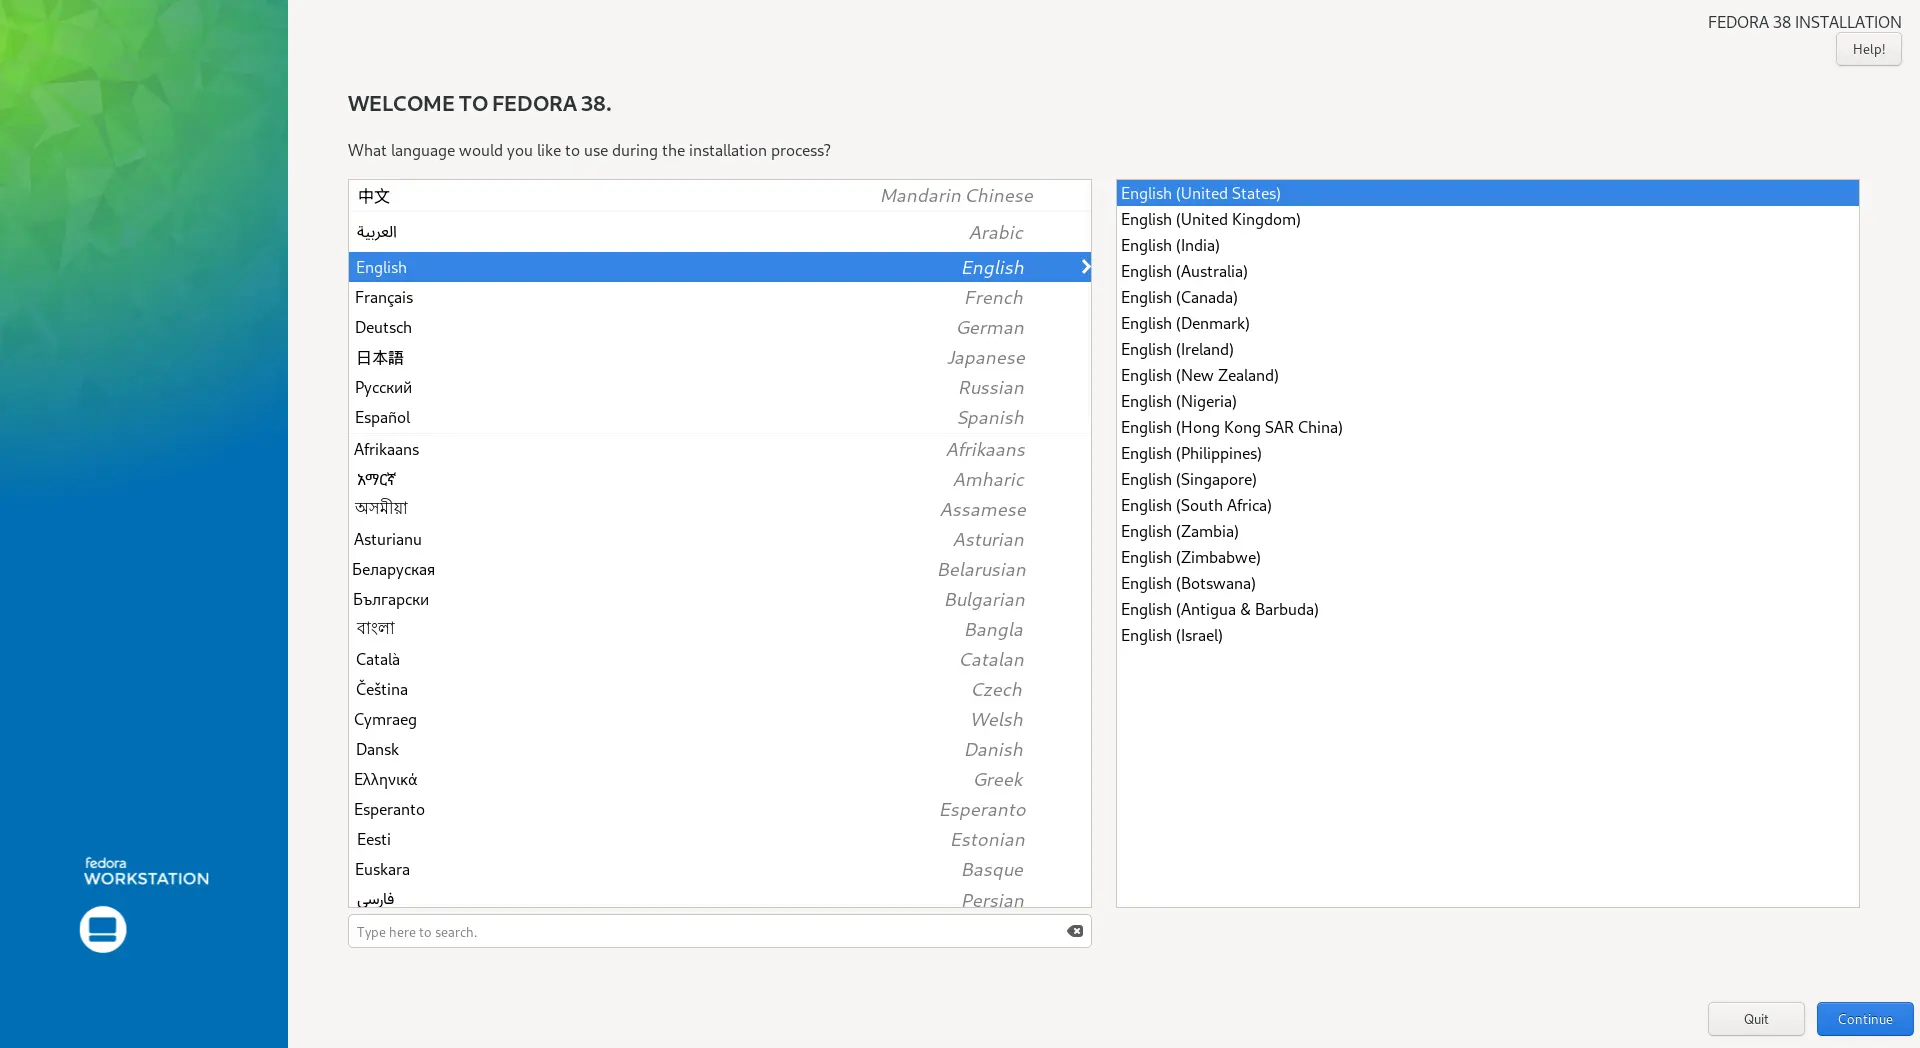
When the wizard opens, select your language that will be in use for current installer wizard:
3. Configure Keyboard, Time & Data:
Little different to other Linux, e.g., Ubuntu, Linux Mint, and Manjaro, after choosing the wizard language, it goes directly to “Installation Summary”:
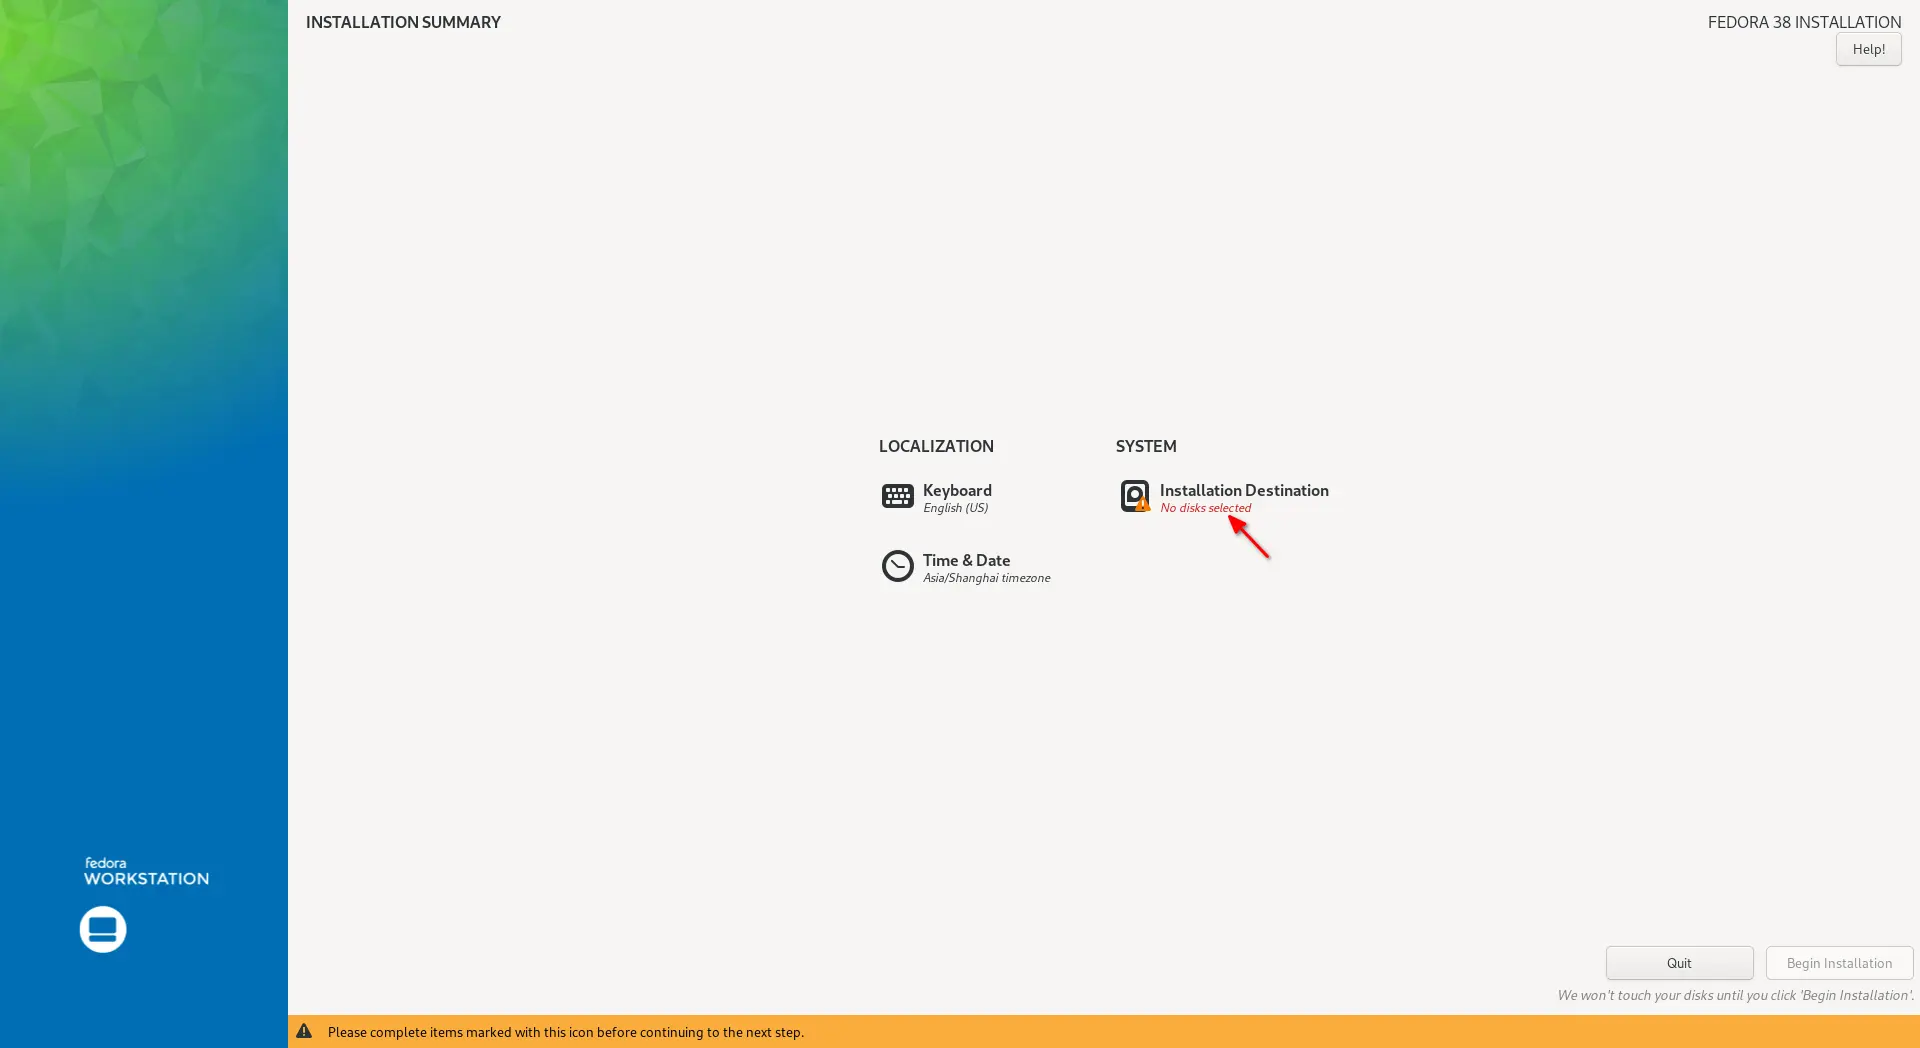
It automatically detects your keyboard and timezone. You can just skip them. If you want, click them one by one and set as you mind.
4. Choose disk for Fedora system:
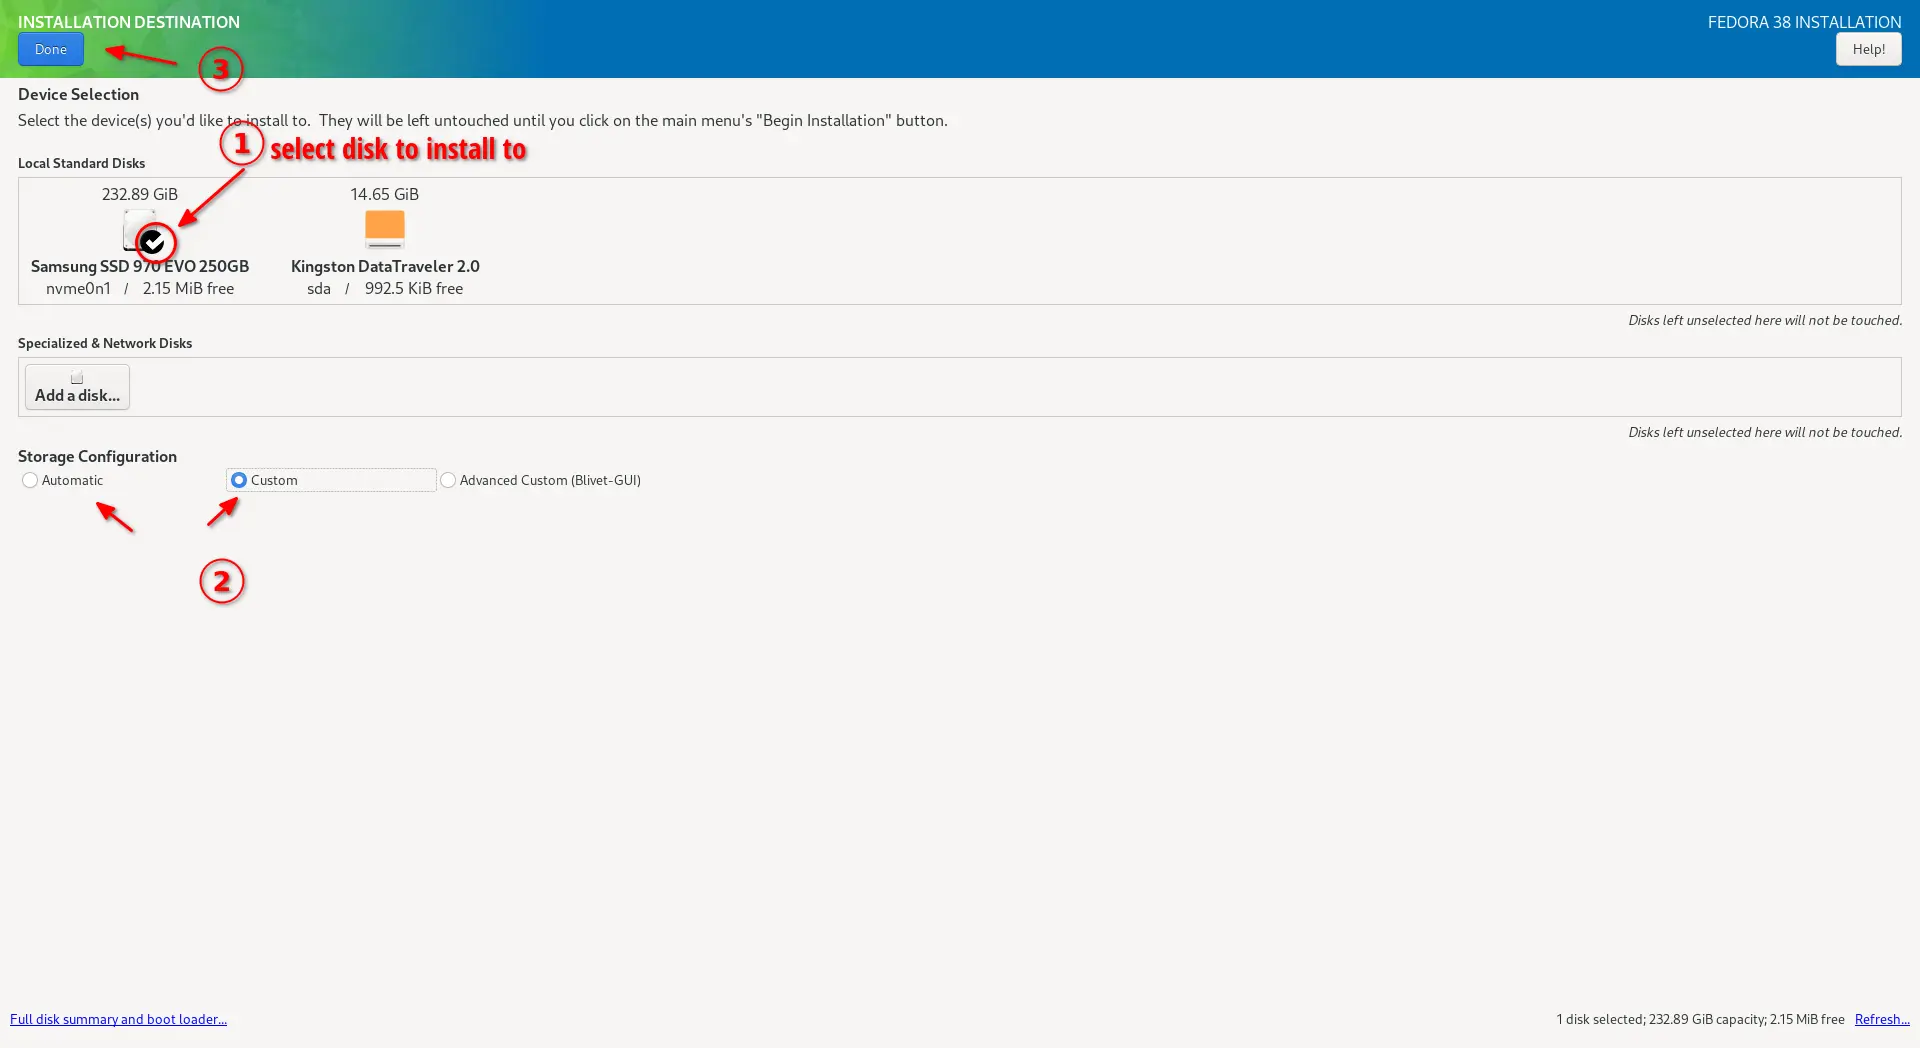
For the SYSTEM section (see the last screenshot), you need to click on it to configure the installation destination.
There do:
- select the disk you want to install Fedora onto. There will be a check-mark on it once selected.
- Under “Storage Configuration”, select ‘Automatic’ if you’re sure there are enough free space, or select “Custom” to manually assign partitions for Fedora.
- Finally, click “Done” button in the top-left.
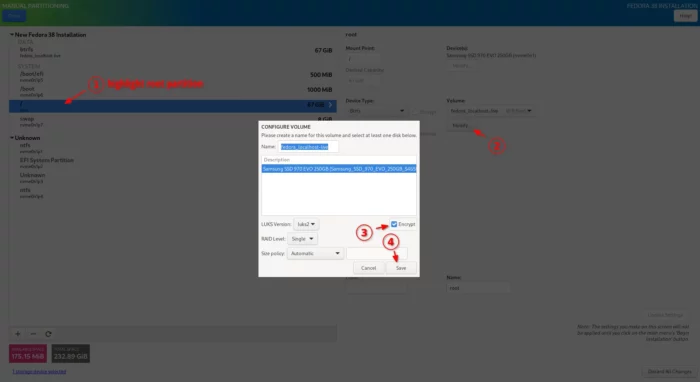
5. Assign disk partitions for Fedora
If you chose “Custom” in the previous screen, it will then go to the following screen once you click Done.
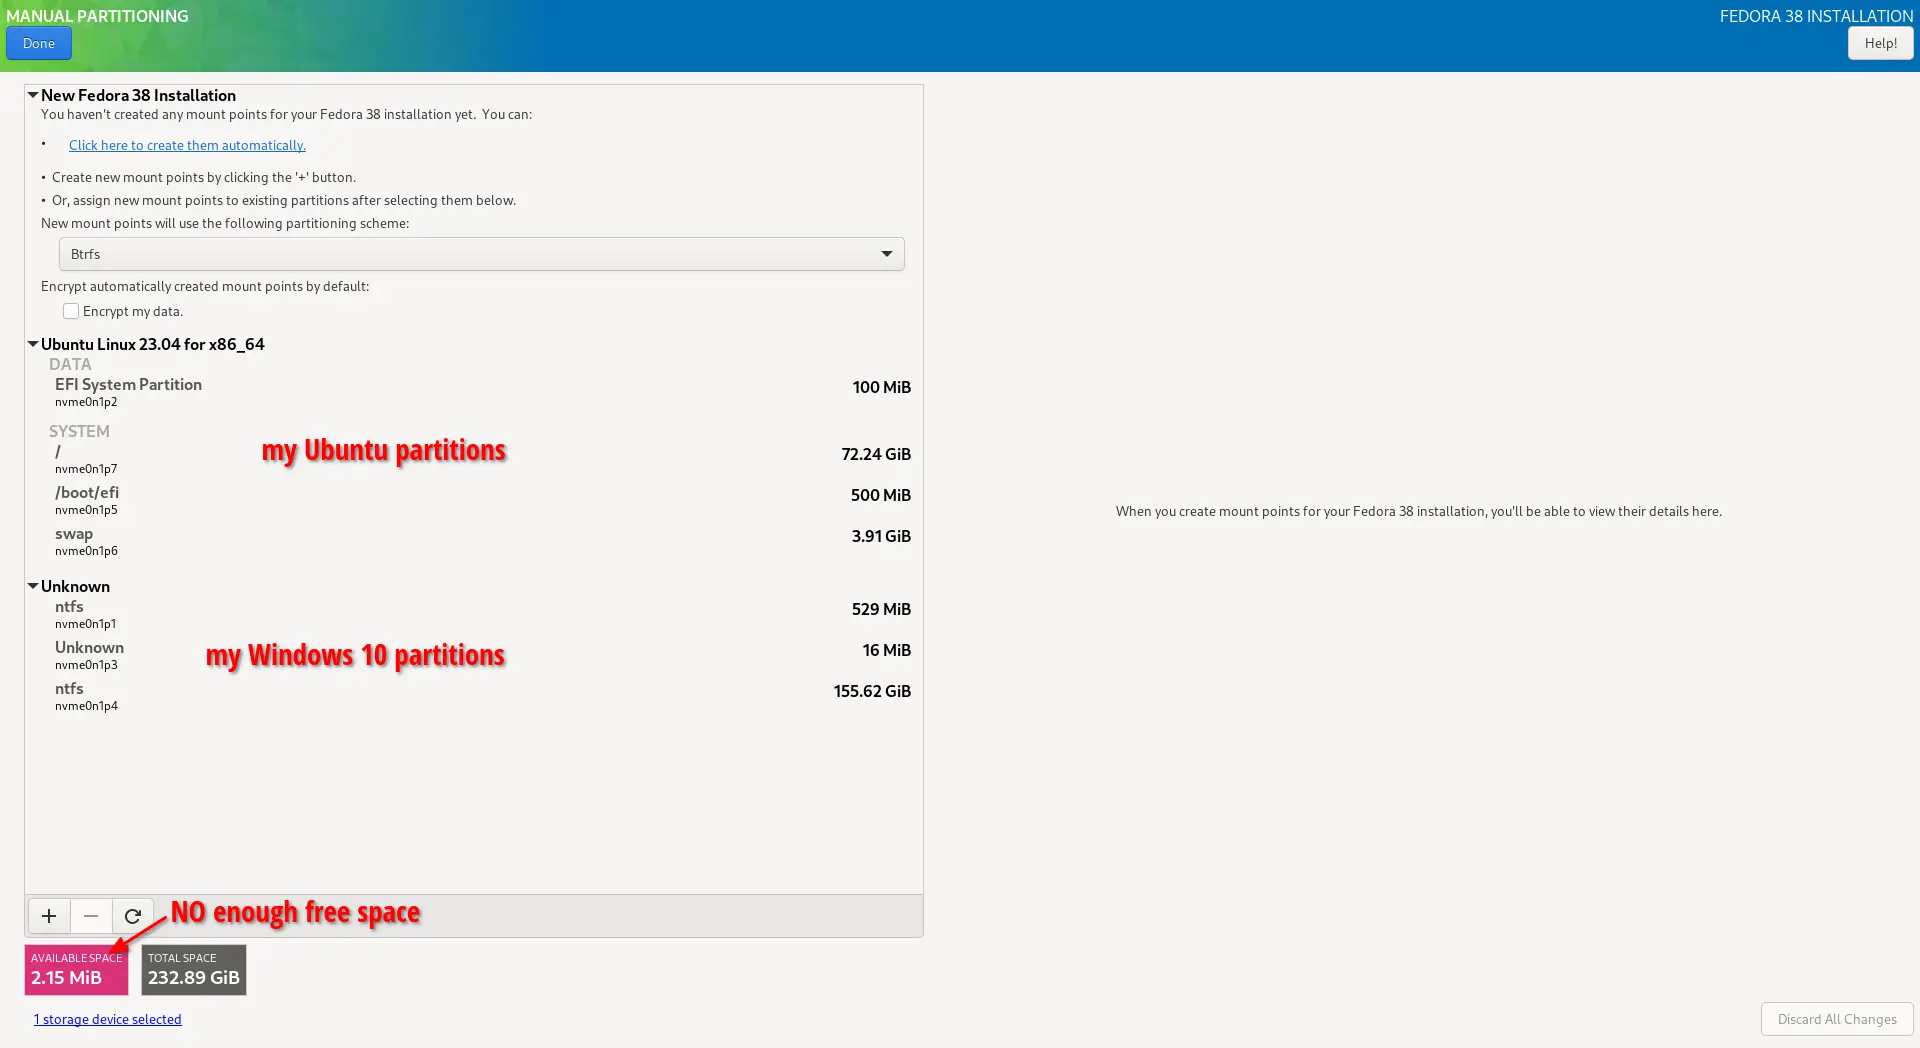
In my case, I have Ubuntu and Windows 10 file systems on the disk, and there’s NO enough free space. So I have to delete something via the “-” icon in bottom left. And, I deleted all the Ubuntu partitions. So it then looks like:
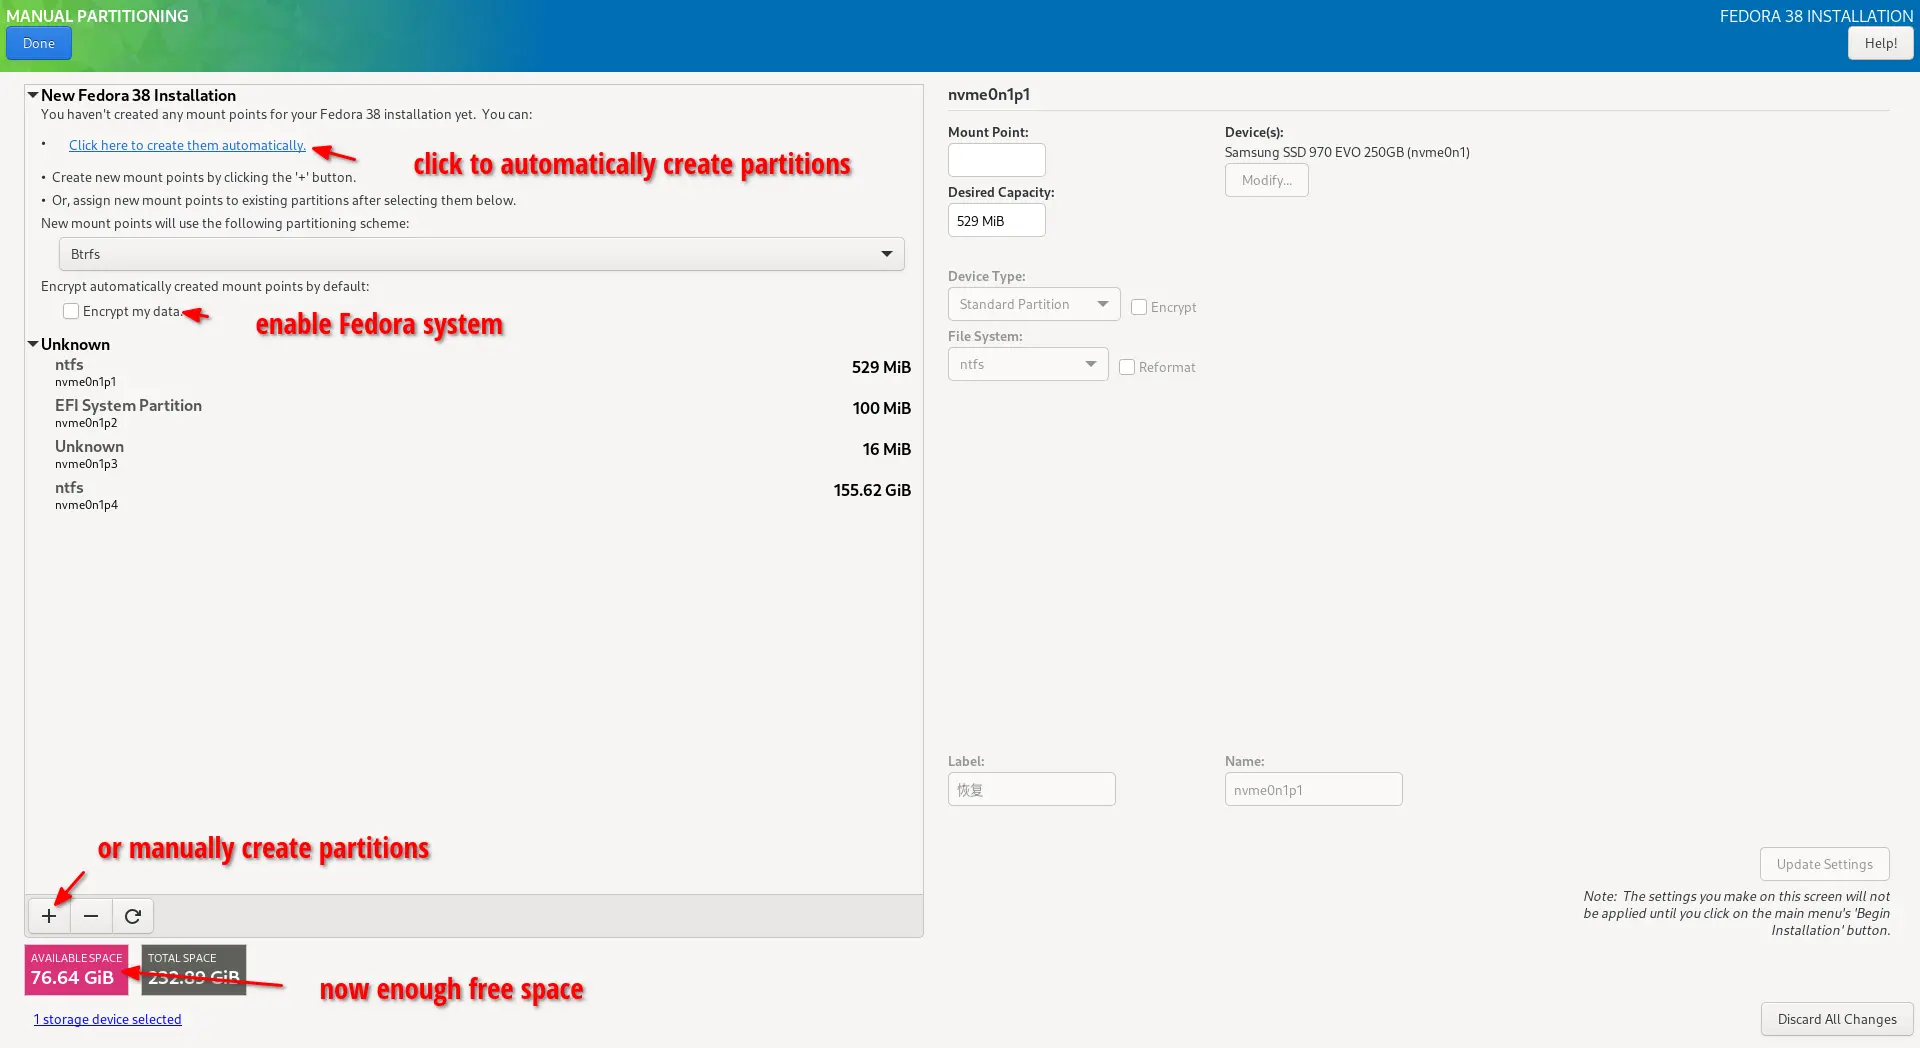
Once you have enough free space, do:
- Option 1 (Super Easy):
- Enable “Encrypt my data” if you want, so it will add password protection on every boot of Fedora.
- Then click the link “Click here to create them automatically” to automatically create all partitions required for Fedora.
- Finally click “Done” in the top-left.
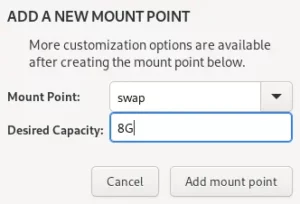
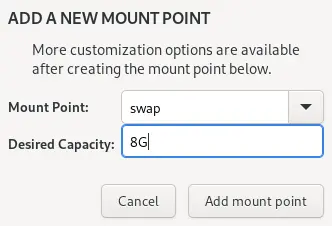
- Option 2. The previous method does NOT create Swap partition in my case. If you DO require swap (e.g., for hibernation use), do following steps to manually create system partitions:
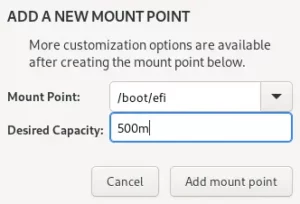
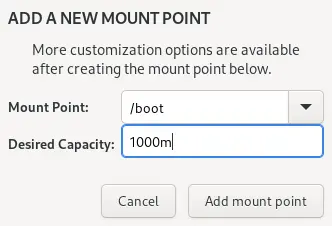
- Click bottom left “+” icon to create 500m partition mount at /boot/efi.
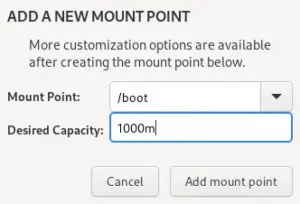
- Then create 1000m partition mount at /boot.
- Click “+” to create a few GB (as large as RAM) Swap partiton.
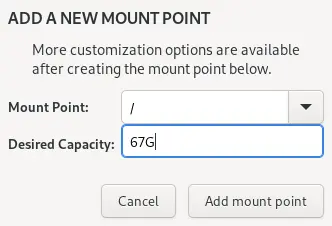
- Finally, click a partition mount at / with as large size as possible.

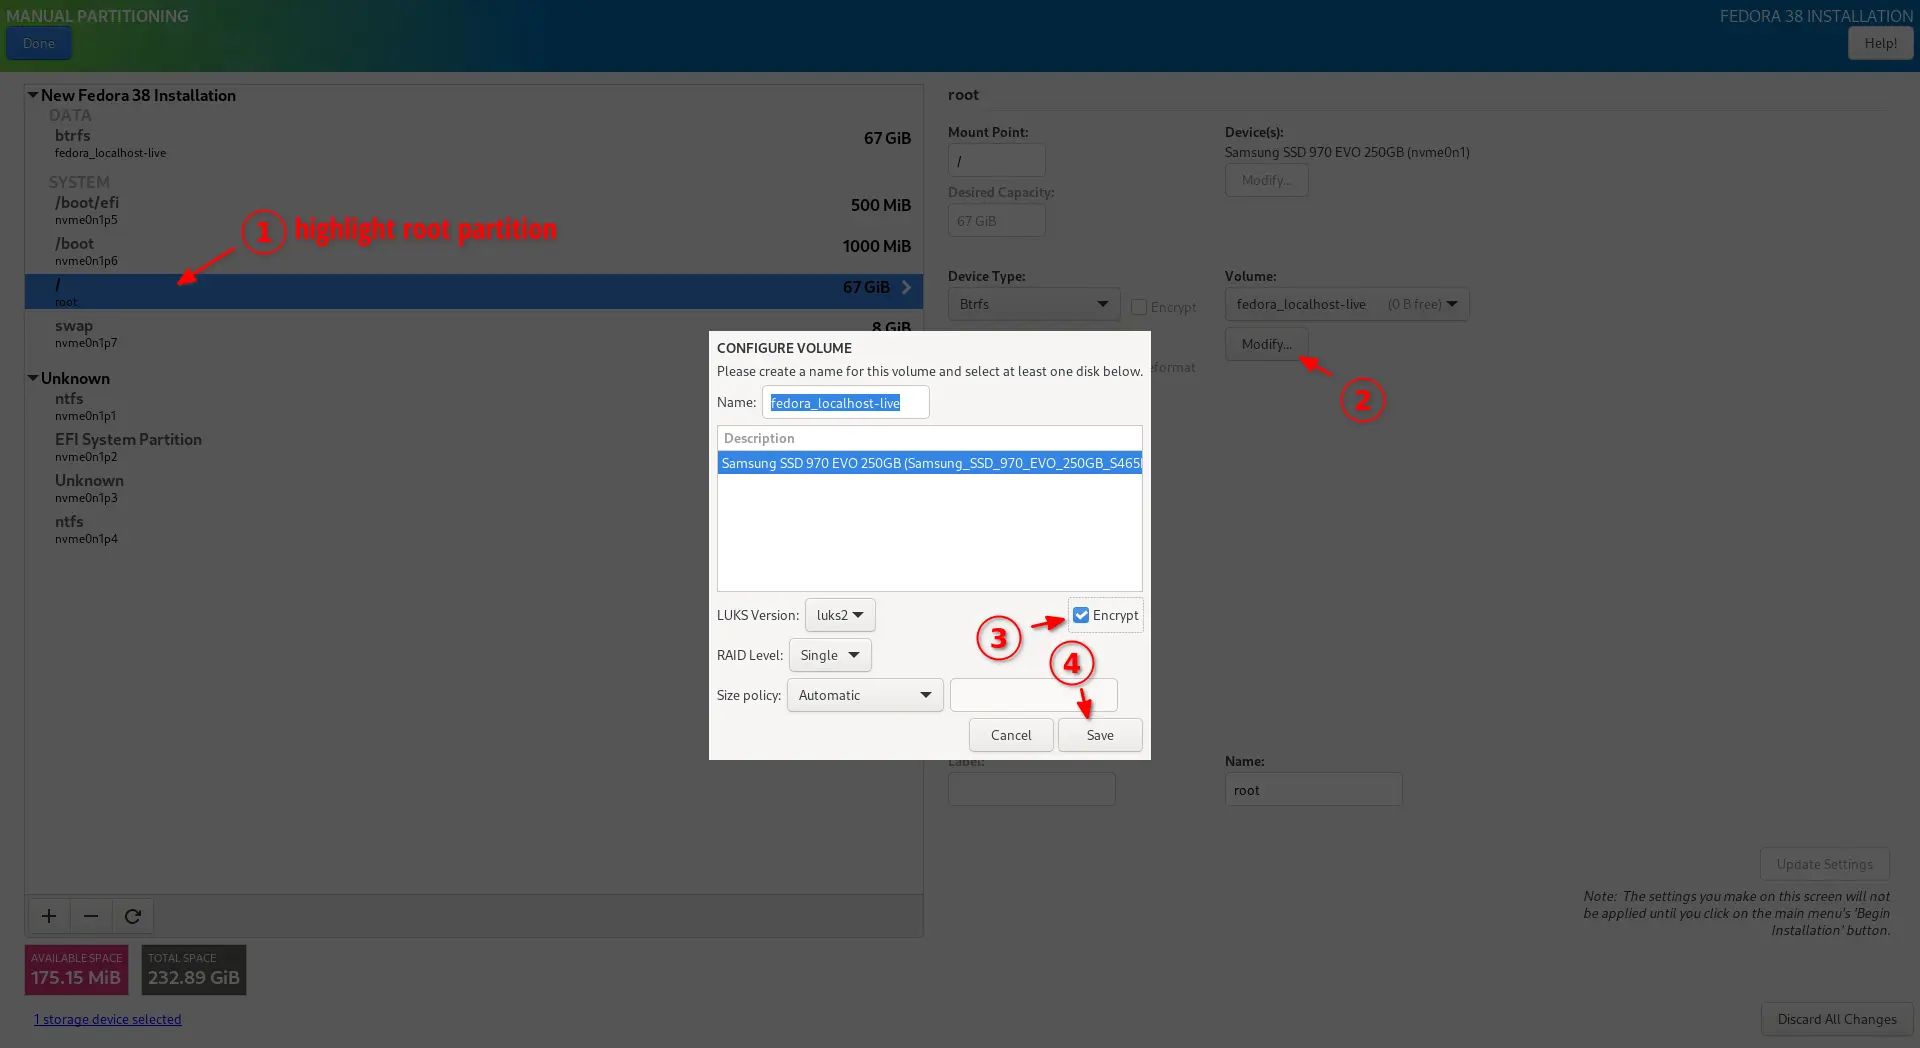
- When done, highlight the root (/) partition, click Modify button in right to enable “Encrypt” option if you need.
- Click bottom left “+” icon to create 500m partition mount at /boot/efi.

After creating partitions for your Fedora system, click top-left “Done” button. It WILL pop-up the dialog ask for setting password, if you enabled “Encrypt” option.

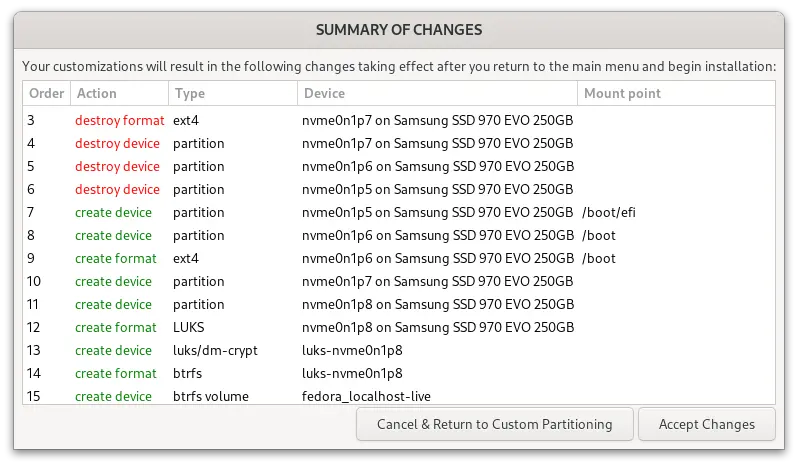
Then, it will pop-up all the changes summary you did on the disk. Click “Accept Changes” to apply.
6. Start Installing
When done assigning disk spaces, the summary page should be looking like the screenshot below:

You can now click “Begin Installation” and wait the installing process done. If everything goes well, it will prompt ‘Complete’ with button to “Finish Installation“.

Then, you can either choose to continue testing the live system, or restart computer.
Re-Enable Windows in the boot menu
If Windows 10 or 11 does not have a separate EFI partition, it may disappear from the boot menu.
In the case, boot Fedora 39 and setup your user account in the welcome wizard. When done, do:
- Click top-left ‘Activities‘ and then search for and open ‘Terminal’.
- When terminal opens, run command to edit the boot menu config file:
sudo gnome-text-editor /etc/default/grub
- When the file opens, add (or set if that line exist): GRUB_DISABLE_OS_PROBER=false
- Save the file, and apply change by running command:
grub2-mkconfig -o /boot/grub2/grub.cfg
Conclusion:
Compare to Linux Mint and Manjaro, the installer wizard of Fedora Linux is not so friendly for beginners. The partition table even don’t tell you what it is in sda1, sda2, etc. It’s troublesome if any other operating system exists in the hard disk.