


Want to mute and unmute microphone quickly using a shortcut key on keyboard? Here’s how to do the trick in Ubuntu and/or Linux Mint.
It’s easy to change the volume level either using System Settings or indicator menu in system tray area. However, a keyboard shortcut can be more efficient during online meeting or audio recording. In case your laptop does not has a physical key to do the job, this tutorial may help!
For Ubuntu 22.04 with default GNOME Desktop, also works in Fedora.
This step is tested and works in Ubuntu 22.04, Fedora Workstation 37, Manjaro Linux with GNOME. It should also work in all GNOME based Linux systems.
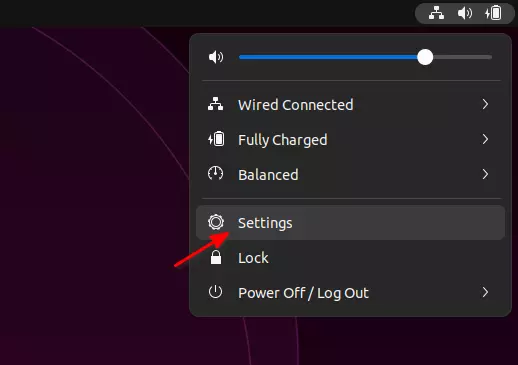
1. Firstly, open system Settings either by searching from ‘Activities’ overview or via system menu.

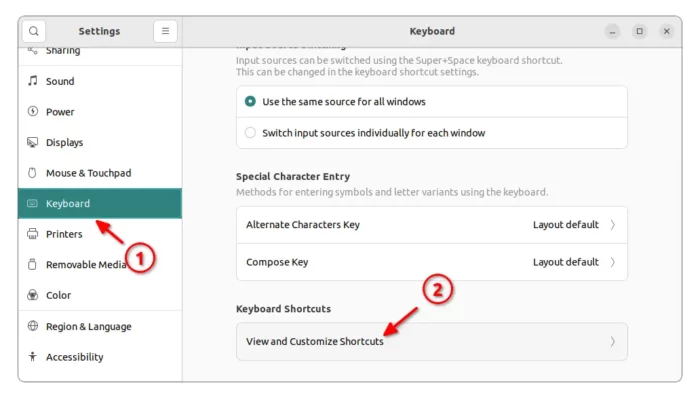
2. When it opens, navigate to Keyboard in left pane, scroll down in right, and click “View and Customize Shortcuts”.

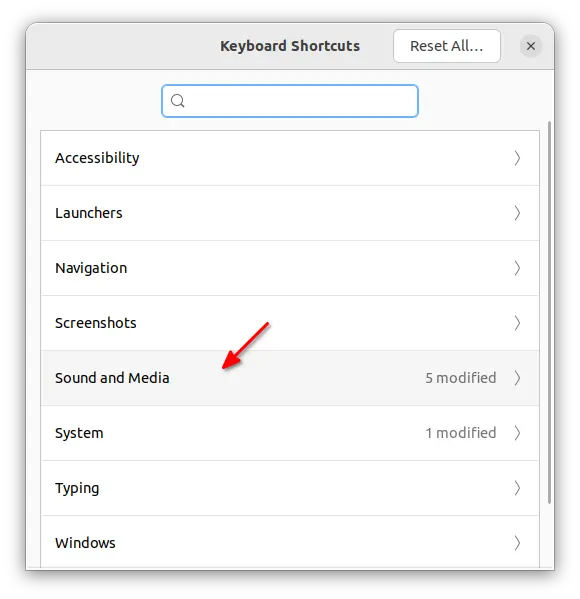
3. In the pop-up dialog, click to go to Sound and Media settings page.
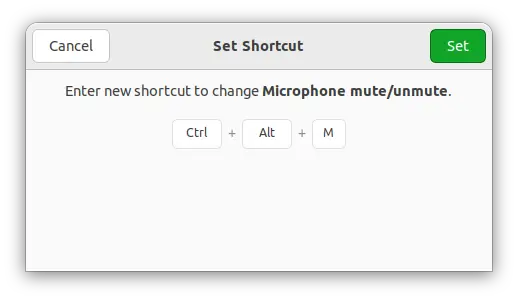
4. You can finally see the Microphone mute/unmute option. The shortcut is by default disabled. Just click on it, and hit your desired keyboard combination in next dialog to set as shortcut.
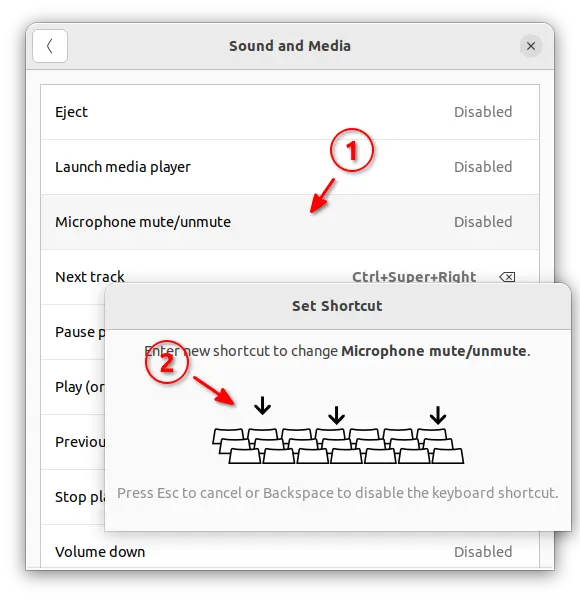
5. After that, it should display the shortcut key you just pressed in the dialog. Click on “Set” button, and it takes place immediately!
For Linux Mint 21 Cinnamon desktop.
Linux Mint also has the shortcut option, but also disabled out-of-the-box.
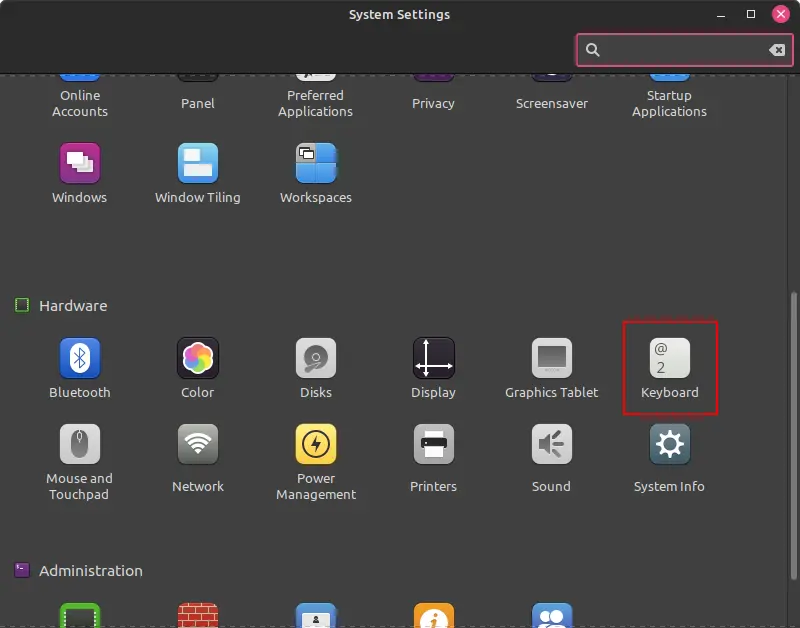
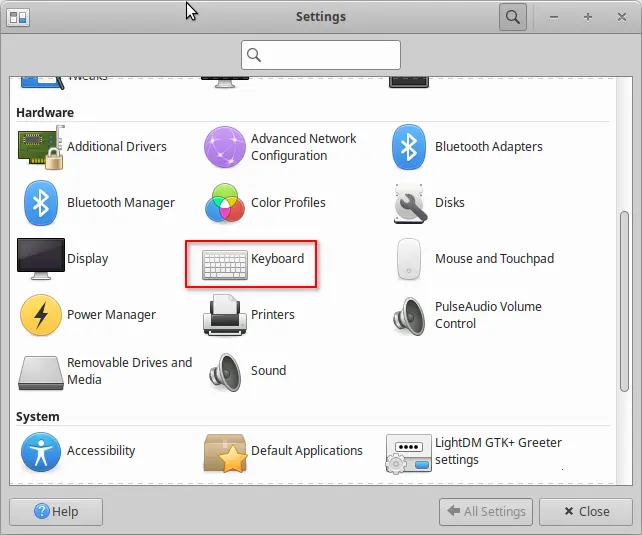
Firstly, open System Settings from start menu. When it opens, navigate to ‘Keyboard‘ under Hardware section.
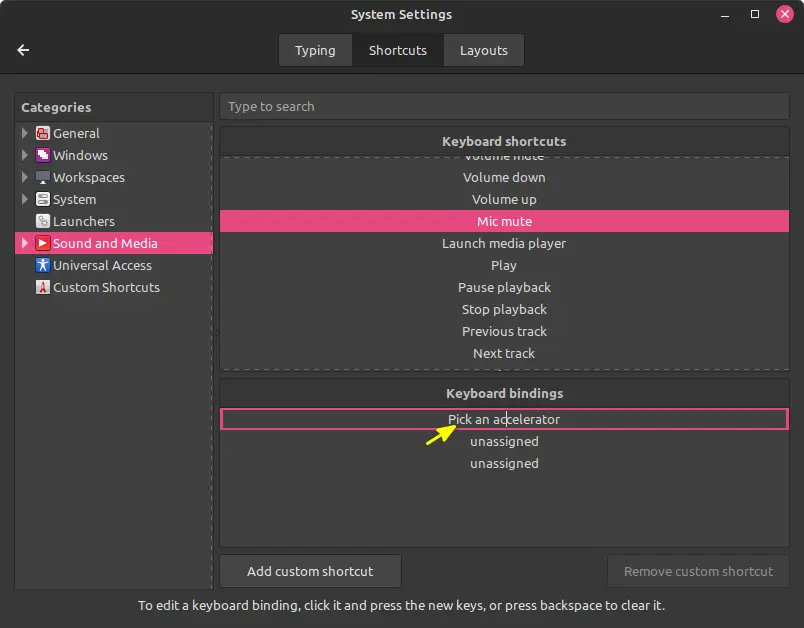
Then, navigate to Sound and Media in left pane. Click Mic mute in right. Finally, double click on first entry under ‘Keyboard bindings’ and hit your desired shortcut key combination.
Mute/Unmute Microphone shortcut in Ubuntu MATE 22.04
MATE desktop also has the corresponding shortcut but not enabled by default.
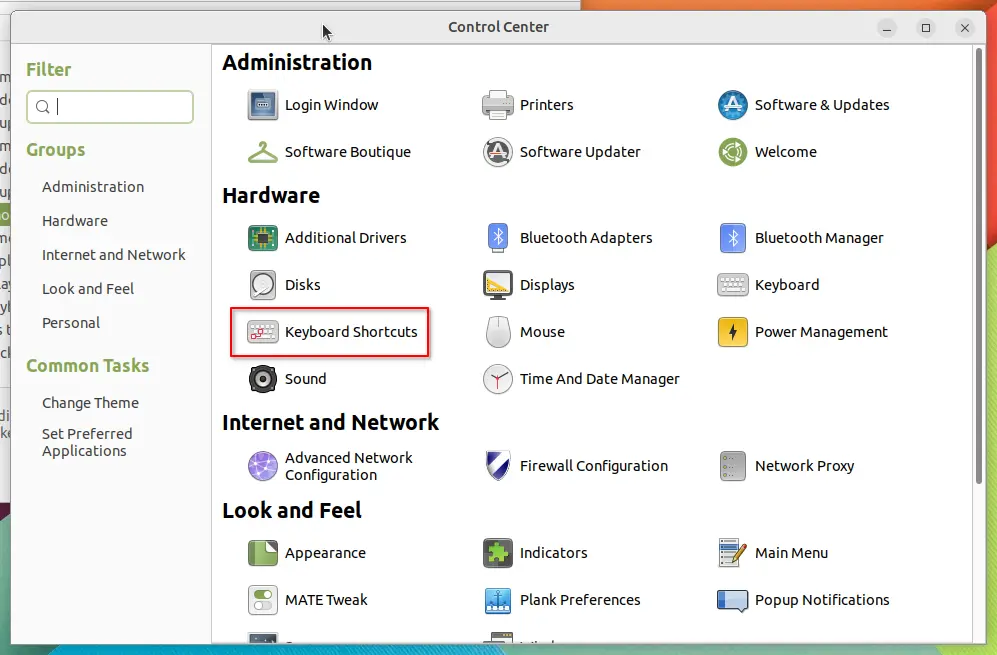
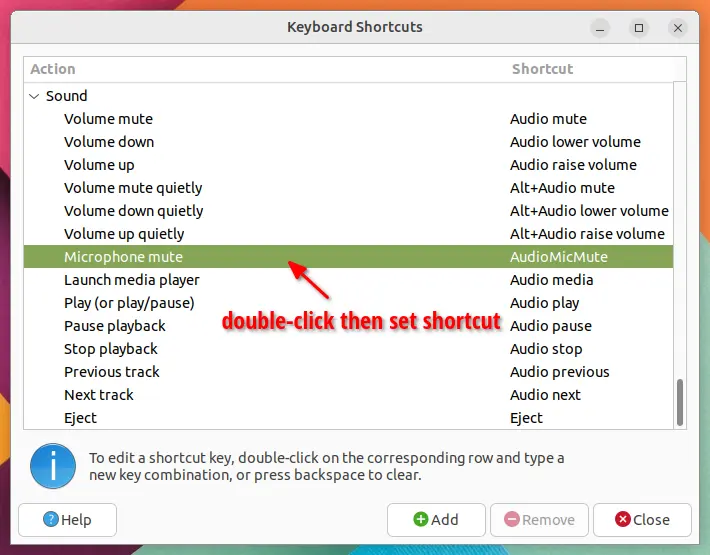
First, search for and open Control Center from start menu and navigate to Keyboard Shortcut.
In pop-up dialog, scroll down and find out Microphone mute option under Sound section. Double-click on that line, and then hit your desired keyboard key combination to use toggle mute mic.
For KUbuntu 22.04/Ubuntu Studio 22.04 with Plasma desktop
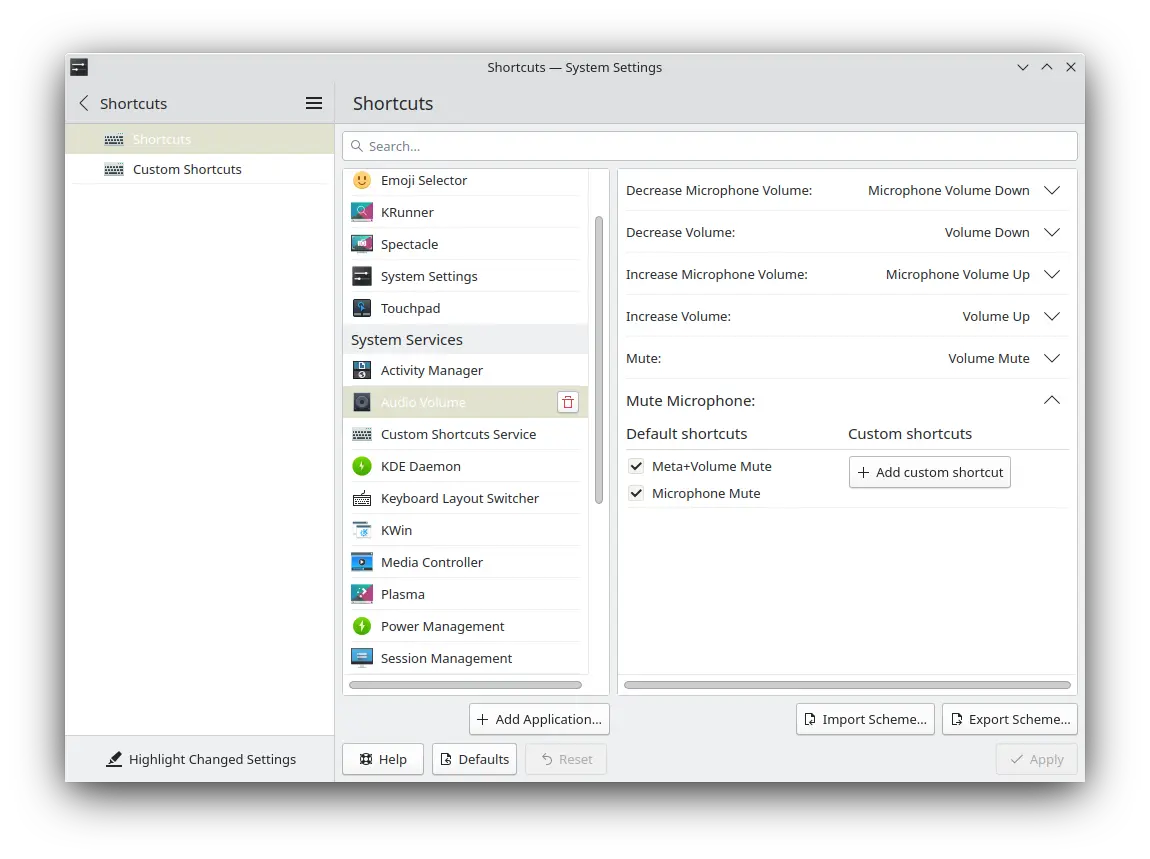
For KDE Plasma desktop environment, open System Settings and navigate to Shortcuts -> System Services -> Audio Volume. In the right, you’ll see the option to add custom shortcut for Mute Microphone.
For XUbuntu 22.04 XFCE, using custom command.
The XFCE desktop so far does not have built-in option for this function. User can however create a custom shortcut to run Linux command to toggle mute/unmute Microphone.
NOTE: NOT only for XFCE, this method should also works in other Linux desktop environments, and also for external microphone.
- Firstly, search for and open a terminal window from start menu. When it opens, run command:
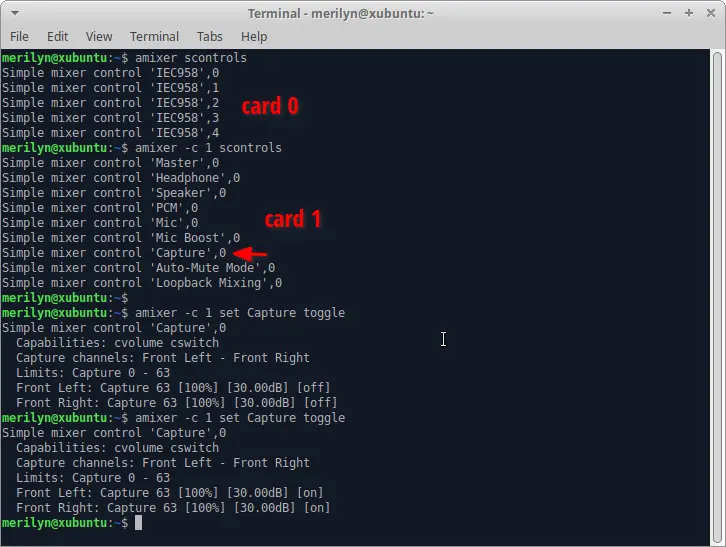
amixer scontrols
This command list all mixer controls for the first card (
card 0). And, it should output something like ‘Headphone’, ‘Speaker’, ‘Mic’, and so forth. - If NOT, check the second card (
card 1, it start counting from 0) by running command:amixer -c 1 scontrols
- Until you find out the card that includes the control for microphone, run the command below to verify:
amixer -c 1 set Capture toggle
Here
-c 1means for second card, change number 1 accordingly or skip-c 1for first card. And the control is usually ‘Capture’, at least it is in 2 of my laptops for built-in Mics.
Open the Sound settings page and keep an eye on input volume level, then run the last command multiple times. It should mute, unmute, mute again if you’ve done the things correctly.
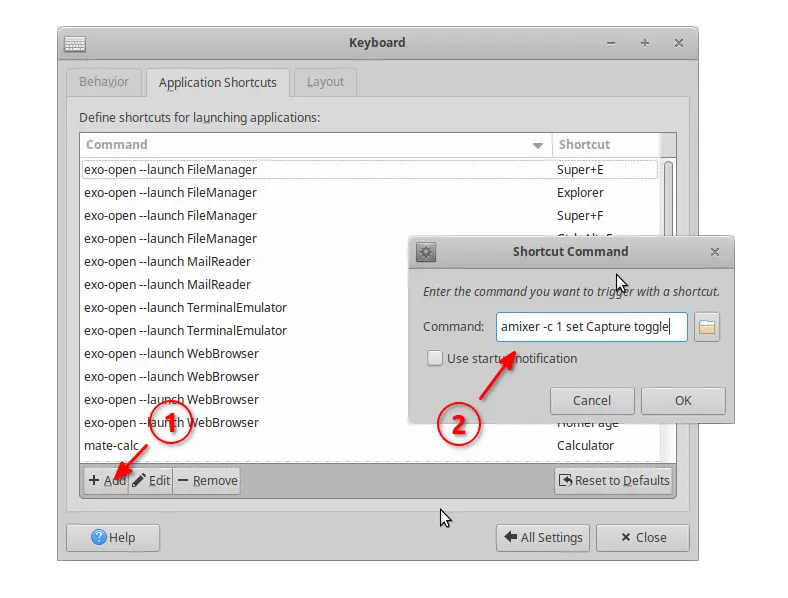
Once you found the correct command to mute/unmute microphone, open System Settings and go to Keyboard.
Click on “Add” button under Application Shortcuts tab, then input the command you just run. Finally assign the keyboard shortcut for it.
That’s it. When done, you’ll see the custom shortcut key in the list. Hit the key combination and enjoy!
