


Want to update your Linux Kernel for specific issue or new hardware support? How’s how to do this in Ubuntu and/or Fedora Linux.
How to Tell current Linux Kernel version
The development of Linux kernel is moving so fast, that most Linux systems do NOT include the latest release series.
Like other Linux, the default Kernels in Ubuntu and Fedora are always a bit old. But, they are get a lot of testing. And, your system developers maintain the kernel packages with security issues and crucial bug-fixes even before they’re getting merged in official Linux kernel releases. So, the system default kernels are always good than the latest Linux Kernels.
User ONLY install / update latest Linux kernel for specific new hardware support, certain bug-fix, and/or testing purpose!!!
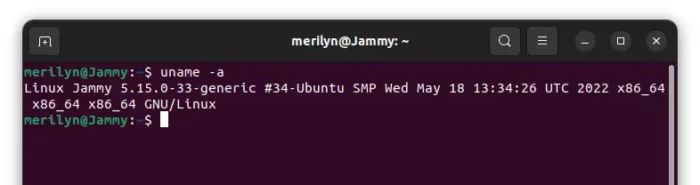
To verify the current running Kernel version, launch terminal from start menu (‘Activities’) and run command:
uname -a

Install Latest or Specific Kernel in Ubuntu:
Ubuntu has an official mainline Kernel PPA, in where you can get all the kernel packages from version 2.6 to the current 5.19 (dev). And, it keeps building the latest Kernels as soon as a new release is out.
By default, Ubuntu systems run with the Ubuntu kernels provided by the Ubuntu repositories. However it is handy to be able to test with unmodified upstream kernels to help locate problems in Ubuntu kernel patches, or to confirm that upstream has fixed a specific issue…
These kernels are not supported and are not appropriate for production use.
To download the .deb packages for specific or latest Kernel version, go to:
Besides 64-bit (amd64) modern PC/laptop, the PPA also supports for arm64/armhf, ppc64el, and s390x CPU architectures.
The PPA usually build the packages in the latest Ubuntu release. Which means, they may NOT install in an old Ubuntu system due to dependency issue.
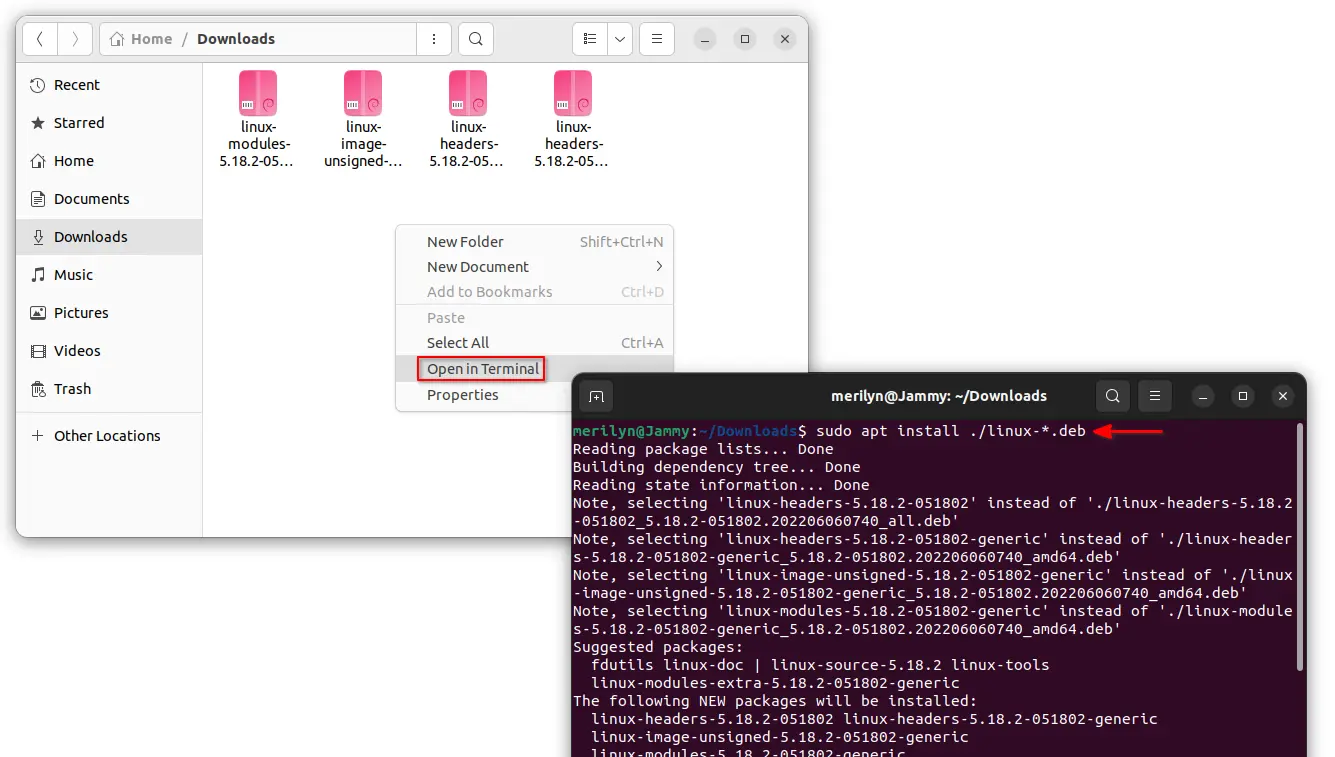
By downloading the packages, you may install them simply by running apt command in terminal:
sudo apt install ~/Downloads/linux-*.deb
Finally, restart computer and verify by running uname -a command in terminal.
How to Uninstall the Kernel packages:
Firstly, restart your PC and select booting previous kernel in “Advanced” boot menu. Then, use the command below to remove the kernel:
sudo apt remove --autoremove linux-image-unsigned-5.18.2-051802-generic linux-headers-5.18.2-051802
Depends on which Kernel version you installed, you NEED to replace the version number “5.18.2-051802” in the command.
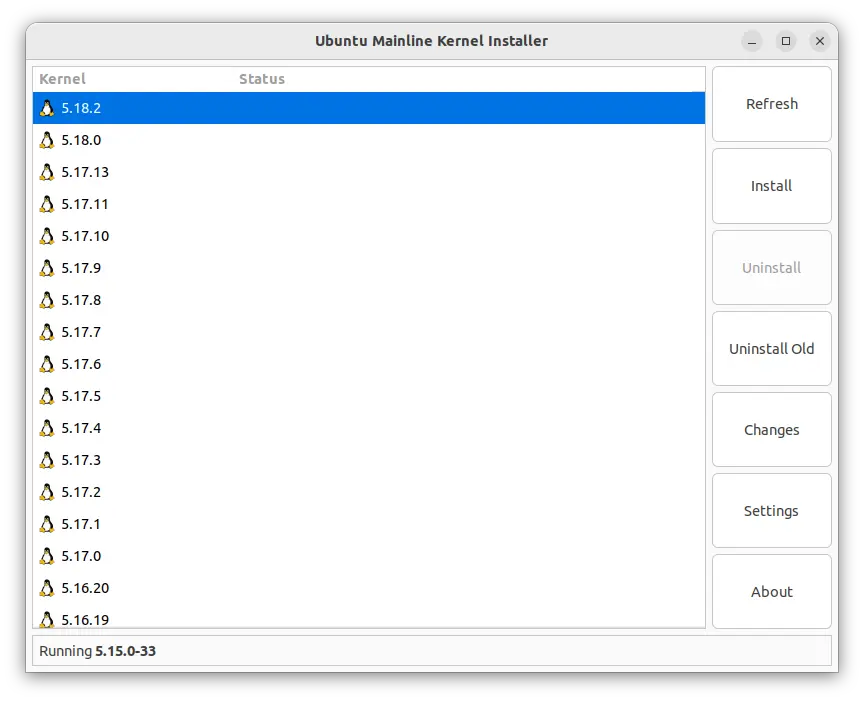
Graphical Tool to install / remove Kernels in Ubuntu:
To make life easier, there’s a third-party tool ‘Ubuntu Mainline Kernel Installer‘ that provides a graphical interface to select install or uninstall Kernel packages from that PPA.
User may install the tool from the developer’s PPA by running the commands below one by one:
sudo add-apt-repository ppa:cappelikan/ppa
sudo apt update
sudo apt install mainline
Install Latest Linux Kernel in Fedora
Like Ubuntu, Fedora has Kernel Vanilla Repositories for the latest Kernel packages. Fedora website refers to that repositories, though they are maintained by contributors.
With them, you may get following Kernel series for amd64, arm64, and ppc64le CPU architectures:
-
- @kernel-vanilla/mainline – the latest kernel in pre-release (aka “rc kernel”) stage.
- @kernel-vanilla/mainline-wo-mergew – same to the previous, but exclude kernels from merge window.
- @kernel-vanilla/stable – latest stable kernel according to kernel.org.
- @kernel-vanilla/stable-rc – same to the previous, but also include the RC kernels.
- @kernel-vanilla/fedora – The latest point release of Fedora’s default Kernel series.
- @kernel-vanilla/next – which is at the forefront of Linux development – thus use at your own risk.
Firstly, search for and open terminal either from start menu or ‘Activities’ overview.


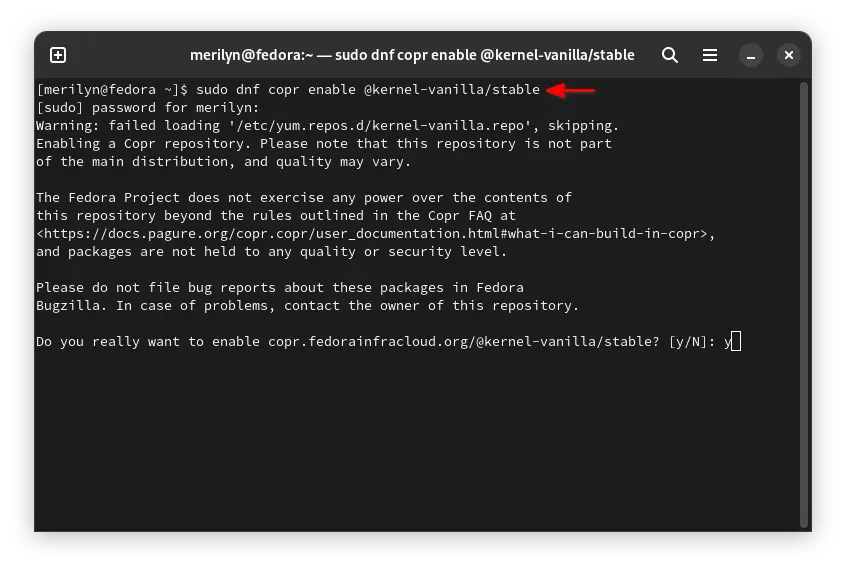
When terminal opens, run command to setup the repositories:
sudo dnf copr enable @kernel-vanilla/stable
Depends on your need, replace @kernel-vanilla/stable with one of the Kernel series in the list above.
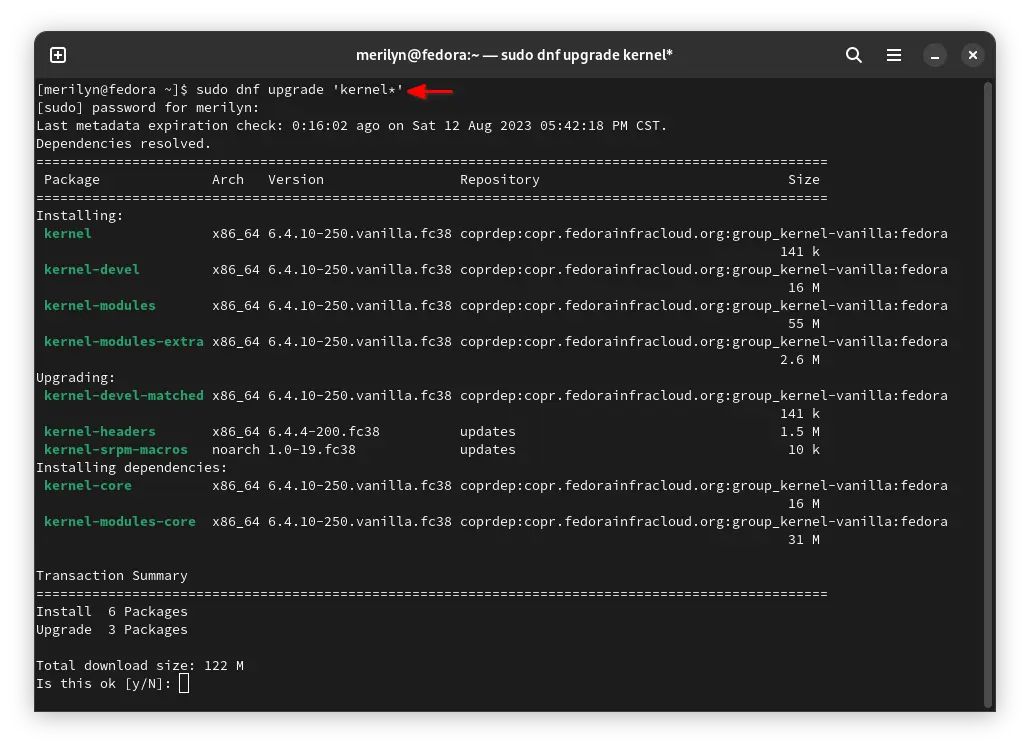
Finally, install latest Kernel via command:
sudo dnf upgrade 'kernel*'
After installation, restart your computer and enjoy!
How to Uninstall the Kernel from that repository:
Firstly, restart your computer and select booting the system default kernel from Grub boot-menu. Then, run the command below will remove kernel packages from vanilla repository.
sudo dnf remove kernel-core-x.x.xx
Replace x.x.xx with kernel version number you’re going to remove.
Last words:
As mentioned above, the default Kernels have lots of testing and contain your system’s own patches. It’s always better than the latest upstream kernels. So, only install for specific reason or testing purpose.
In addition, the kernel packages in this tutorial are “NOT signed” with a key typical systems will trust. You may need to disable ‘Secure Boot‘ in BIOS to make them work.