


This is a step by step beginner’s guide shows how to install Ubuntu (Ubuntu 23.10 Updated) in your machine to dual boot with Windows 10/11.
Requirements
To follow this tutorial, you need to prepare following things first:
- A USB stick with 6GB+ momery.
- PC or laptop running Windows, Linux, or macOS.
- Internet connection for downloading the disco image.
Download Ubuntu 23.10
The .iso disco image of Ubuntu 23.10 is available to download at the link below:
It’s highly recommended to verify the file integrity after downloaded the image. And, this can be done:
- For Linux, open terminal and run command (change filename accordingly):
sha256sum ~/Downloads/ubuntu-23.10-desktop-amd64.iso
- For Windows, use command to check the sha256 hash (change user1 name and file name accordingly):
certutil -hashfile C:\Users\user1\Downloads\ubuntu-23.10-desktop-amd64.iso SHA256
- And for macOS, use command:
shasum -a 256 ~/Downloads/ubuntu-23.10-desktop-amd64.iso
Running one of the previous commands will output the sha-256 hash. You just need to compare it to the one in Ubuntu downloads page.
Create boot-able USB Installer
There are quite a few tools for burning ISO image into USB stick.
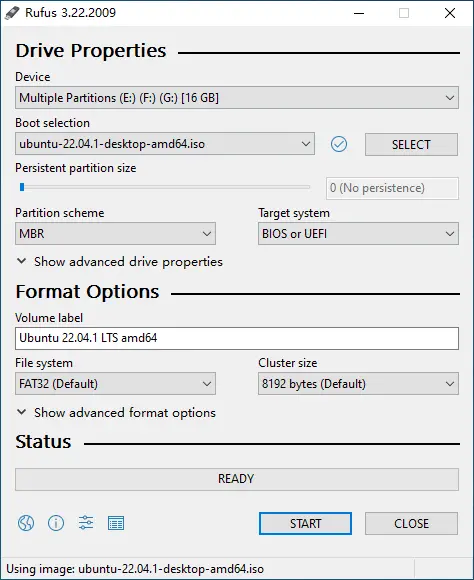
For Windows, just download and use Rufus:
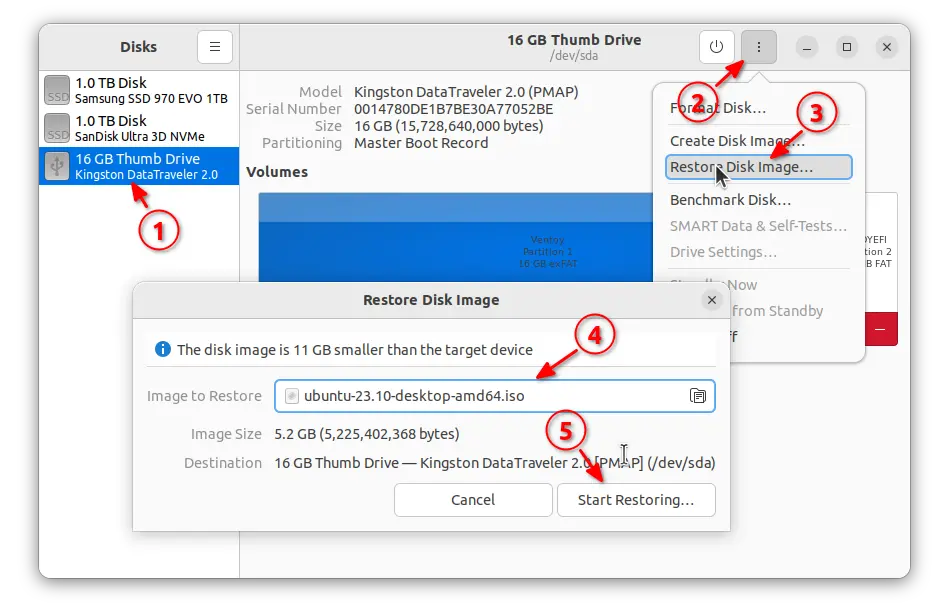
For Ubuntu, Fedora, and other Linux with GNOME, search for and open “GNOME Disks”. When it opens, highlight the USB device, and go to “⋮ -> Restore Disk Image”.
I don’t have a macOS machine, but there’s a few other tools for creating bootable USB, including macOS support.
Boot the USB installer
After creating the USB installer, connect it into the destination PC, and boot it. Usually, press Delete (or other key depends on your machine) to get into BIOS, select the USB as first boot device and press F10 to save and reboot.
Also, it’s recommended to disable secure boot to avoid boot issue, though you can re-enable it after installed Ubuntu.
If everything goes well, you’ll see the boot menu as the screenshot below shows you.

Just hit Enter to boot with the first menu entry and continue the steps below.
Installer wizard – Configure language, keyboard, etc.
After successfully booting the USB installer, it will bring you directly to install wizard for installing Ubuntu 23.10.
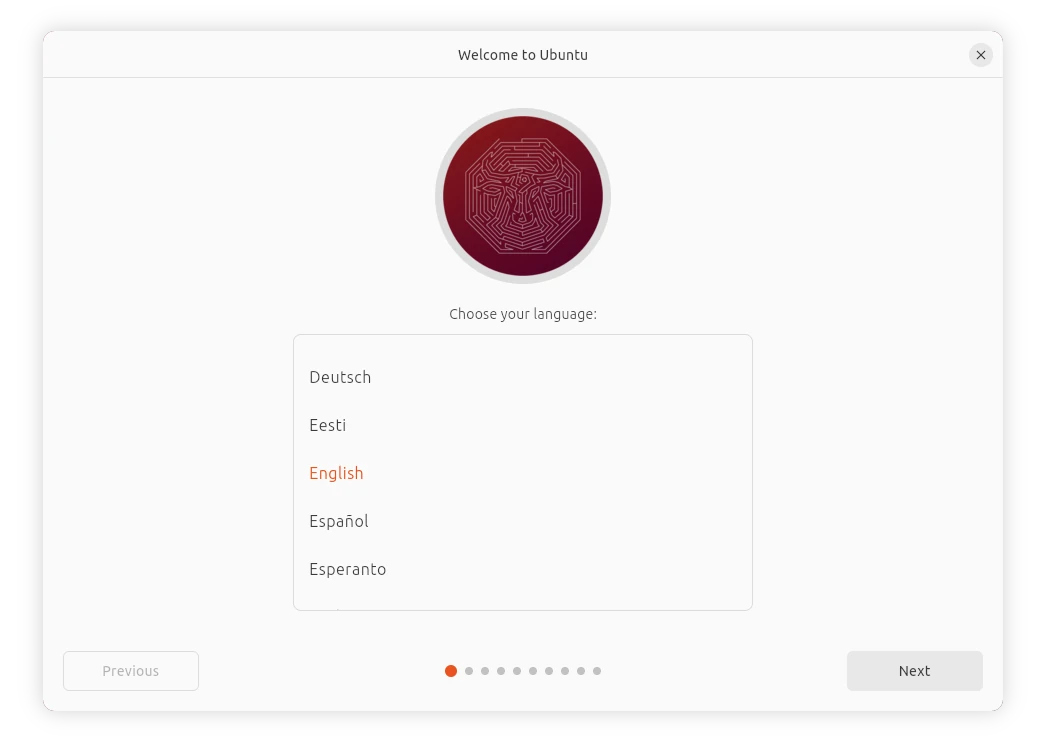
First choose language, then select either “Install” or “Try” the live system. In live system, you can re-launch the wizard at any time by clicking “Activities” and click the first app icon in left.
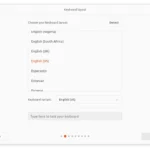
The next screens will also ask for selecting keyboard layout, connecting network (not required), etc. The default options are OK in most cases!

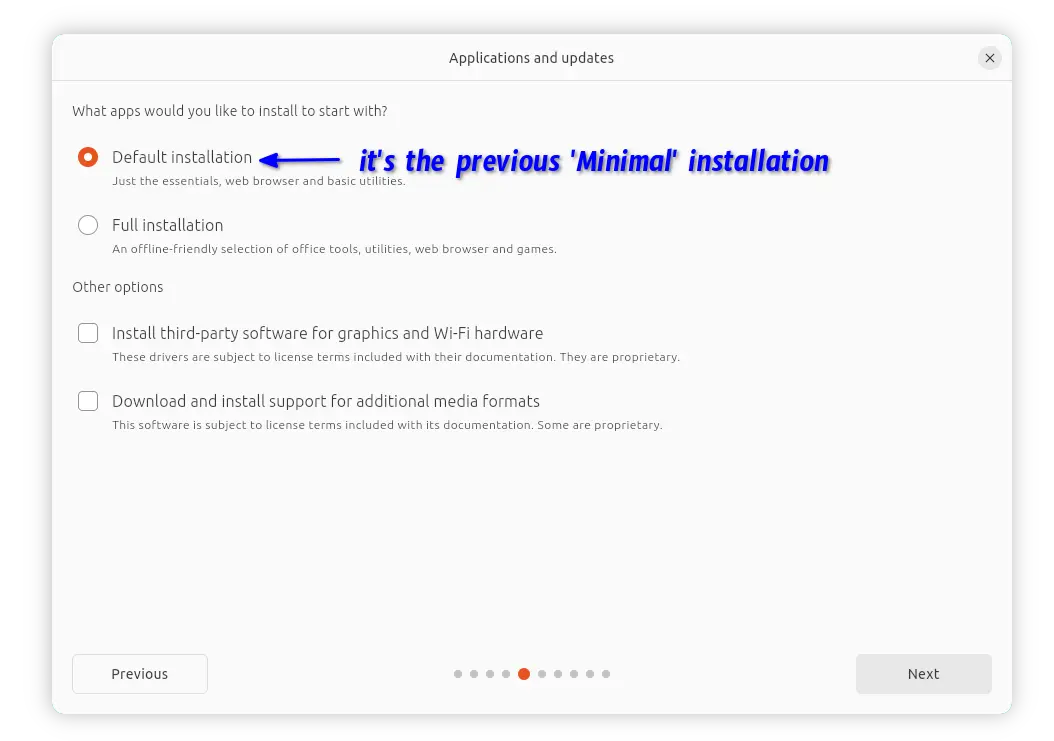
However, the “Default Installation” is a minimal installation, that excludes many apps, such as LibreOffice, Thunderbird, Rhythmbox, etc. Choose “Full Installation” if you prefer to the old default installation in previous Ubuntu releases.
Type of Installation
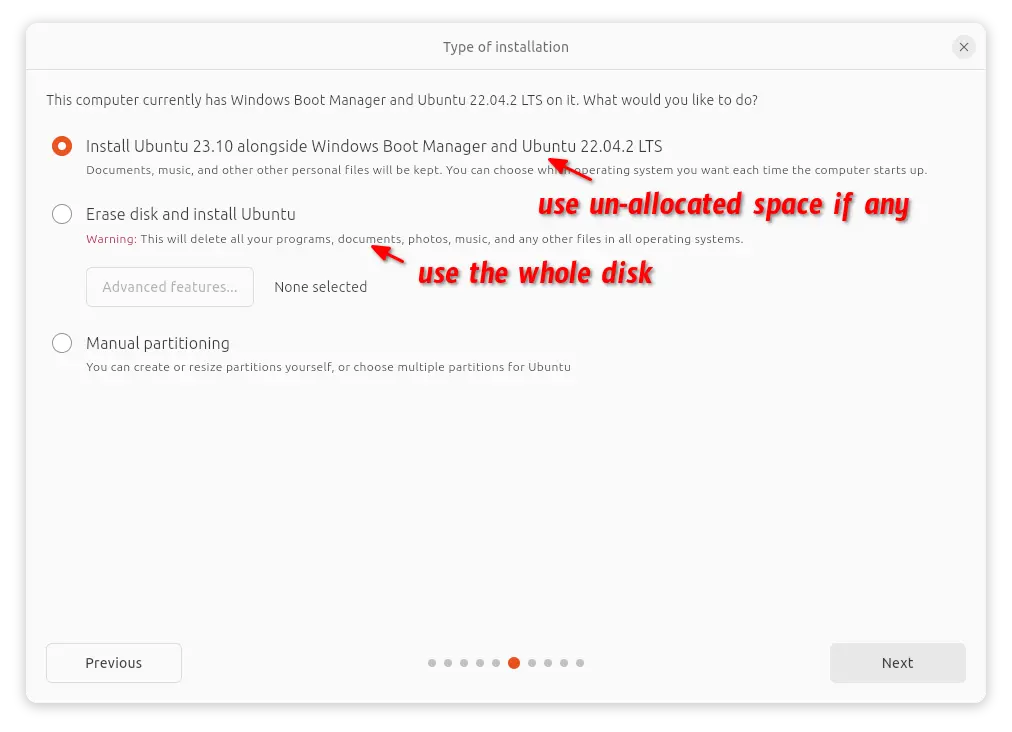
When the wizard goes into “Type of Installation” page, it will display a few options depends on your disk status:
- Install Ubuntu 23.10 alongside xxx.
- Erase disk and Install Ubuntu.
- Manual partitioning.
If you’re going to use the whole disk for Ubuntu 23.10, select “Erase disk and Install Ubuntu”. Keep in mind all data in destination disk will be lost. And, this option support Advanced features such as disk encryption.
If you have another operating system (such as Microsoft Windows) on the disk, and have enough un-allocated space (25 GB at least, but as large as good), use the first choice to install Ubuntu 23.10 alongside.
For other cases and advanced users, use “Manual partitioning”.
Manual partitioning
If you selected “Manual partitioning” in the previous step, it will go into the partition table. In my case, I have Windows 11 (sda5) and Ubuntu 22.04 (sda3) in the disk. No free un-allocated disk spaces.
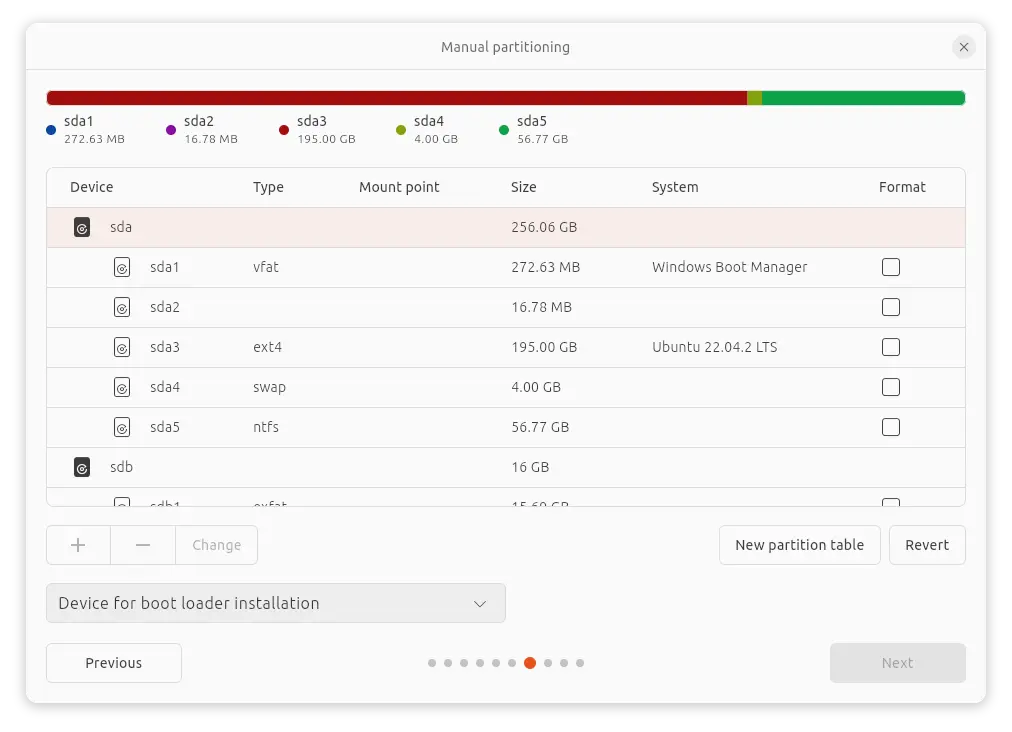
In my case, I’m going to delete the Ubuntu 22.04 disk partitions, by choosing them and clicking ‘-‘ icon to delete one by one. After that, I have dozens of GB free spaces.
BE CAREFUL when deleting partitions! It’s better to leave unchanged for partitions that you don’t sure what they are used for. NTFS partitions are usually for Windows, and small partitions with dozen or hundred of MB space can be for specific use.
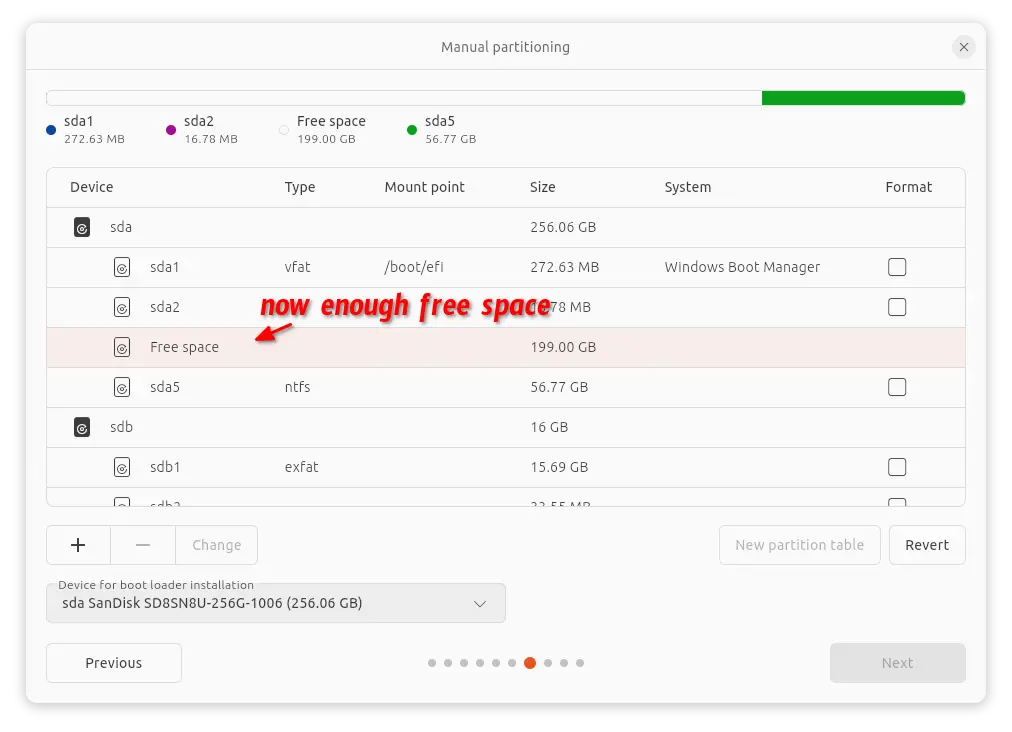
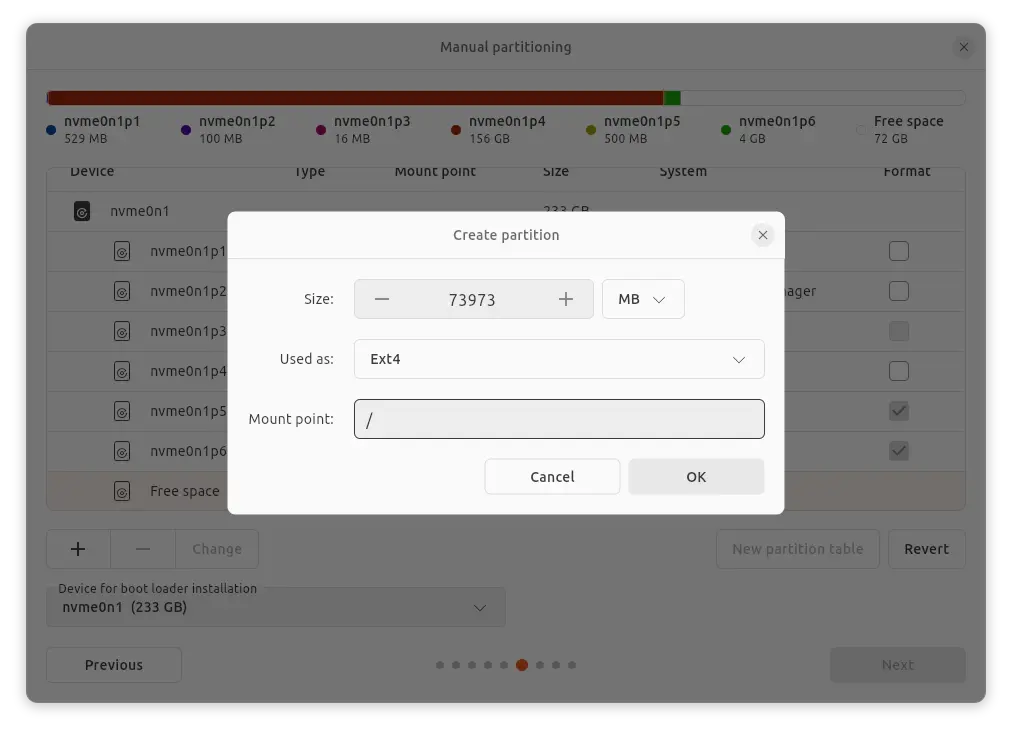
Create partitions for Ubuntu 23.10
Once you got enough un-allocated space for Ubuntu 23.10, highlight the free space and click “+” one by one to create following partitions.
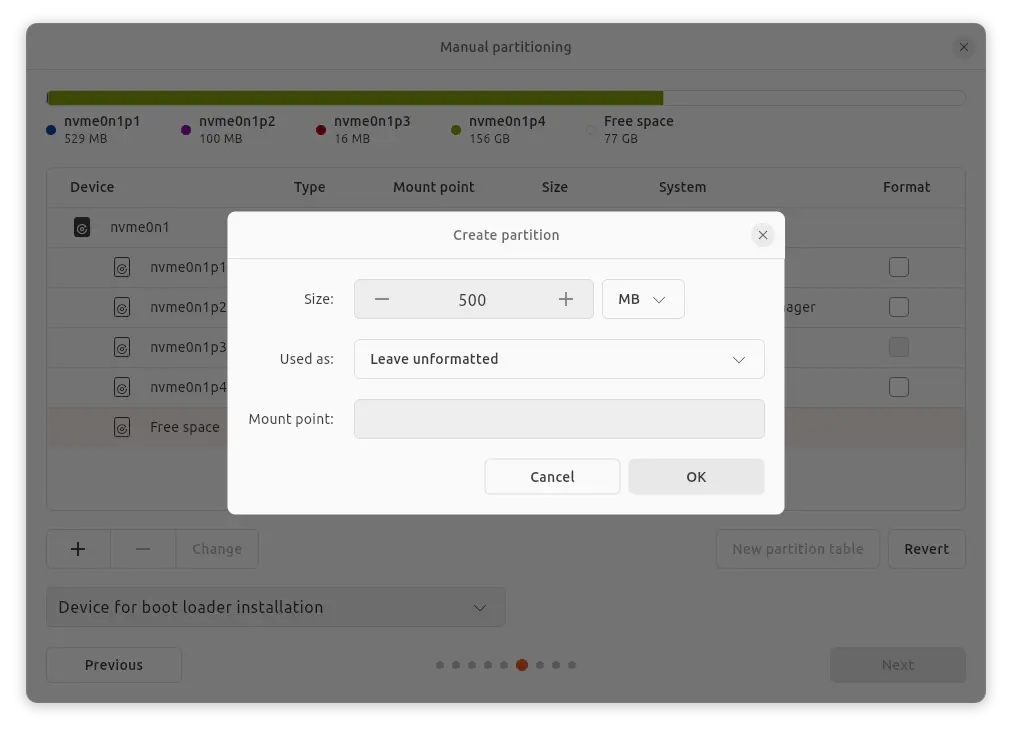
1. EFI. First, create a 500 MB partition. Select use as “Leave unformatted”. After clicking OK, highlight that partition in table, and click “Change“, then:
- select use as “FAT32“.
- choose or type mount point /boot/efi
You can SKIP creating this partition, if there’s already a partition on table mounted as ‘/boot/efi‘. In my case, it’s auto-detected and auto-mounted.
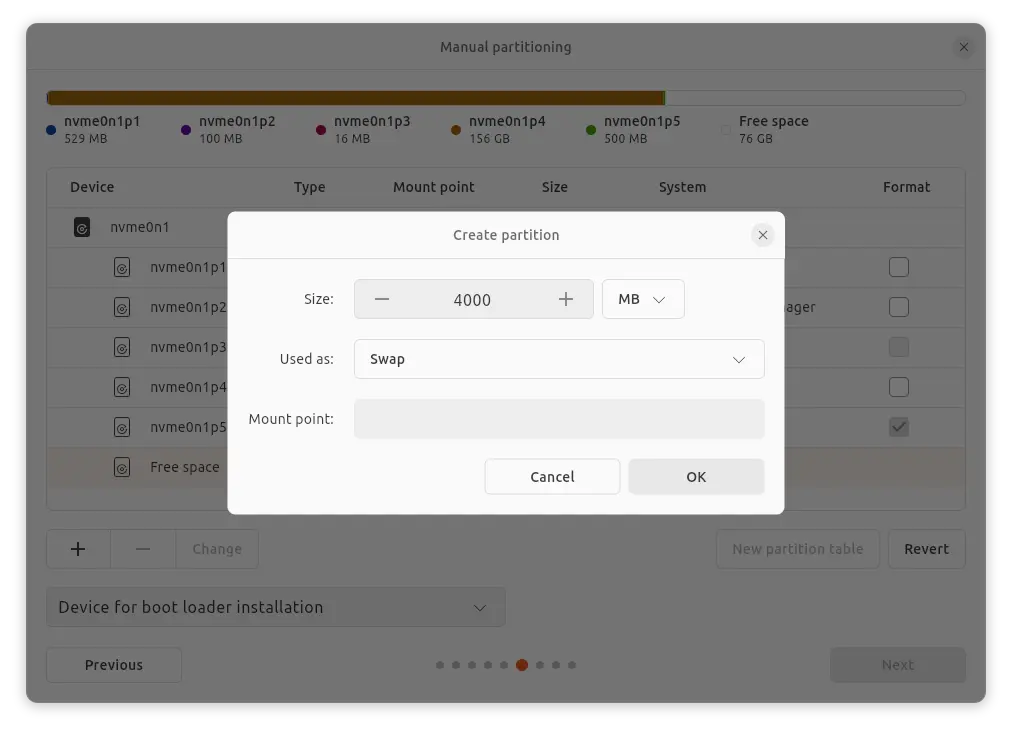
2. Swap. For small RAM, and/or hibernation feature, you may also create a Swap area. Though, this partition is OPTIONAL.
- Set size as large as RAM.
- Select use as Swap.
3. Ubuntu filesystem. Finally, create the partition for Ubuntu file system.
- Set size 20 GB+, but as large as good for long time use
- Select use as EXT4.
- Select mount point /
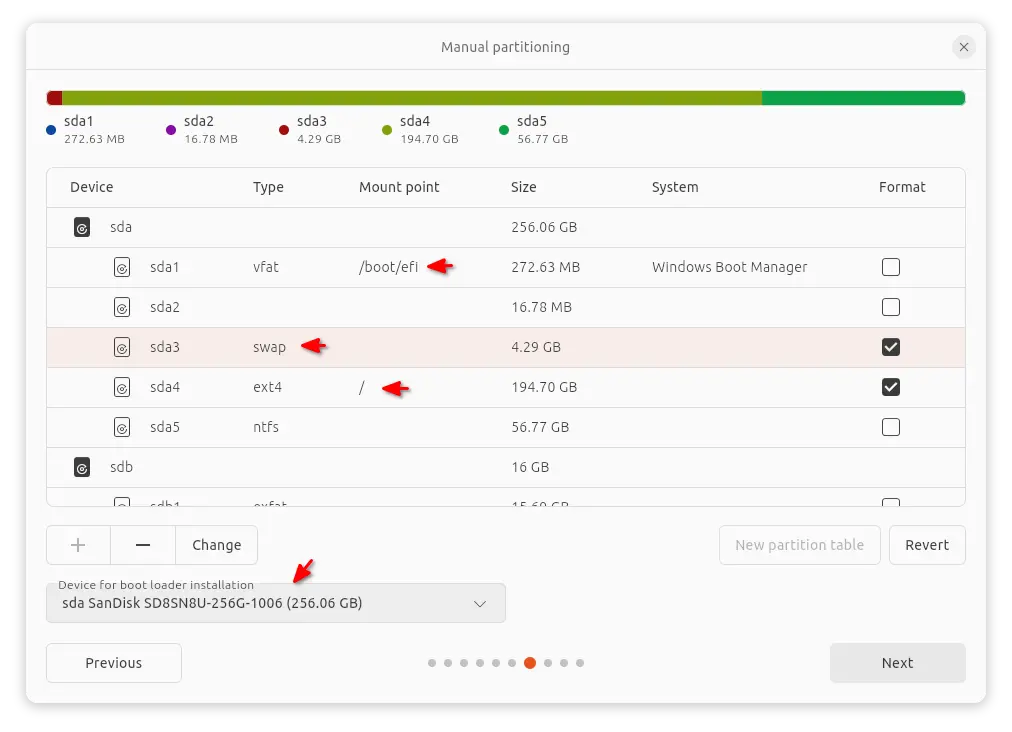
Finally, you should see ‘/boot/efi‘, ‘/‘, and ‘swap‘ partitions on the table. Also, choose the destination disk on bottom for installing boot-loader to.
Start installing process
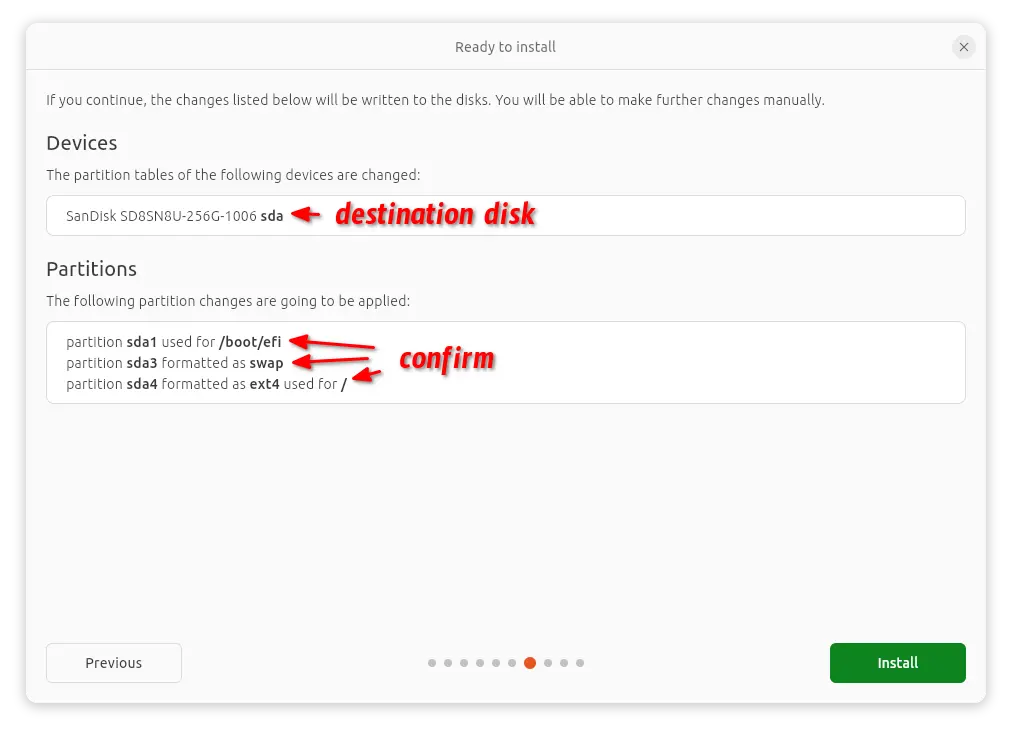
When done creating partitions, click “Next”. It will show you the summary of changed disk and disk partitions.
NOTE: It’s still possible to cancel everything you did, until you clicking “Install” button in this step. So, check carefully to make sure everything is done correctly!
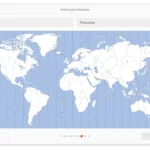
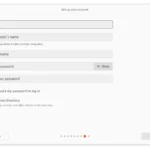
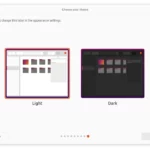
Then select time zone, setup user account, and select light/dark mode. When done, it will show you the installing process.
Once Ubuntu is successfully installed on your machine. It will show you the screen below.
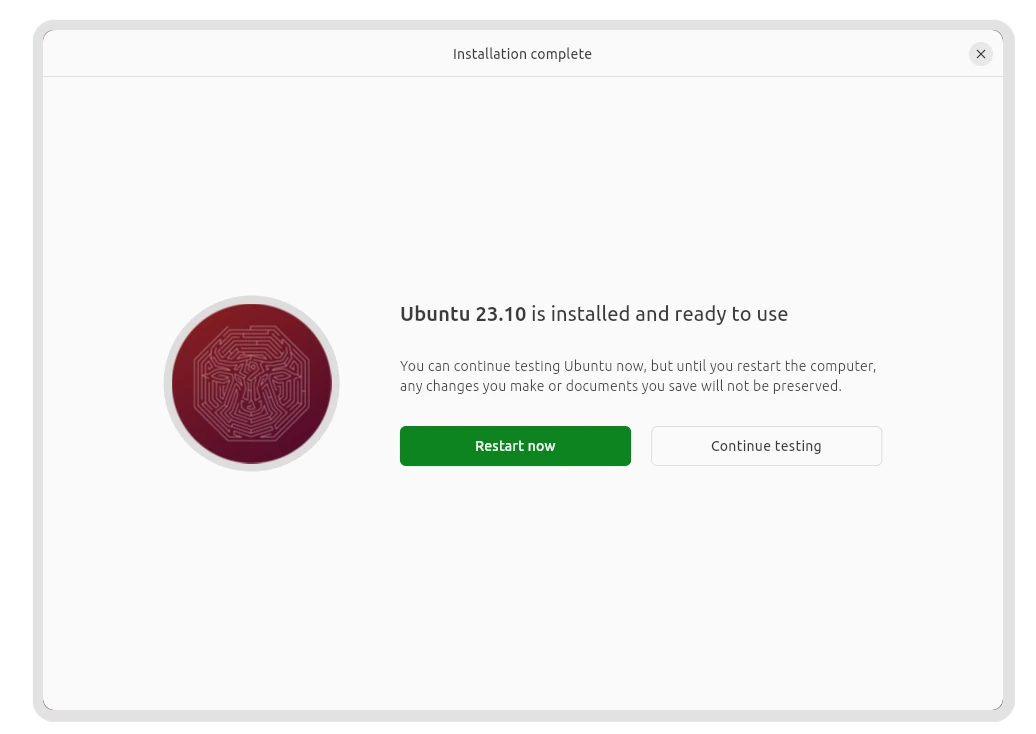
Either click “Continue testing” to try Ubuntu 23.10 live system, or restart and done.
Ubuntu's boot menu may NOT show Window boot entry, enable it by following this tutorial.