


Here’s how to install Gnu Octave, the scientific programming language, in Ubuntu via different ways, including Flatpak, Snap, Ubuntu PPA, and compile from source.
GNU Octave does NOT provide official Linux package. While Octave in Ubuntu main repositories is always old, volunteers maintain the latest package in different formats. In this tutorial, you may find your favorite method to install it in Ubuntu.
Option 1. Install GNU Octave via Flatpak package
Some of the software contributors maintain GNU Octave for Linux in Flatpak, which can be considered official Linux package.
Flatpak is an universal Linux package format runs in sandbox. Many Linux distributions, e.g., Ubuntu, Debian, Fedora, CentOS, Linux Mint, and more, support the package, though it requires separate daemon to run the apps.
Some Linux has flatpak installed out-of-the-box, and allows to install Flatpak using system’s Software App.
Setup Flatpak in Ubuntu:
1.) Firstly, search for and open a terminal window either from ‘Activities‘ overview screen, or by pressing Ctrl+Alt+T on keyboard. When terminal opens, run command to install the daemon:
sudo apt install flatpak

If you’re stilling running Ubuntu 18.04 or even Ubuntu 16.04, run following commands one by one to install Flatpak PPA, before being able to install the daemon:
sudo add-apt-repository ppa:flatpak/stable

sudo apt-get update
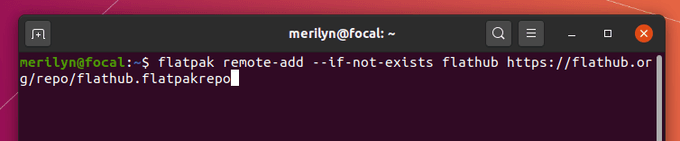
2.) Secondly, add the flathub.org repository that hosts the Flatpak packages. To do so, copy and paste the command into terminal and hit run:
flatpak remote-add --if-not-exists flathub https://flathub.org/repo/flathub.flatpakrepo
Install / Uninstall Octave Flatpak:
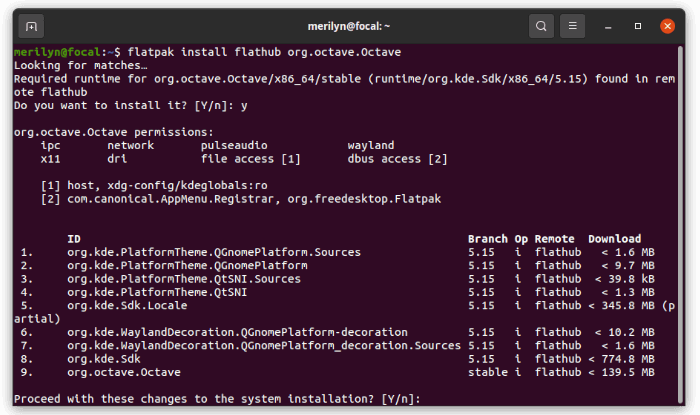
After setting up the flatpak daemon, you may simply run command in terminal to install this high-level interpreted language:
flatpak install flathub org.octave.Octave
Like normal apps, you can search for and open it from the ‘Activities’ overview screen after installation.
(Optional) And for choice, you may easily remove the flatpak package by running this single command in a terminal window:
flatpak uninstall --delete-data org.octave.Octave
Option 2. Install Octave via the Snap package:
The snap can be the easiest way to install the latest GNU Octave in Ubuntu. And the package is also maintained by one of the software contributors.
Snap is another universal Linux package format developed by Canonical, the company behind Ubuntu. It runs in sandbox, and is available out-of-the-box. Since Ubuntu 20.04, users can search for and install apps in Snap format directly from Ubuntu Software.
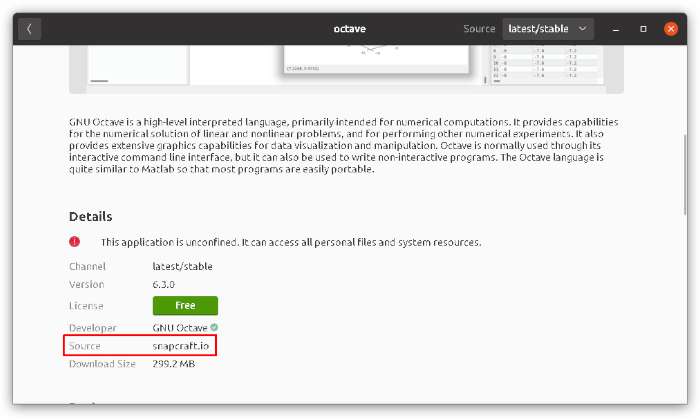
NOTE: There may be two Octave packages in Ubuntu Software, choose install the one from snapcraft.io.
Users can alternatively run a command in terminal to install the programming language via snap:
sudo snap install octave
Also, you may launch Octave snap by searching it from the overview screen.
Option 3. Install Octave via PPA in Ubuntu 20.04 LTS:
Some users do not like the Flatpak and Snap. Because they need separate daemon to run the apps, and take more disk space since dependencies are bundled and need even separate GNOME platform, Qt framework, etc.
So this third-party PPA is created with the most recent GNU Octave package for Ubuntu 20.04 LTS and Linux Mint 20.
Add PPA and install the deb package:
To install Octave from the PPA, open terminal by searching from the overview screen or start menu. When it opens, run commands:
a.) Copy and paste the command into terminal and hit Enter to add the PPA:
sudo add-apt-repository ppa:devacom/science
Running sudo command needs user authentication, type your password when it asks (no visual feedback) and hit Enter to continue.
b.) Next run command to install the classic Octave deb package:
sudo apt install octave
For Linux Mint 20, you may manually update the cache via sudo apt update command.
Remove PPA & the deb package:
For any reason, you may remove the PPA repository by running the command below in a terminal window:
sudo add-apt-repository --remove ppa:devacom/science
And remove the scientific computing software if want, via command:
sudo apt remove --autoremove octave octave-common
Option 4. How to Compile GNU Octave from the source:
For those don’t like Flatpak / Snap, running on other Ubuntu releases, or don’t trust third-pary PPA, it’s NOT hard to build the software from source tarball.
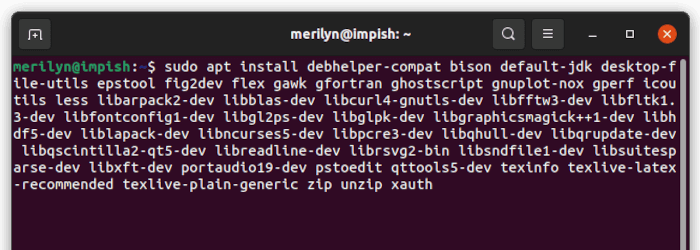
1. Install build dependencies:
You need to first install the development tools for building a software. To do so, open terminal either via Ctrl+Alt+T or by searching it from the overview screen.
When terminal opens, run command to install them:
sudo apt install debhelper-compat bison default-jdk desktop-file-utils epstool fig2dev flex gawk gfortran ghostscript gnuplot-nox gperf icoutils less libarpack2-dev libblas-dev libcurl4-gnutls-dev libfftw3-dev libfltk1.3-dev libfontconfig1-dev libgl2ps-dev libglpk-dev libgraphicsmagick++1-dev libhdf5-dev liblapack-dev libncurses5-dev libpcre3-dev libqhull-dev libqrupdate-dev libqscintilla2-qt5-dev libreadline-dev librsvg2-bin libsndfile1-dev libsuitesparse-dev libxft-dev portaudio19-dev pstoedit qttools5-dev texinfo texlive-latex-recommended texlive-plain-generic zip unzip xauth rapidjson-dev libsundials-dev
NOTE: this is test in Ubuntu 22.04 for GNU Octave 7.2.0. The dependency libraries may vary on different Ubuntu editions.
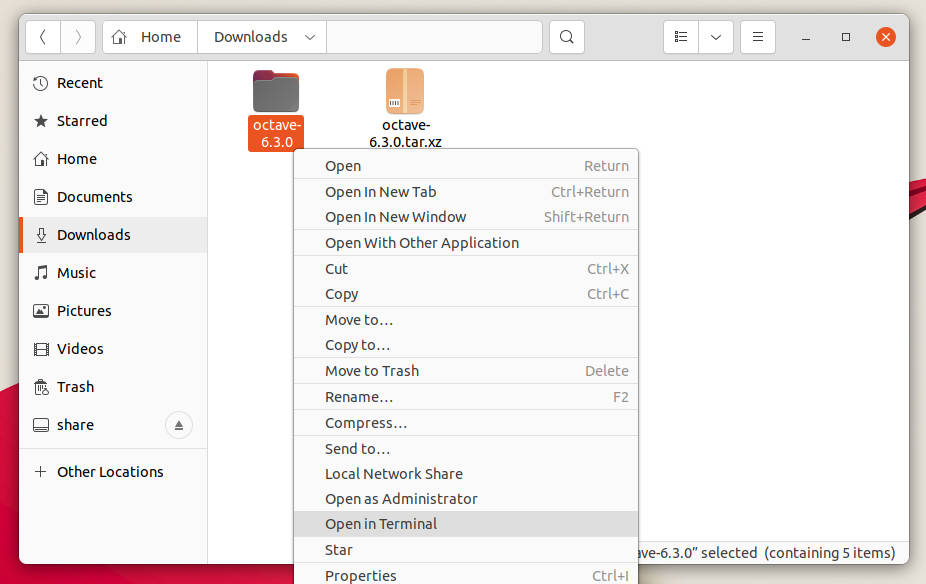
2. Download GNU Octave source tarball.
The latest source tarball is available to download at the button link below:
After the downloading process, extract it in the file manager, and right-click on new generated folder to choose ‘Open in Terminal‘
3. Build and install Octave
The last step will open a terminal window and navigate to the source folder automatically as working directory.
a.) In that terminal window, run command to create and go to the build folder:
mkdir build && cd build
b.) Next configure the source. In case of “HDF5 library not found” issue, I added the code to specify the path to HDF5 (for 64-bit PC only).
./../configure --prefix=/usr --disable-jit --with-hdf5-includedir=/usr/include/hdf5/serial --with-hdf5-libdir=/usr/lib/x86_64-linux-gnu/hdf5/serial
You may try without the flags, just with command ./../configure --prefix=/usr
c.) If there’s no error from the previous terminal outputs, start building the software via command:
make -j2
NOTE: this command start 2 jobs simultaneously. Depends on the CPU, you may use make -j4 (or even 8) to speed up the process.
d.) The make command may take quite a few minutes building the software depends on your computer. As a GNU project, it’s recommended to run post-build tests if no error in previous step.
make check
e.) When everything’s done successfully, you can finally install GNU Octave via command:
sudo make install
Like normal app, you can launch it either from start menu or by searching from the overview screen.
Remove Octave from build directory:
Until you remove the source folder, you may navigate to the “build” directory (create in step a.)) in terminal window and uninstall GNU Octave via command:
sudo make uninstall
Conclusion:
While GNU Octave does not provide official Linux binary package, the Flatpak and Snap are well-trusted methods to install the latest version in Ubuntu and other Linux. However, they run in sandbox and some do not like them. A third-party PPA maintains the native .deb package for Ubuntu 20.04, though it’s less trusted. Fortunately, it’s not hard to compile from the source.