


For those working on Ubuntu Linux with multiple monitors, here’s how to enable the left dock panel and top bar on all displays.
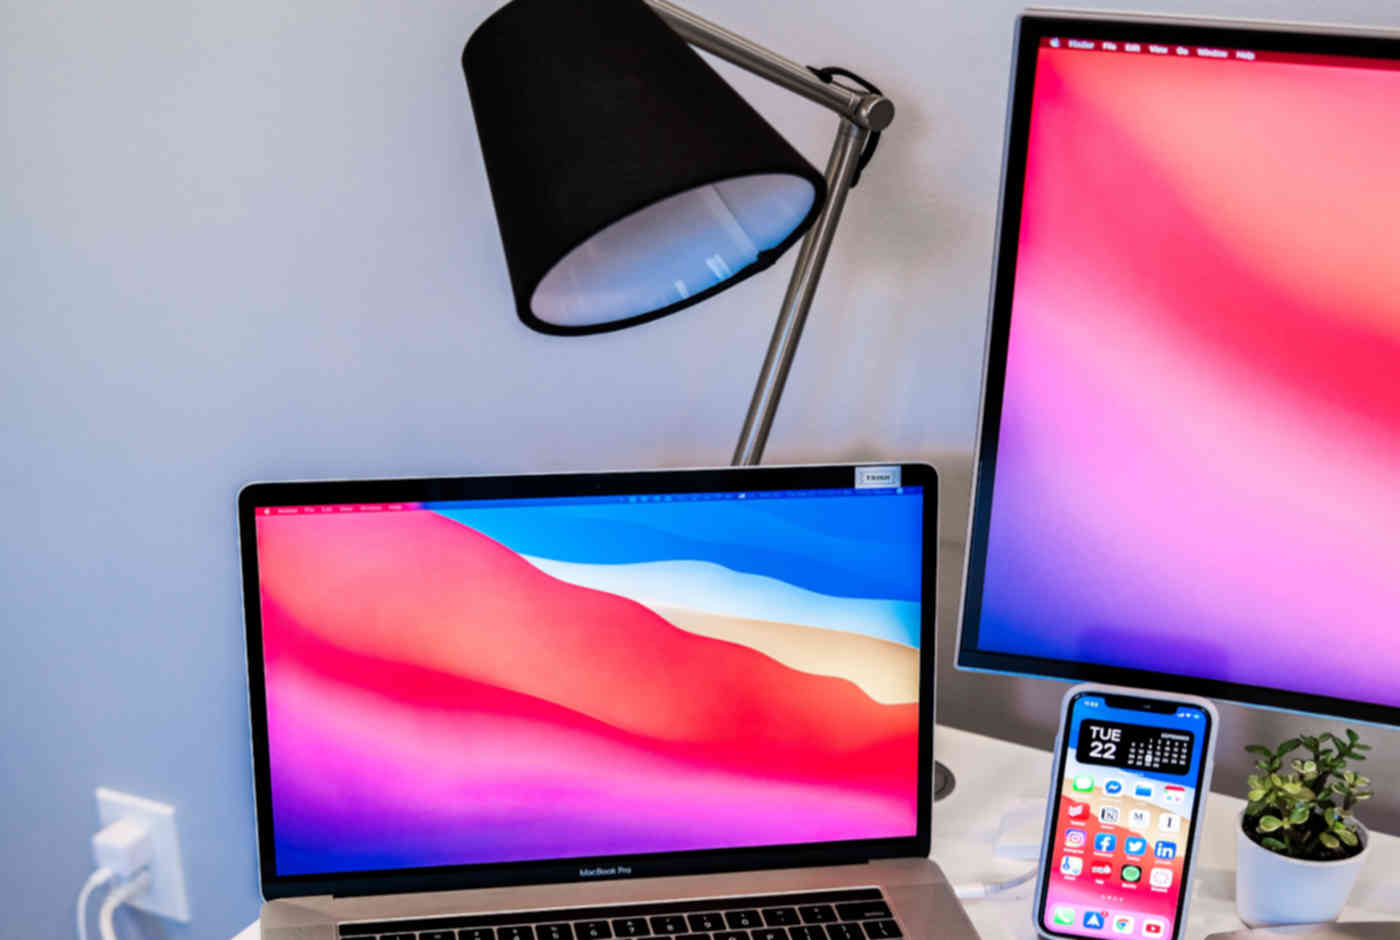
GNOME by default will extend the desktop screen if you plugged in a second monitor. However, both the left (or bottom) dock panel and top bar do NOT appear in the non-primary displays. It shows only a blank desktop with background wallpaper.
For those want to show the panels on all monitors to make them look like the primary display, this tutorial may help!
Downsides: for non-primary monitor, the top-panel does NOT have system tray applets in right-corner. And, for GNOME without dash-to-dock, there's also NO bottom dock in overview for non-primary monitor.
1. Show the Dock Panel on All Displays:
The left (or bottom if you moved it) panel in Ubuntu is handled by Gnome extension (Dash-to-Dock). It has built-in option to toggle show dock on all displays. And users can enable it via the steps below.
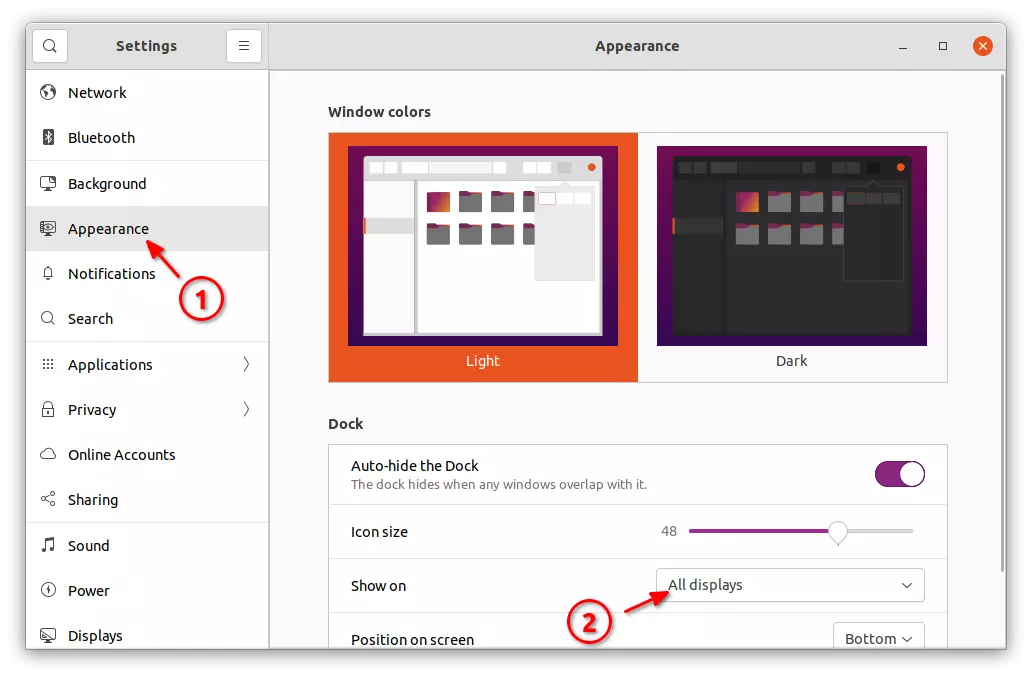
UPDATE: Ubuntu has updated the ‘Appearance‘ settings dialog, so users may easily enable this feature via Settings -> Appearance -> Dock -> Show on ‘All Displays’.
Single command to display dock on all monitors:
Firstly, either press Ctrl+Alt+T key combination on keyboard, or search or and open terminal from activities overview screen.
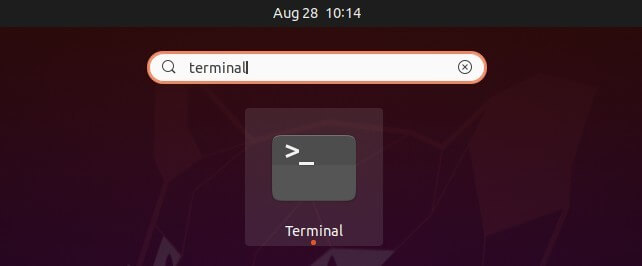
When terminal opens, copy and paste the command below into the window and hit Enter:
gsettings set org.gnome.shell.extensions.dash-to-dock multi-monitor true
This command will enable the feature immediately!
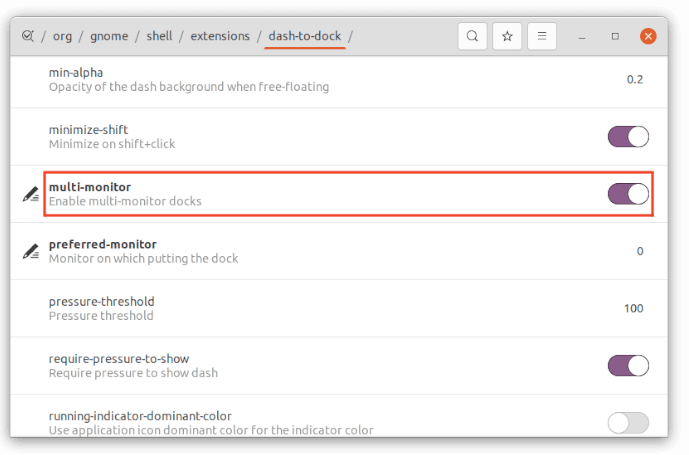
Enable multi-monitors support via Dconf Editor:
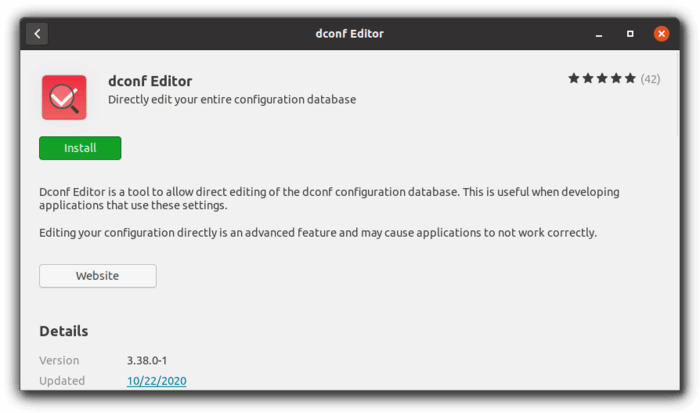
For those hate Linux commands, the graphical configuration tool ‘Dconf Editor’ is present to toggle the settings.
Firstly, search for and install ‘Dconf Editor’ in Ubuntu Software if you don’t have it.
Then, launch the tool and navigate to ‘org/gnome/shell/extensions/dash-to-dock‘. Scroll down and you’ll find the toggle icon for ‘multi-monitor’ support.
2. Enable GNOME Top Bar on Multiple Monitors:
The Top bar is one of the core GNOME components. It does not provide option to toggle multi-monitor support. However, a third-party Gnome extension can do the trick!
For GNOME 38 and earlier:
For Ubuntu 21.04, Ubuntu 20.04, Debian 11 with GNOME 3.38 and earlier version, this open-source project adds ability to enable multi-monitor support.
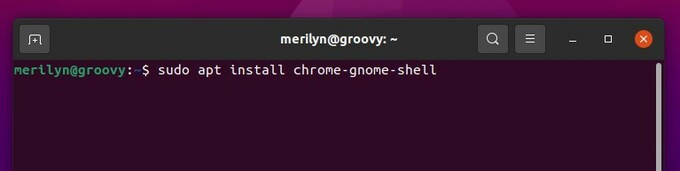
1.) Firstly, open terminal by searching from the overview screen and run command to install the chrome-gnome-shell package:
sudo apt install chrome-gnome-shell
2.) Next, go to the extension web page and use the ON/OFF switch to install it:
For those don’t see the slider icon, click the ‘click here to install browser extension‘ link to install browser add-on and refresh the web page.
For GNOME 40 ~ 44:
For Ubuntu 22.04 and Ubuntu 23.04 with GNOME 42 and GNOME 44, there’s a fork of the extension mentioned above works for me.
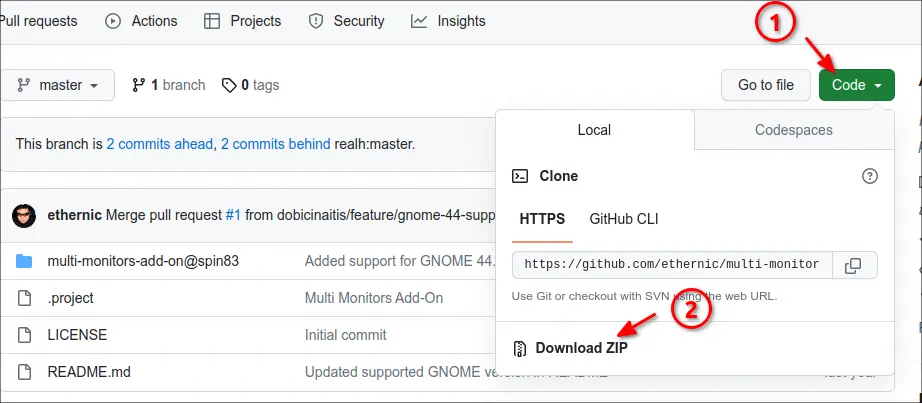
1.) First, go to the project page via the link below:
Then, select download the source via ‘Code’ -> ‘Download Zip’.
2.) Once downloading process finished, do:
- Go to Downloads folder, extract the zip package.
- Open another file window, and navigate to .local/share/gnome-shell/extensions/.
- Drag and drop the ‘multi-monitors-add-on@spin83’ sub-folder from extracted folder to
.local/share/gnome-shell/extensions/.
.local is hidden folder, press Ctrl+H to show/hide it. And create 'extensions' sub-folder under '.local/share/gnome-shell' if it does not exist.

3.) Restart Gnome Shell. For the default Wayland session, just log out and back in. For the classic Xorg session, press Alt+F2, then type r in pop-up ‘Run a command’ box, and hit Enter.
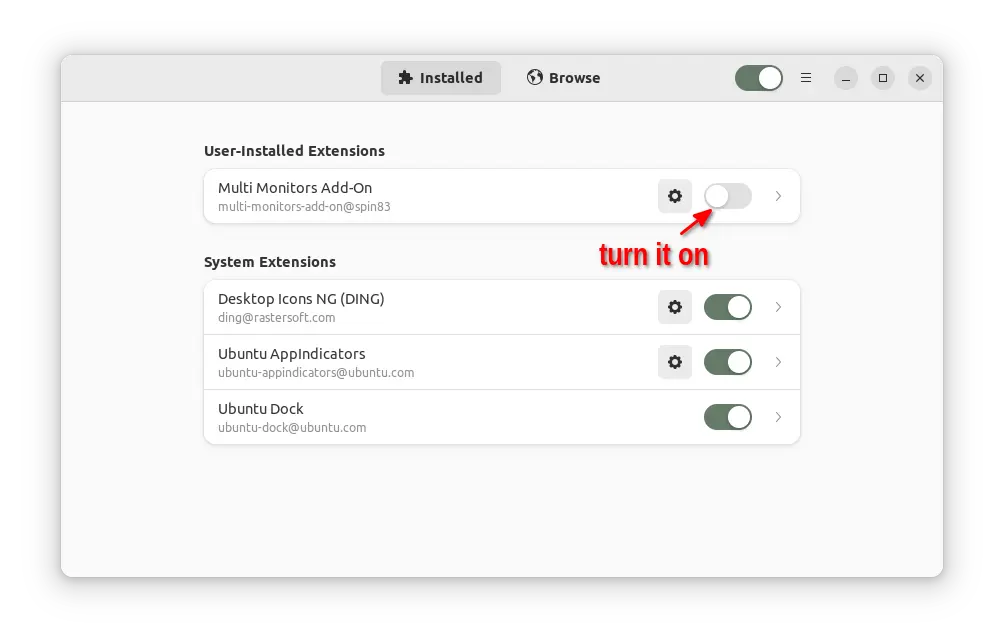
4.) Finally, launch either ‘Gnome Extensions‘ or ‘Extension Manager‘ (both available in Ubuntu Software). Then, turn on that extension.
There may be errors in the extension manager, though you may skip it since the top panel do appear on all monitors!